LSQT1174ENG.book 6 ページ 2007年1月29日 月曜日 午後1時28分
Before using
(15)
(16)
(11)![]()
![]() (17)
(17)
(25)
(12)
(13)
(18)
(19)
(20)
(26)
(27)
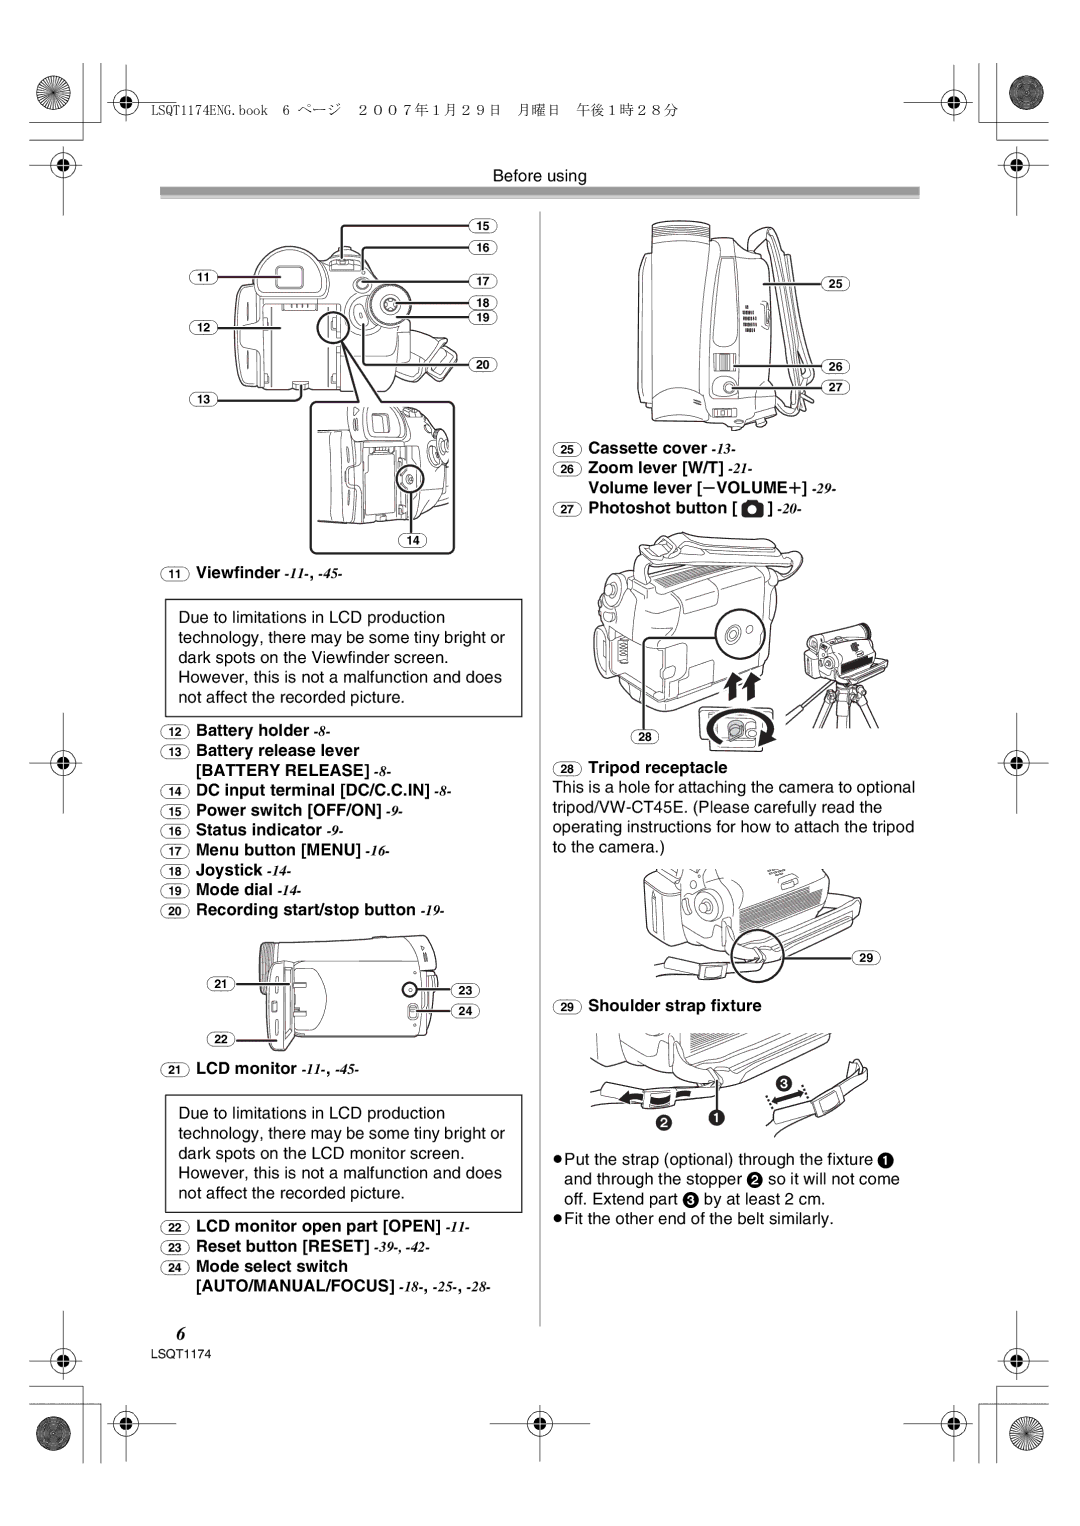
(25)Cassette cover
(26)Zoom lever [W/T]
Volume lever [sVOLUMEr]
(27)Photoshot button [ ![]() ]
]
(14)
(11)Viewfinder
Due to limitations in LCD production technology, there may be some tiny bright or dark spots on the Viewfinder screen. However, this is not a malfunction and does not affect the recorded picture.
(12)Battery holder
(13)Battery release lever [BATTERY RELEASE]
(14)DC input terminal [DC/C.C.IN]
(15)Power switch [OFF/ON]
(16)Status indicator
(17)Menu button [MENU]
(18)Joystick
(19)Mode dial
(20)Recording start/stop button
(21)![]()
![]() (23)
(23)
![]() (24)
(24)
(22)
(21)LCD monitor
Due to limitations in LCD production technology, there may be some tiny bright or dark spots on the LCD monitor screen. However, this is not a malfunction and does not affect the recorded picture.
(22)LCD monitor open part [OPEN]
(23)Reset button [RESET]
(24)Mode select switch [AUTO/MANUAL/FOCUS]
(28)![]()
(28)Tripod receptacle
This is a hole for attaching the camera to optional
(29)
(29)Shoulder strap fixture
3
2 1
≥Put the strap (optional) through the fixture 1 and through the stopper 2 so it will not come off. Extend part 3 by at least 2 cm.
≥Fit the other end of the belt similarly.
6
LSQT1174