Basic Operation
Remote control operation
Adjusting the image
You can display one of the PICTURE or ADVANCED menu items by pressing the PICTURE ADJUSTMENT button. Press the button to switch between PICTURE and ADVANCED menu. Press F G to select the required menu item and I H to adjust.
PICTURE menu items
PICTURE MODE, CONTRAST, BRIGHTNESS, COLOUR, TINT, SHARPNESS, COLOUR TEMPERATURE and DYNAMIC IRIS
ADVANCED menu items
GAMMA, CONTRAST, BRIGHTNESS, COLOR MANAGEMENT, NR, MPEG NR, CINEMA REALITY and
NOTE:
For each menu items description, see “Menu Navigation” on page 26.
The screen will be cleared after 7 seconds without any operation.
Setting your own colour profile
You can adjust a selected colour individually and save and retrieve under the PICTURE MODE setting. Press the COLOR MANAGEMENT button to open the menu.
PROFILE | NORMAL |
|
CURSOR
LOG
PROFILE SAVE
Create a new profile
Adjusting the selected colour
Select a colour and adjust COLOUR, TINT and
BRIGHTNESS.
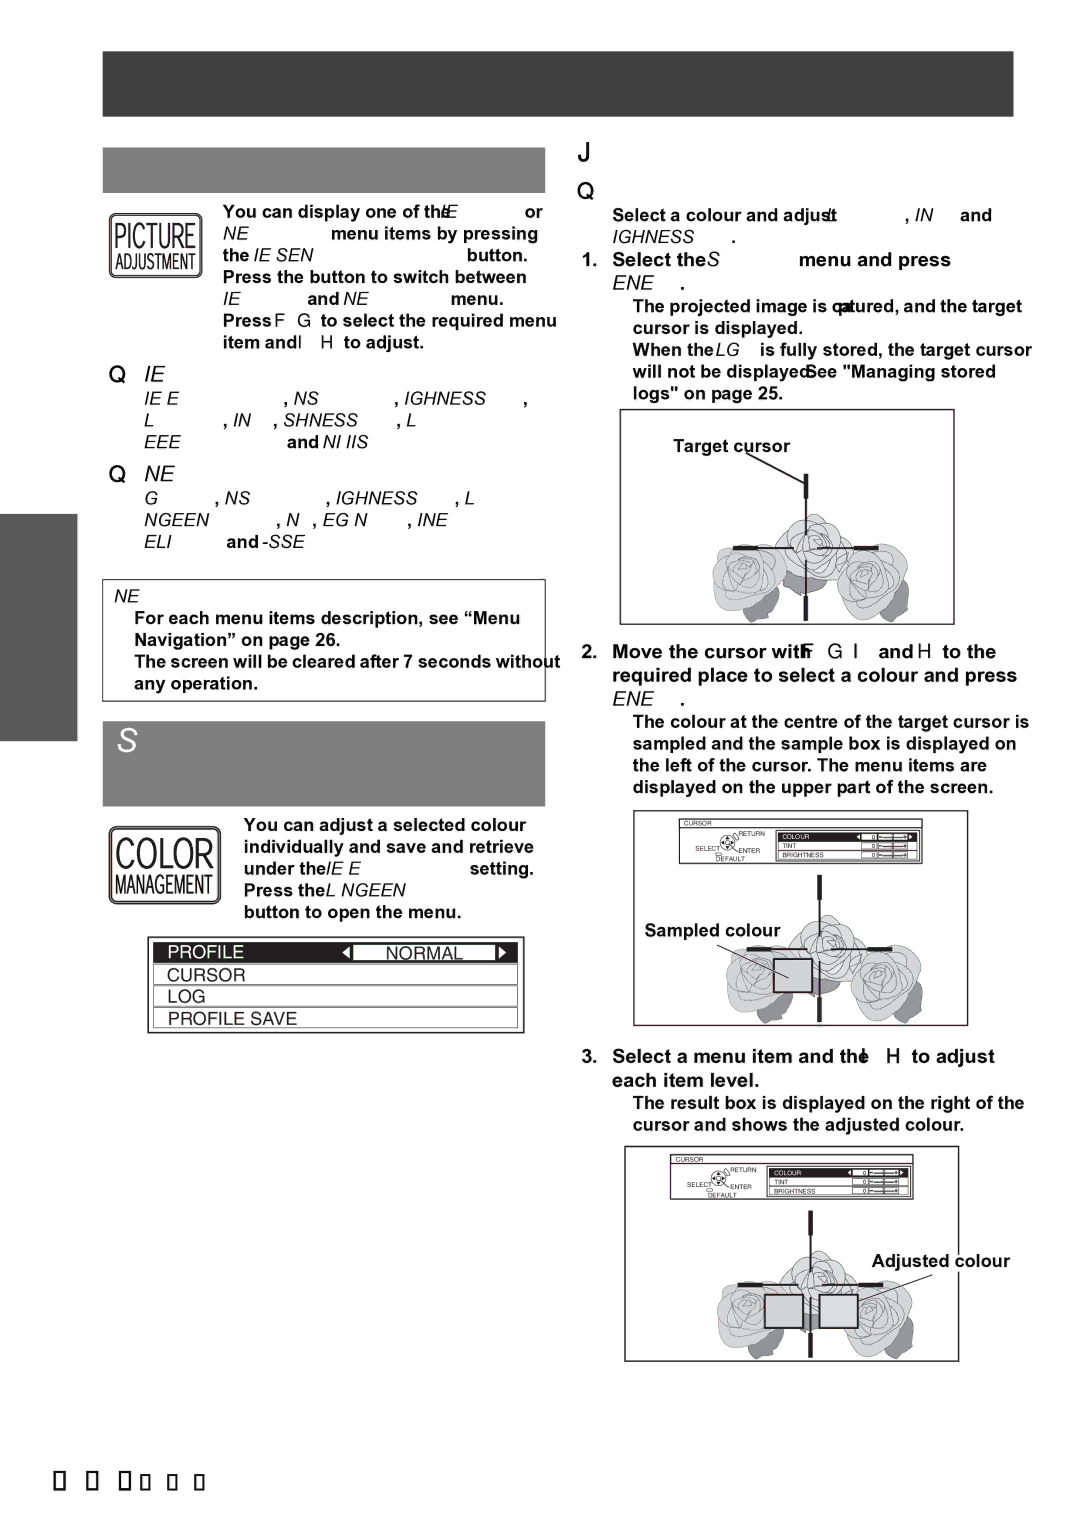
1.Select the CURSOR menu and press
ENTER.
The projected image is captured, and the target cursor is displayed.
When the LOG is fully stored, the target cursor will not be displayed. See "Managing stored logs" on page 25.
Target cursor
2.Move the cursor with F G I and H to the required place to select a colour and press
ENTER.
The colour at the centre of the target cursor is sampled and the sample box is displayed on the left of the cursor. The menu items are displayed on the upper part of the screen.
CURSOR
| RETURN | COLOUR | |
|
| ||
SELECT | ENTER | TINT | |
BRIGHTNESS | |||
| |||
DEFAULT | |||
| |||
Sampled colour
3.Select a menu item and the I H to adjust each item level.
The result box is displayed on the right of the cursor and shows the adjusted colour.
CURSOR |
|
| |
| RETURN | COLOUR | |
|
| ||
SELECT | ENTER | TINT | |
| BRIGHTNESS | ||
DEFAULT | |||
| |||
|
| Adjusted colour | |
24 - ENGLISH