Projecting an image
Selecting the input signal
1. Switch on the connected devices.
Press the play button of the required device.
2.Press the INPUT SELECT buttons to select the required input method if needed. See “Switching the input signal” on page 28.
The image will be projected on the screen.
NOTE:
•SIGNAL SEARCH is ON as default and the signal from the connected devices is detected automatically. See “SIGNAL SEARCH” on page 41.
Basic Operation
Positioning the image
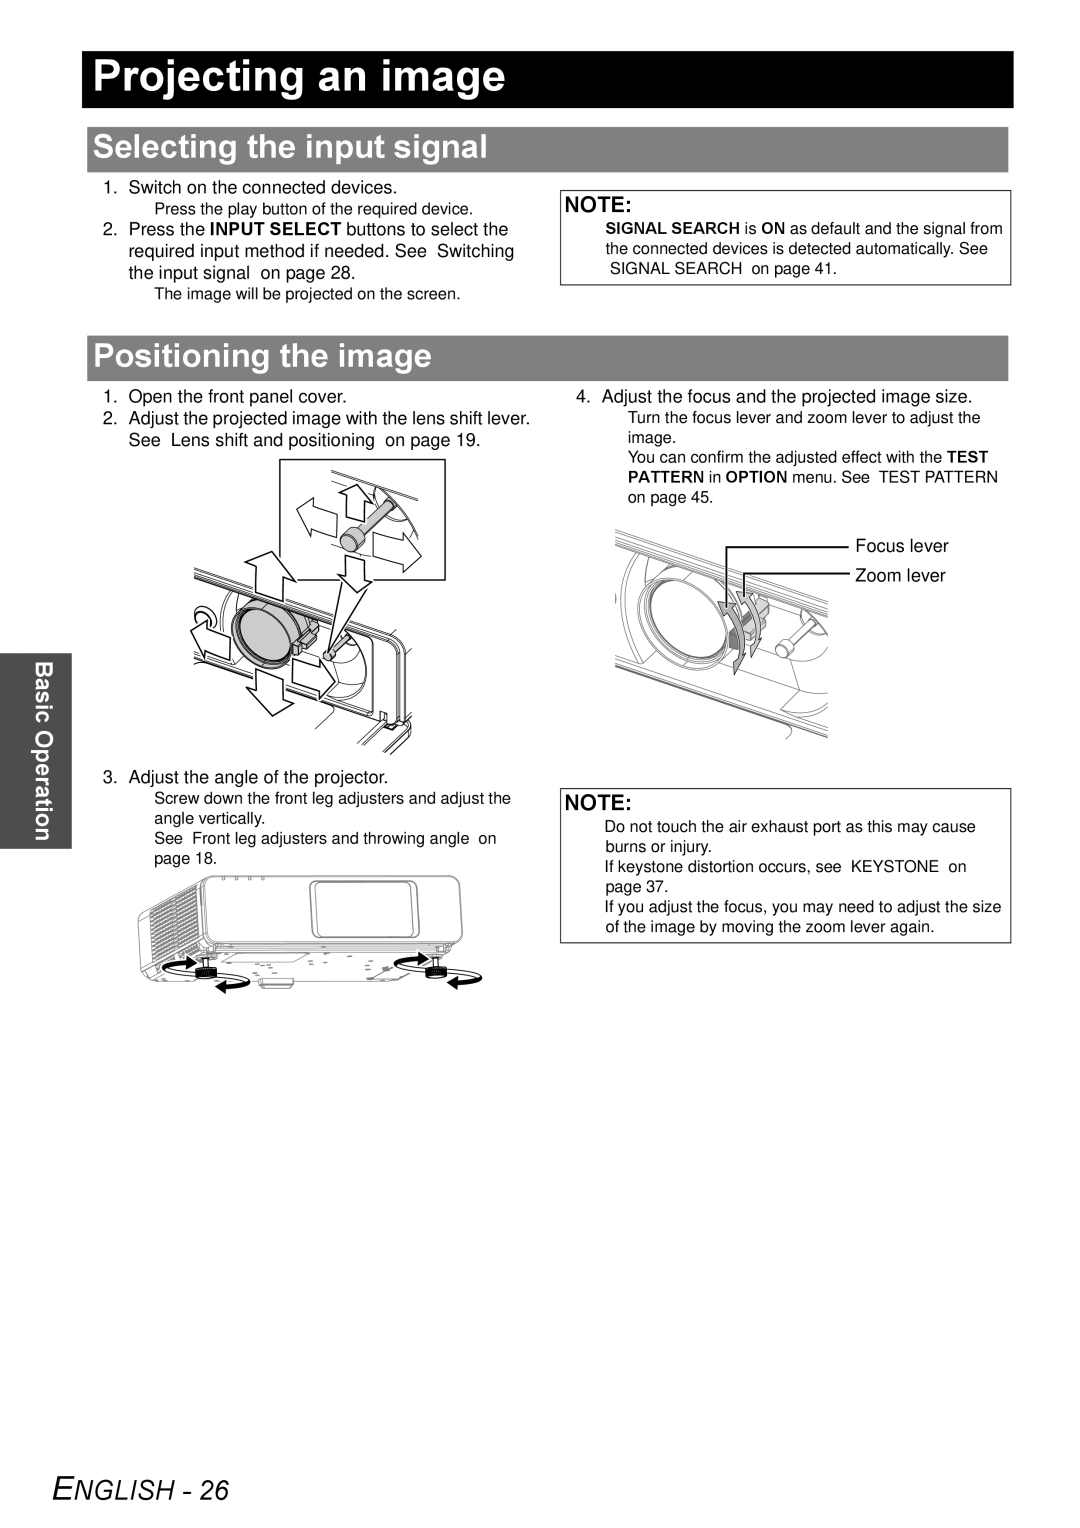
1.Open the front panel cover.
2.Adjust the projected image with the lens shift lever. See “Lens shift and positioning” on page 19.
3. Adjust the angle of the projector.
Screw down the front leg adjusters and adjust the angle vertically.
See “Front leg adjusters and throwing angle” on page 18.
4.Adjust the focus and the projected image size.
Turn the focus lever and zoom lever to adjust the image.
You can confirm the adjusted effect with the TEST PATTERN in OPTION menu. See “TEST PATTERN” on page 45.
Focus lever
Zoom lever
NOTE:
•Do not touch the air exhaust port as this may cause burns or injury.
•If keystone distortion occurs, see “KEYSTONE” on page 37.
•If you adjust the focus, you may need to adjust the size of the image by moving the zoom lever again.