Image Adjustment
You can manually adjust the pan/tilt/azimuth angles, focus, and zoom while observing the con- nected monitor.
Notes:
•When connecting an LCD monitor to adjust the camera images, use an
•Do not hold the camera by lens unit to adjust panning, tilting, or azimuth.
•The video output to the BNC will be interrupted while an LCD monitor is connected to the monitor output jack.
•While an LCD monitor is connected to the monitor output jack, ELC (Electric Light Control) becomes effective to obtain a proper focus. During focus adjustment, blooming or smear on highlighted objects may be caused. However, ALC (Automatic Light Control) is effective during the normal use, and blooming or smear is reduced.
•Adjust zoom and focus after adjusting panning and tilting. (Refer to Step 3 and 4.)
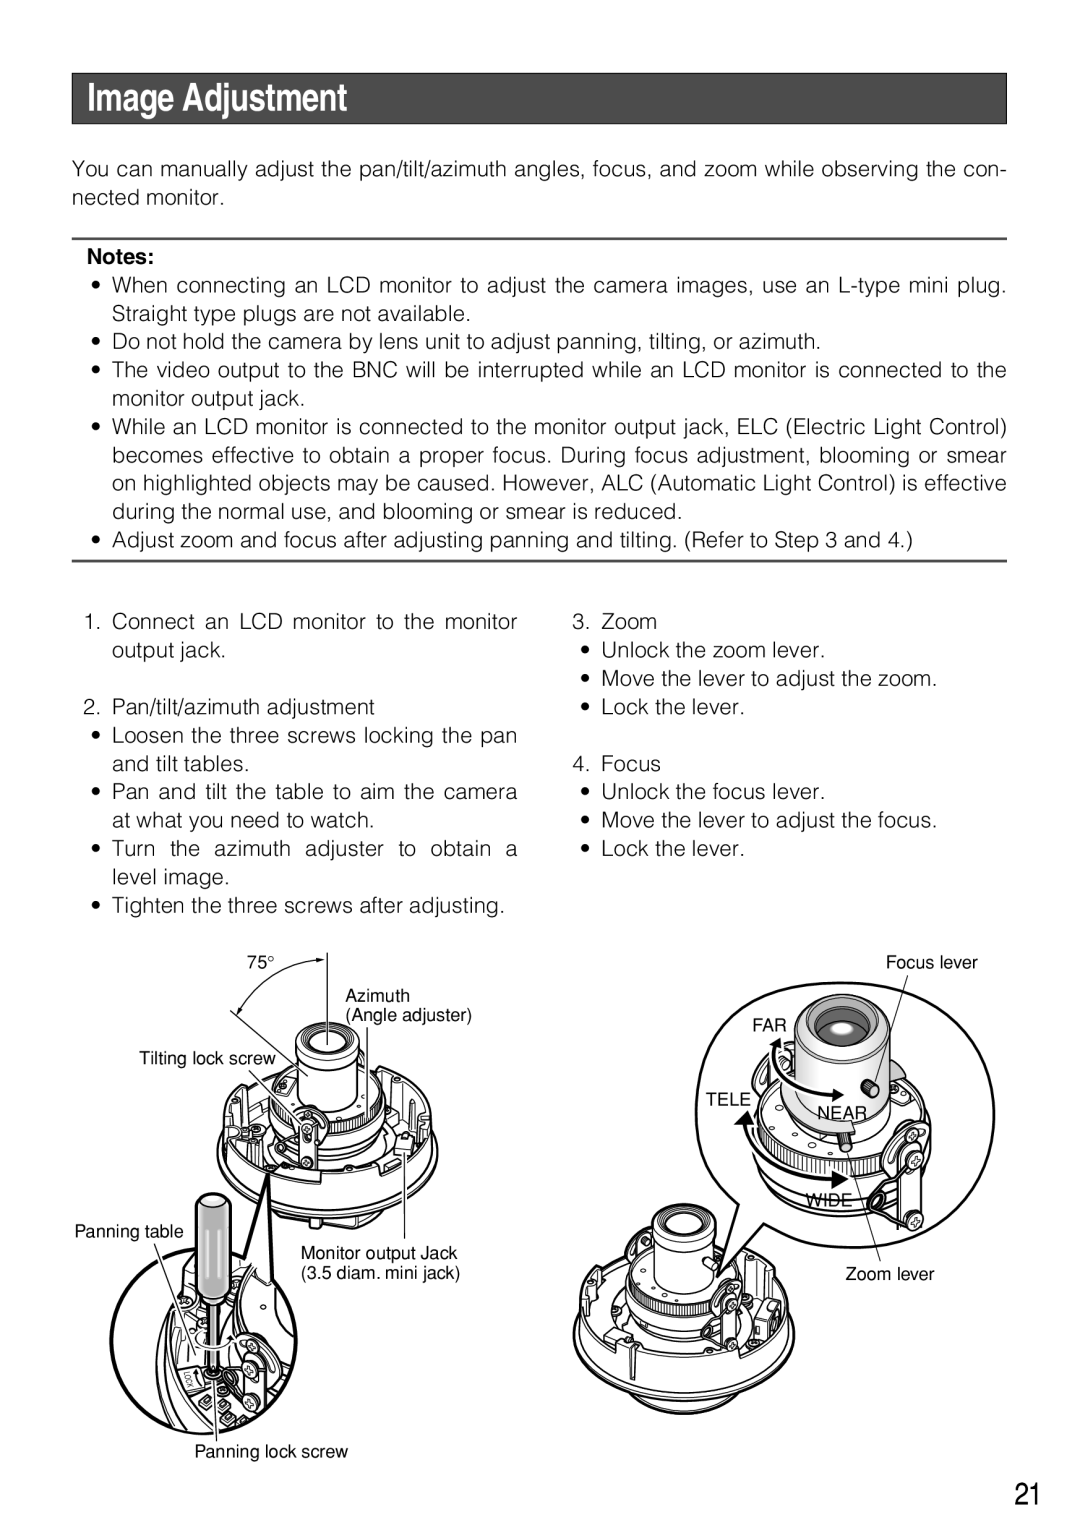
1. | Connect an LCD monitor to the monitor | 3. | Zoom |
| output jack. | • | Unlock the zoom lever. |
|
| • | Move the lever to adjust the zoom. |
2. | Pan/tilt/azimuth adjustment | • | Lock the lever. |
• | Loosen the three screws locking the pan |
|
|
| and tilt tables. | 4. | Focus |
• | Pan and tilt the table to aim the camera | • | Unlock the focus lever. |
| at what you need to watch. | • | Move the lever to adjust the focus. |
• | Turn the azimuth adjuster to obtain a | • | Lock the lever. |
| level image. |
|
|
• | Tighten the three screws after adjusting. |
|
|
75°
Azimuth
(Angle adjuster)
Tilting lock screw
Panning table
Monitor output Jack (3.5 diam. mini jack)
Focus lever
FAR
TELE
NEAR
WIDE
Zoom lever
Panning lock screw
21