•To erase all characters of the camera ID, select RESET and press the [SET] button. Note: For Chinese language, up to 8 characters can be entered.
4.To specify the ID display position:
1.Select POSI and press SET.
→The entered camera ID will be highlighted on the screen.
2.Move it into the appropriate position and press SET.
→The position is determined and the screen will return to the CAMERA ID menu. Note: Keep pressing any of [LEFT], [RIGHT], [UP], or [DOWN] button for a second or
more to move the camera ID faster as necessary.
2.Light Control Mode Setting (ALC)
Select a light control mode depending on the lens type mounted. The default setting is ALC. ALC↓: Is applicable to the auto iris lens.
2-1. ALC Mode with SUPER-D3 ON
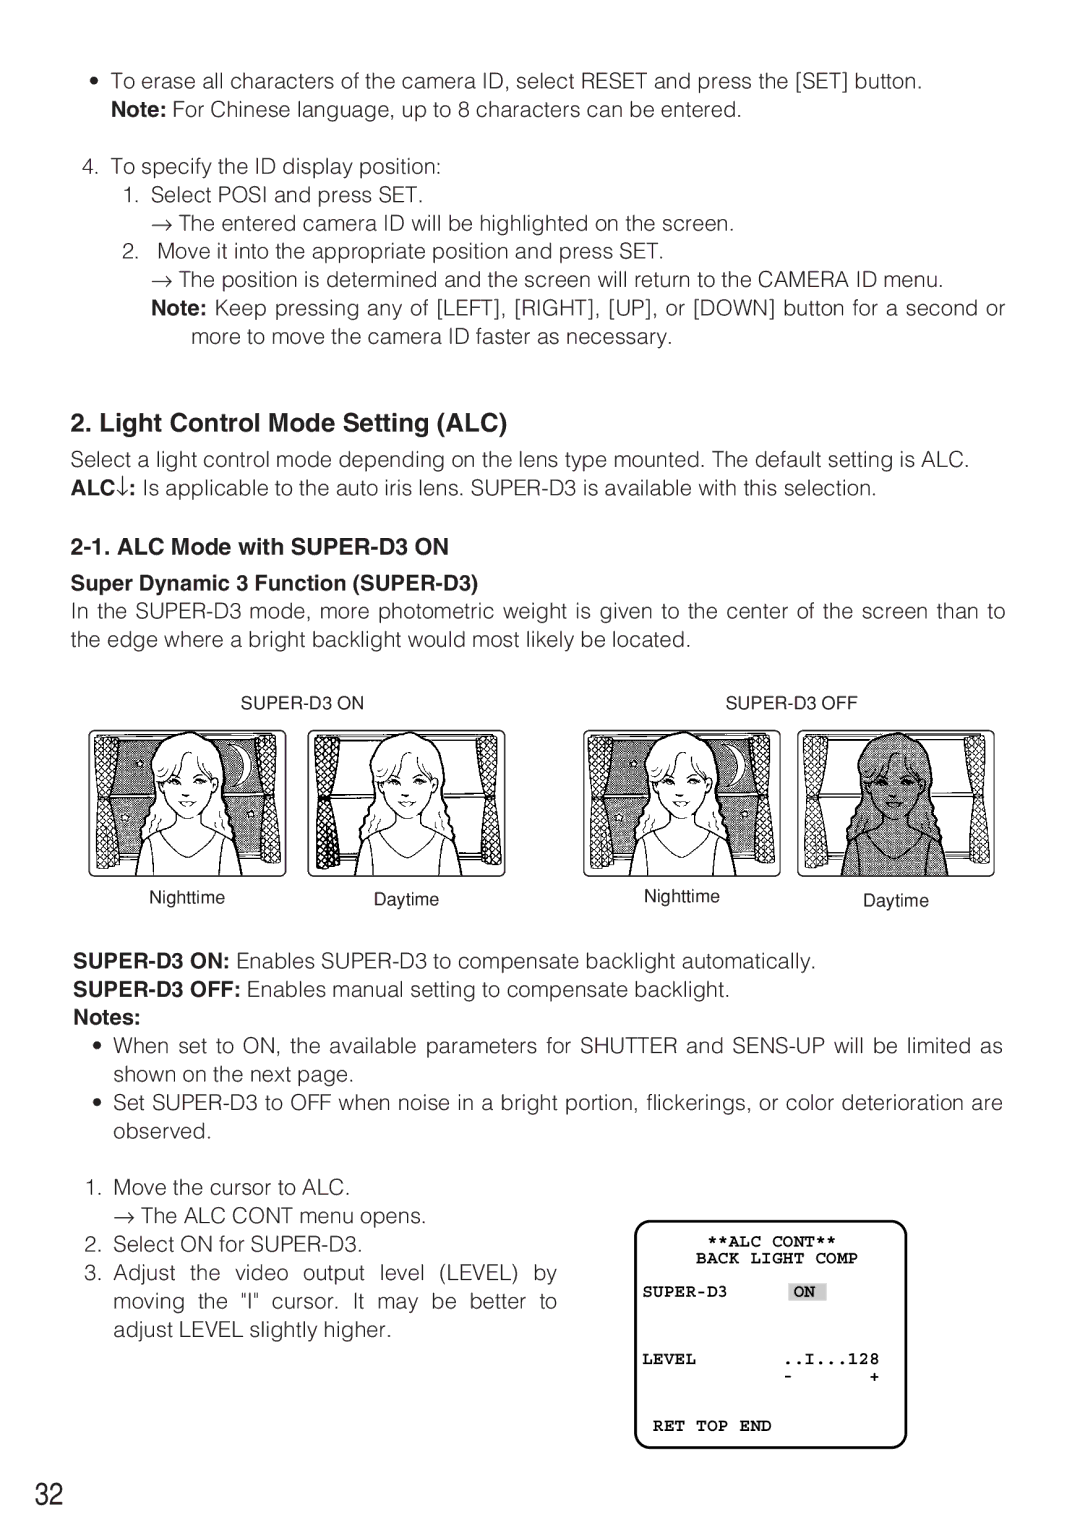
Super Dynamic 3 Function (SUPER-D3)
In the
Nighttime | Daytime | Nighttime | Daytime |
Notes:
•When set to ON, the available parameters for SHUTTER and
•Set
1.Move the cursor to ALC.
→ The ALC CONT menu opens.
2.Select ON for
3.Adjust the video output level (LEVEL) by moving the "I" cursor. It may be better to adjust LEVEL slightly higher.
**ALC CONT**
BACK LIGHT COMP
LEVEL | ..I...128 | |
| - | + |
RET TOP END
32
