3.Move the cursor to the area where backlight is bright and press [SET] to mask that area. The mask turns to white. (When the cursor is moved on an area that has already been masked, the mask and cursor start blinking.)
Blinking |
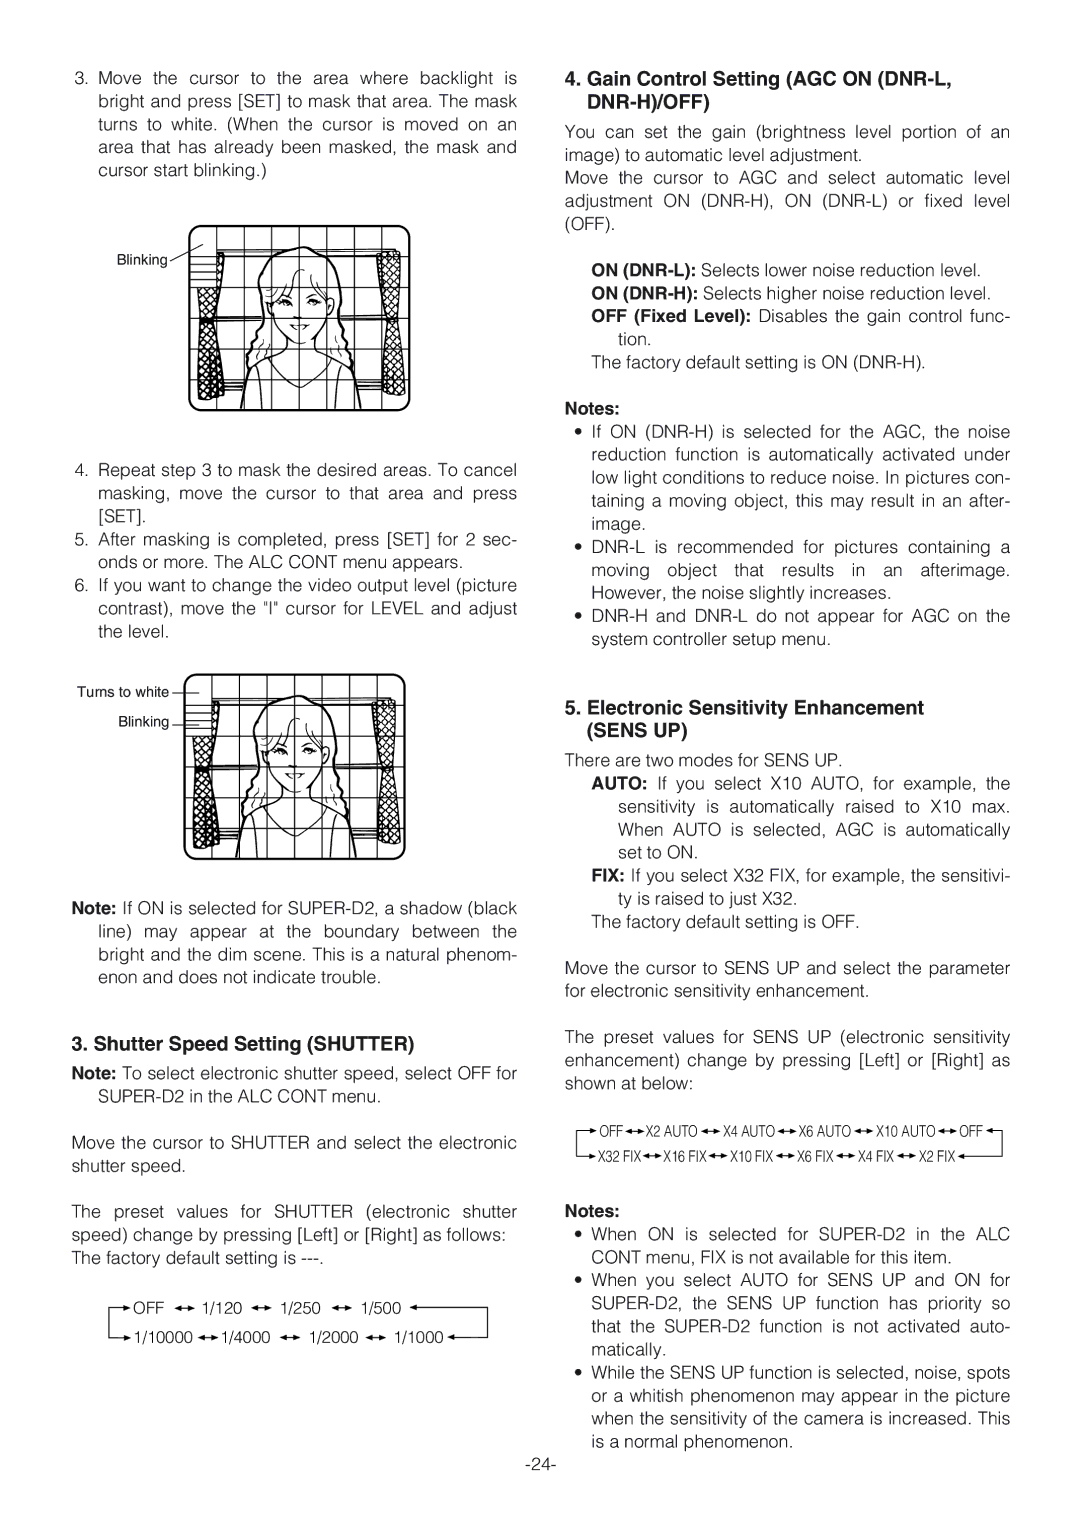
4.Repeat step 3 to mask the desired areas. To cancel masking, move the cursor to that area and press [SET].
5.After masking is completed, press [SET] for 2 sec- onds or more. The ALC CONT menu appears.
6.If you want to change the video output level (picture contrast), move the "I" cursor for LEVEL and adjust the level.
Turns to white |
Blinking |
Note: If ON is selected for
4.Gain Control Setting (AGC ON (DNR-L, DNR-H)/OFF)
You can set the gain (brightness level portion of an image) to automatic level adjustment.
Move the cursor to AGC and select automatic level adjustment ON
ON
ON
OFF (Fixed Level): Disables the gain control func- tion.
The factory default setting is ON
Notes:
•If ON
•
•
5.Electronic Sensitivity Enhancement (SENS UP)
There are two modes for SENS UP.
AUTO: If you select X10 AUTO, for example, the sensitivity is automatically raised to X10 max. When AUTO is selected, AGC is automatically set to ON.
FIX: If you select X32 FIX, for example, the sensitivi- ty is raised to just X32.
The factory default setting is OFF.
Move the cursor to SENS UP and select the parameter for electronic sensitivity enhancement.
3. Shutter Speed Setting (SHUTTER)
Note: To select electronic shutter speed, select OFF for
Move the cursor to SHUTTER and select the electronic shutter speed.
The preset values for SHUTTER (electronic shutter speed) change by pressing [Left] or [Right] as follows: The factory default setting is
![]() OFF
OFF ![]()
![]() 1/120
1/120 ![]()
![]() 1/250
1/250 ![]()
![]() 1/500
1/500 ![]()
![]() 1/10000
1/10000 ![]()
![]() 1/4000
1/4000 ![]()
![]() 1/2000
1/2000 ![]()
![]() 1/1000
1/1000 ![]()
The preset values for SENS UP (electronic sensitivity enhancement) change by pressing [Left] or [Right] as shown at below:
![]() OFF
OFF![]()
![]() X2 AUTO
X2 AUTO ![]()
![]() X4 AUTO
X4 AUTO![]()
![]() X6 AUTO
X6 AUTO ![]()
![]() X10 AUTO
X10 AUTO![]()
![]() OFF
OFF ![]()
![]() X32 FIX
X32 FIX![]()
![]() X16 FIX
X16 FIX![]()
![]() X10 FIX
X10 FIX ![]()
![]() X6 FIX
X6 FIX ![]()
![]() X4 FIX
X4 FIX ![]()
![]() X2 FIX
X2 FIX![]()
Notes:
•When ON is selected for
•When you select AUTO for SENS UP and ON for
•While the SENS UP function is selected, noise, spots or a whitish phenomenon may appear in the picture when the sensitivity of the camera is increased. This is a normal phenomenon.