Alternate CM9700 Connection
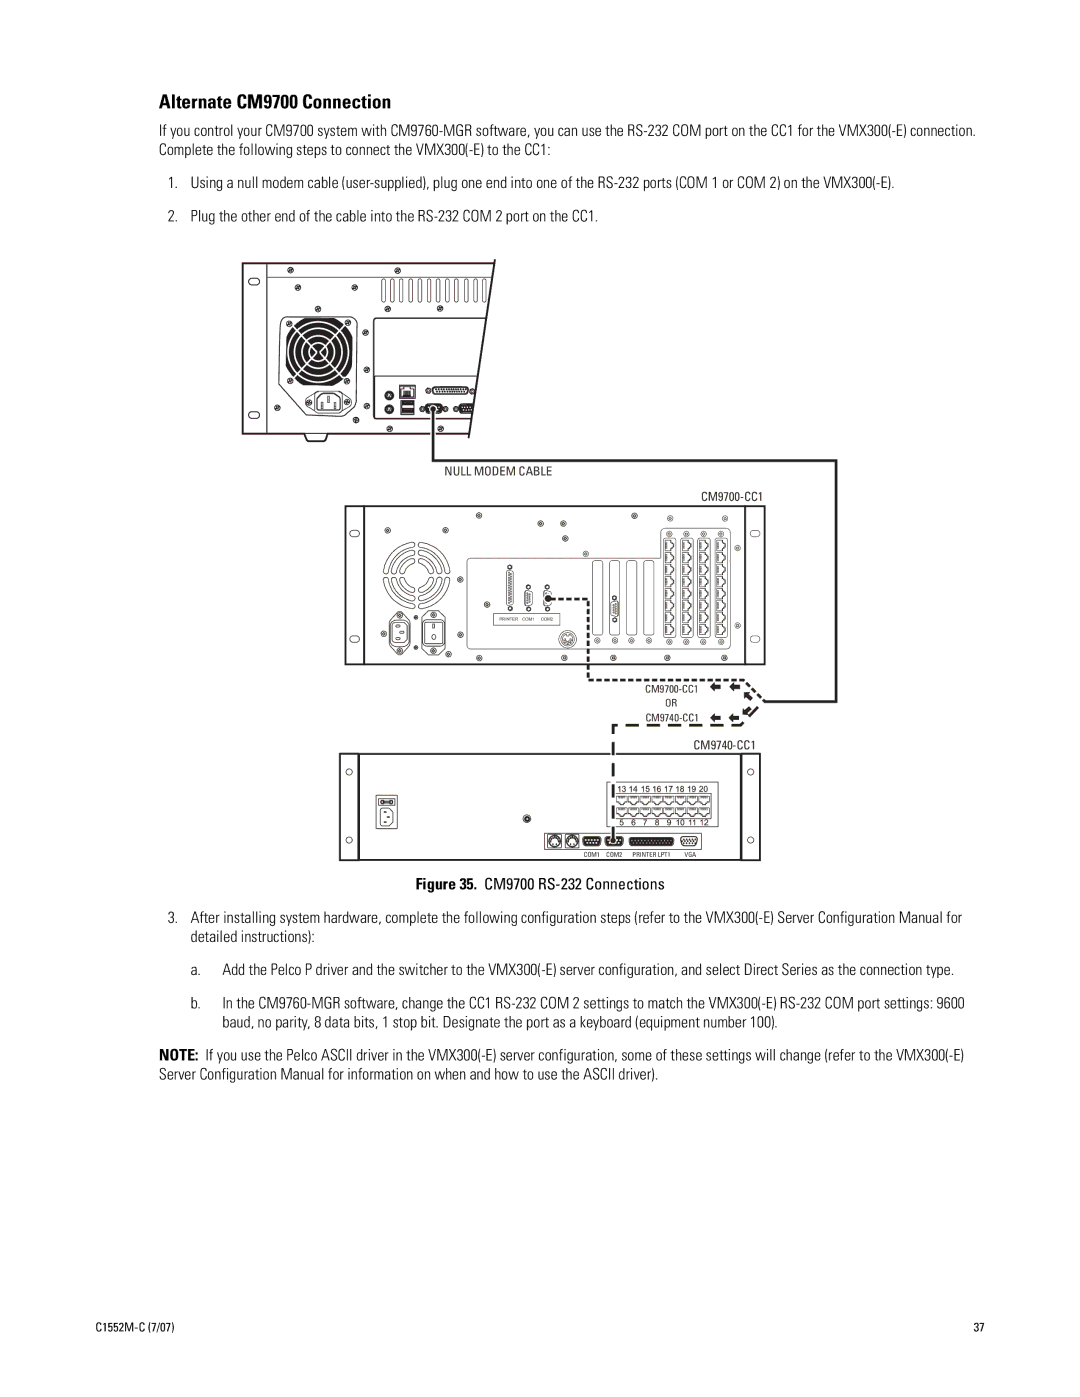
If you control your CM9700 system with CM9760-MGR software, you can use the RS-232 COM port on the CC1 for the VMX300(-E) connection. Complete the following steps to connect the VMX300(-E) to the CC1:
1.Using a null modem cable (user-supplied), plug one end into one of the RS-232 ports (COM 1 or COM 2) on the VMX300(-E).
2.Plug the other end of the cable into the RS-232 COM 2 port on the CC1.
NULL MODEM CABLE | | | |
| | | CM9700-CC1 |
PRINTER COM1 COM2 | | | |
| | CM9700-CC1 |
| | OR | |
| | CM9740-CC1 |
| | | CM9740-CC1 |
COM1 | COM2 | PRINTER LPT1 | VGA |
Figure 35. CM9700 RS-232 Connections | |
3.After installing system hardware, complete the following configuration steps (refer to the VMX300(-E) Server Configuration Manual for detailed instructions):
a.Add the Pelco P driver and the switcher to the VMX300(-E) server configuration, and select Direct Series as the connection type.
b.In the CM9760-MGR software, change the CC1 RS-232 COM 2 settings to match the VMX300(-E) RS-232 COM port settings: 9600 baud, no parity, 8 data bits, 1 stop bit. Designate the port as a keyboard (equipment number 100).
NOTE: If you use the Pelco ASCII driver in the VMX300(-E) server configuration, some of these settings will change (refer to the VMX300(-E) Server Configuration Manual for information on when and how to use the ASCII driver).

