ROOF TERMINATION VENTING
Ceiling opening:
1)Determine the exact position of the fi replace so that the vent pipe is centered (if possible) between two building framing members. Lay out the vent system path, minimiz- ing the number of elbows and length of vent. Consult your local building codes prior to proceeding.
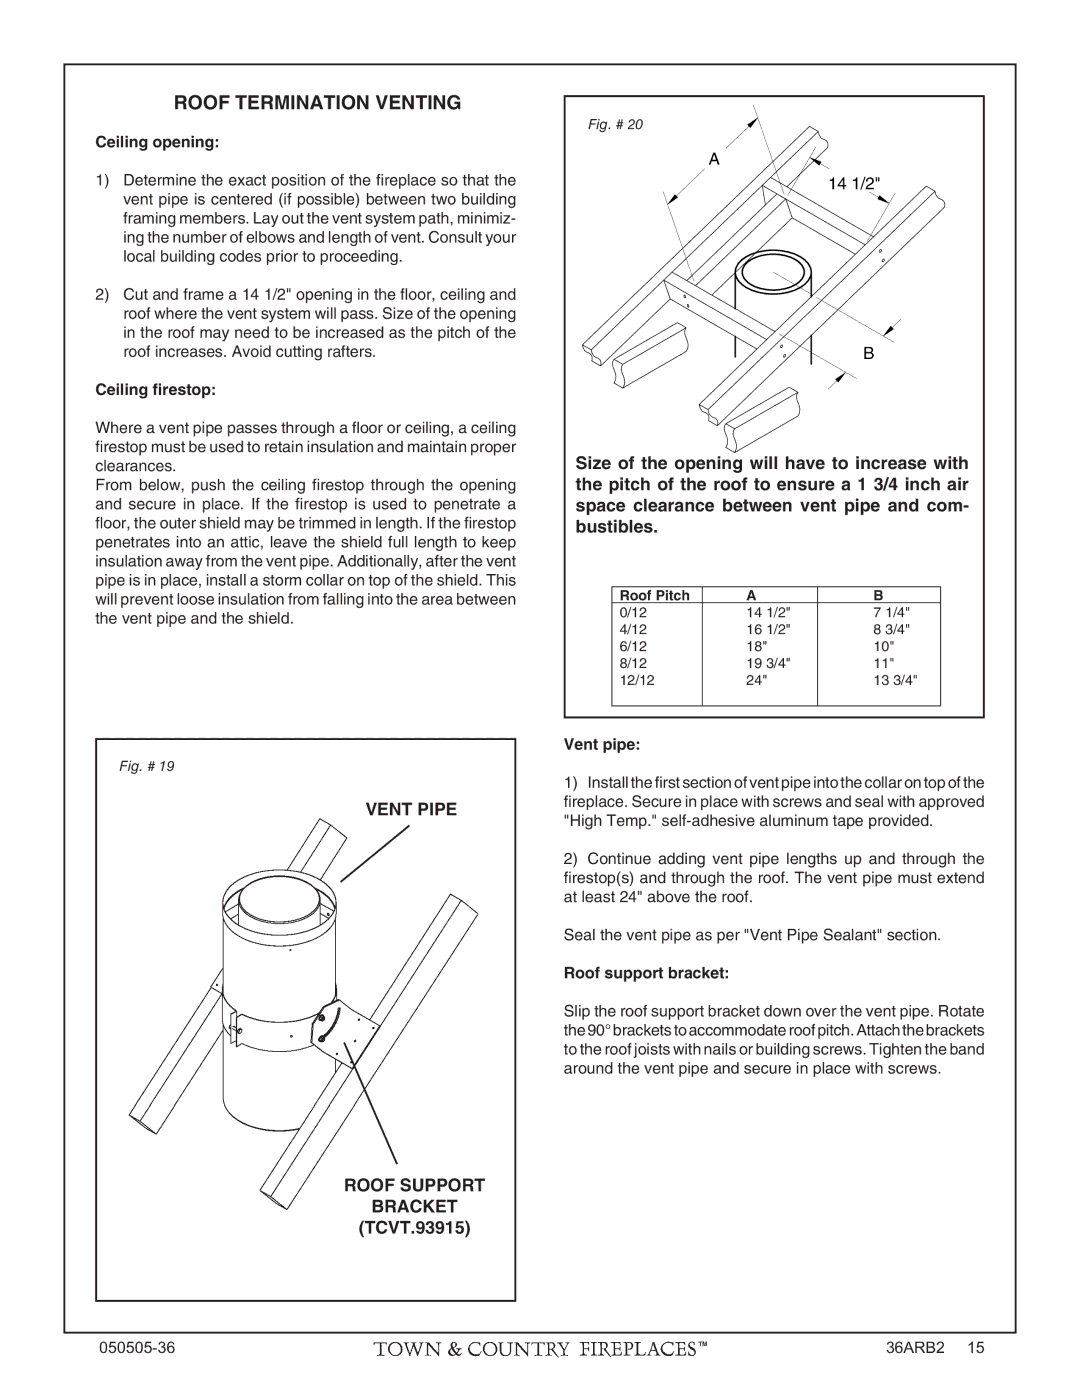
2)Cut and frame a 14 1/2" opening in the fl oor, ceiling and roof where the vent system will pass. Size of the opening in the roof may need to be increased as the pitch of the roof increases. Avoid cutting rafters.
Ceiling firestop:
Where a vent pipe passes through a fl oor or ceiling, a ceiling fi restop must be used to retain insulation and maintain proper clearances.
From below, push the ceiling fi restop through the opening and secure in place. If the fi restop is used to penetrate a fl oor, the outer shield may be trimmed in length. If the fi restop penetrates into an attic, leave the shield full length to keep insulation away from the vent pipe. Additionally, after the vent pipe is in place, install a storm collar on top of the shield. This will prevent loose insulation from falling into the area between the vent pipe and the shield.
Fig. # 20
A
14 1/2"
B
Size of the opening will have to increase with the pitch of the roof to ensure a 1 3/4 inch air space clearance between vent pipe and com- bustibles.
Roof Pitch | A | B |
0/12 | 14 1/2" | 7 1/4" |
4/12 | 16 1/2" | 8 3/4" |
6/12 | 18" | 10" |
8/12 | 19 3/4" | 11" |
12/12 | 24" | 13 3/4" |
|
|
|
Fig. # 19
VENT PIPE
ROOF SUPPORT
BRACKET
(TCVT.93915)
Vent pipe:
1)Install the first section of vent pipe into the collar on top of the fi replace. Secure in place with screws and seal with approved "High Temp."
2)Continue adding vent pipe lengths up and through the fi restop(s) and through the roof. The vent pipe must extend at least 24" above the roof.
Seal the vent pipe as per "Vent Pipe Sealant" section.
Roof support bracket:
Slip the roof support bracket down over the vent pipe. Rotate the 90° brackets to accommodate roof pitch. Attach the brackets to the roof joists with nails or building screws. Tighten the band around the vent pipe and secure in place with screws.
36ARB2 15 |