5. Operation | On Screen Display Menu > |
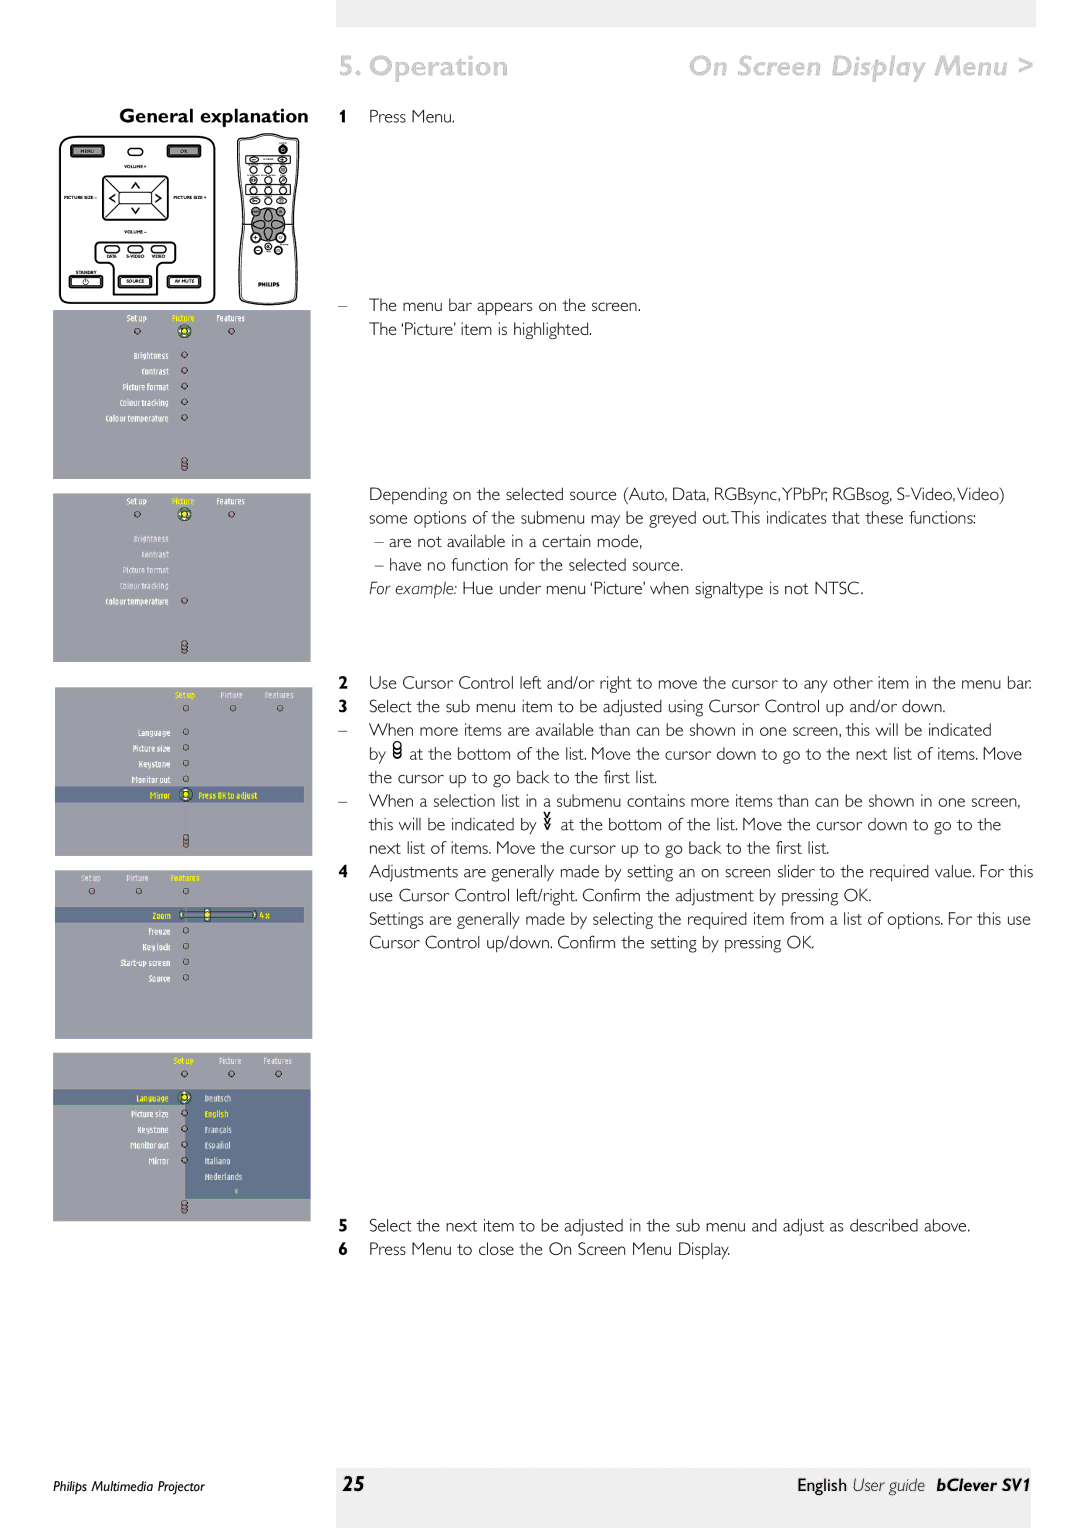
General explanation 1 Press Menu. |
|
MENU |
| OK |
| |
|
| VOLUME + |
|
|
PICTUREI | SIZEI – |
| PICTUREI | SIZEI + |
|
| VOLUME – |
|
|
| DATA | VIDEO |
| |
STANDBY |
|
|
| |
|
| SOURCE | AV MUTE | |
|
| STAND BY |
| PICTURE SIZE |
|
BRIGHTNESS | CONTRAST | FREEZE |
PICTURE FORMAT COLOUR TRACKING | ZOOM | |
DATA | VIDEO | |
KEY LOCK | AV MUTE | INFO |
MENU |
| OK |
KEYSTONE
MUTE
–The menu bar appears on the screen. The ‘Picture’ item is highlighted.
Depending on the selected source (Auto, Data, RGBsync,YPbPr, RGBsog,
–are not available in a certain mode,
–have no function for the selected source.
For example: Hue under menu ‘Picture’ when signaltype is not NTSC.
2Use Cursor Control left and/or right to move the cursor to any other item in the menu bar.
3Select the sub menu item to be adjusted using Cursor Control up and/or down.
–When more items are available than can be shown in one screen, this will be indicated
by ![]() at the bottom of the list. Move the cursor down to go to the next list of items. Move the cursor up to go back to the first list.
at the bottom of the list. Move the cursor down to go to the next list of items. Move the cursor up to go back to the first list.
–When a selection list in a submenu contains more items than can be shown in one screen,
this will be indicated by <<< at the bottom of the list. Move the cursor down to go to the next list of items. Move the cursor up to go back to the first list.
4Adjustments are generally made by setting an on screen slider to the required value. For this use Cursor Control left/right. Confirm the adjustment by pressing OK.
Settings are generally made by selecting the required item from a list of options. For this use
Cursor Control up/down. Confirm the setting by pressing OK.
5Select the next item to be adjusted in the sub menu and adjust as described above.
6Press Menu to close the On Screen Menu Display.
Philips Multimedia Projector | 25 | English User guide bClever SV1 |
|
|
|