| 3. Set up | > |
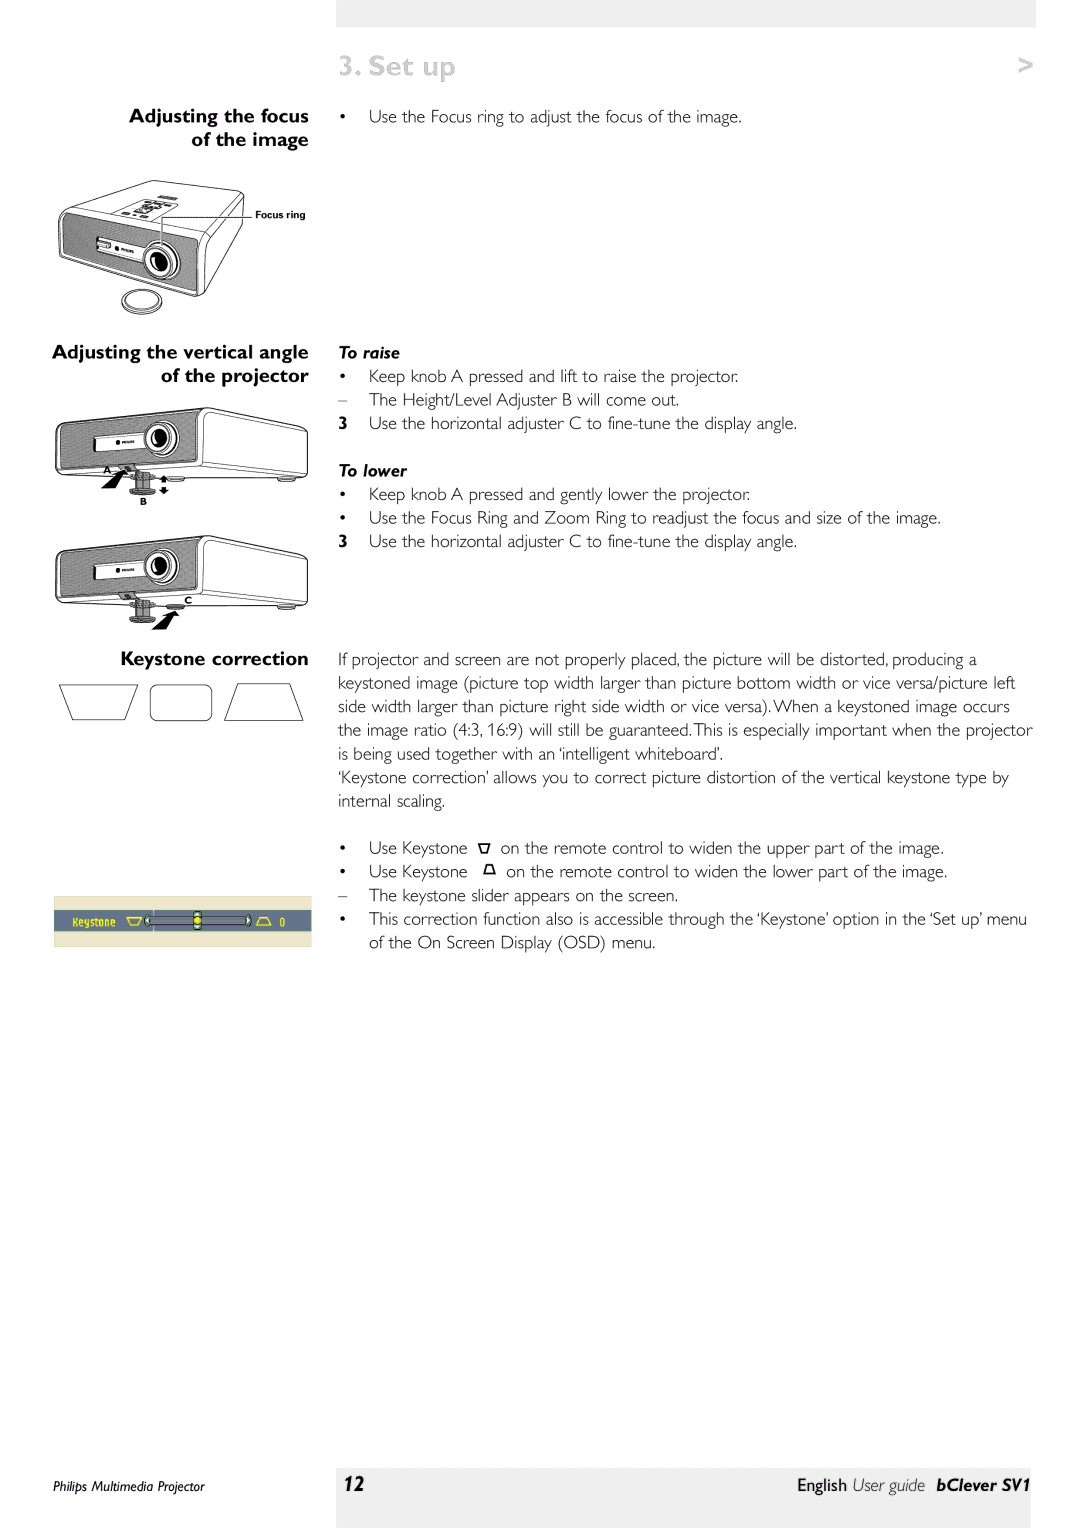
Adjusting the focus | • Use the Focus ring to adjust the focus of the image. |
|
of the image |
|
|
Focus ring |
|
|
Adjusting the vertical angle | To raise | |
of the projector | • | Keep knob A pressed and lift to raise the projector. |
| – | The Height/Level Adjuster B will come out. |
3 Use the horizontal adjuster C to
A![]()
B
C
To lower
•Keep knob A pressed and gently lower the projector.
•Use the Focus Ring and Zoom Ring to readjust the focus and size of the image.
3 Use the horizontal adjuster C to
Keystone correction If projector and screen are not properly placed, the picture will be distorted, producing a keystoned image (picture top width larger than picture bottom width or vice versa/picture left side width larger than picture right side width or vice versa). When a keystoned image occurs the image ratio (4:3, 16:9) will still be guaranteed. This is especially important when the projector is being used together with an ‘intelligent whiteboard’.
‘Keystone correction’ allows you to correct picture distortion of the vertical keystone type by internal scaling.
•Use Keystone ![]() on the remote control to widen the upper part of the image.
on the remote control to widen the upper part of the image.
•Use Keystone ![]() on the remote control to widen the lower part of the image.
on the remote control to widen the lower part of the image.
– The keystone slider appears on the screen.
•This correction function also is accessible through the ‘Keystone’ option in the ‘Set up’ menu of the On Screen Display (OSD) menu.
Philips Multimedia Projector | 12 | English User guide bClever SV1 |
|
|
|
