Positioning the projector and screen
3. Set up |
| > |
SCREEN | A | B |
|
| SCREEN |
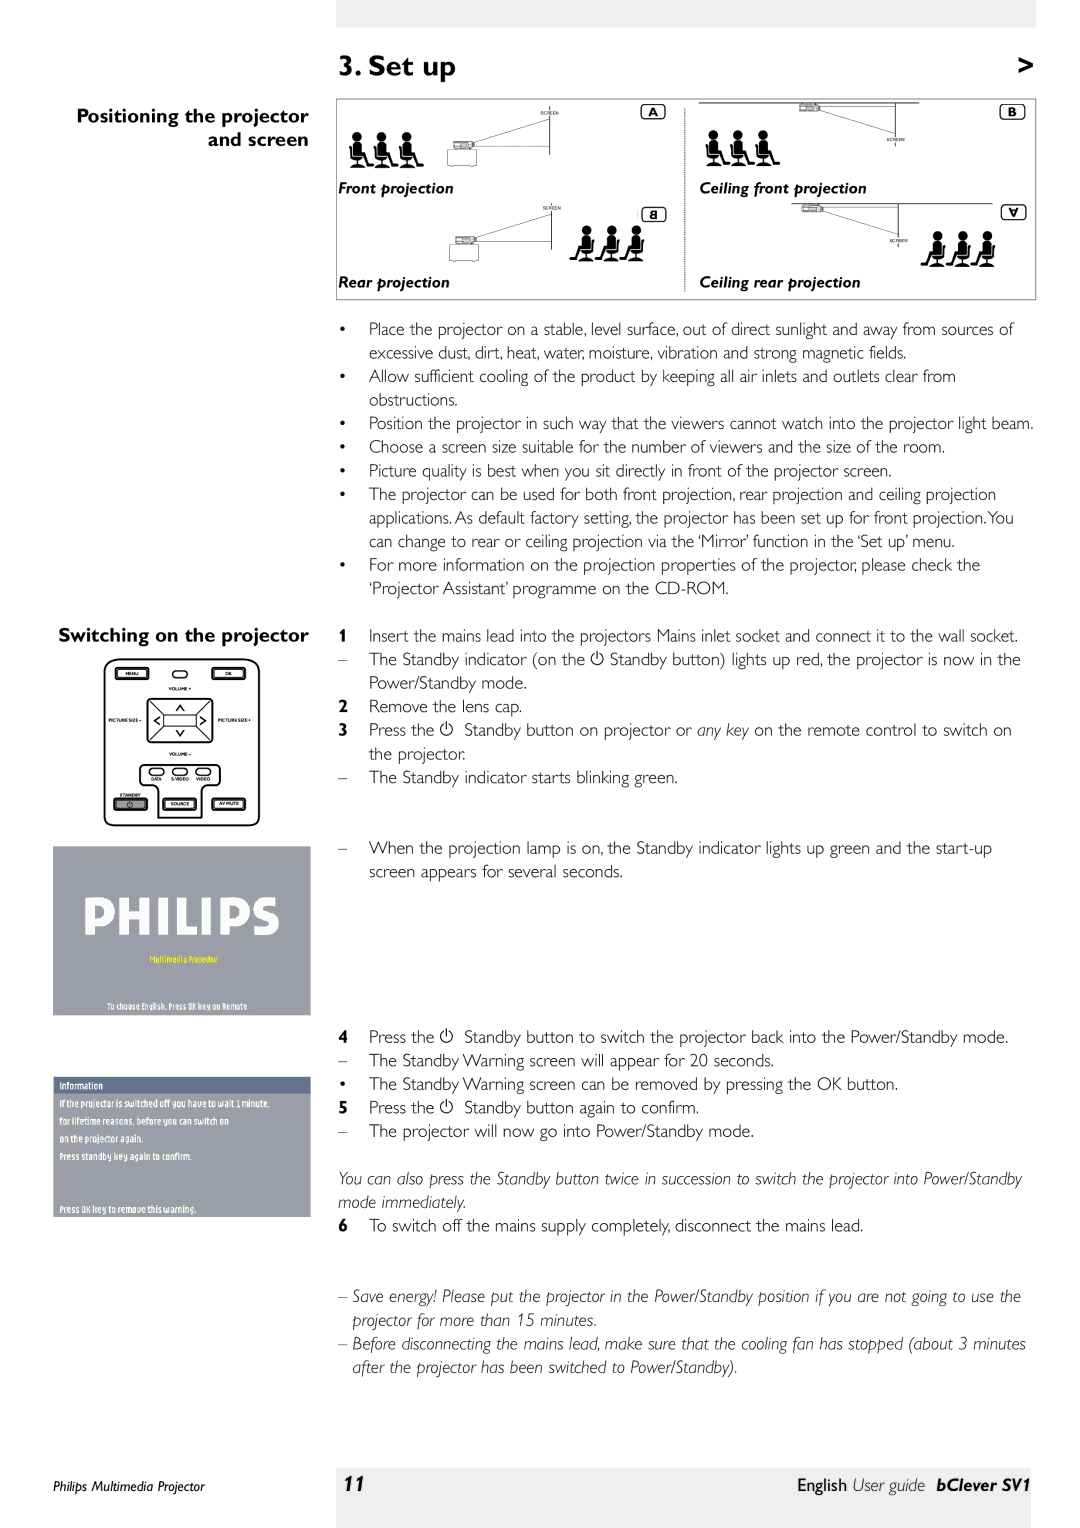
Front projection |
| Ceiling front projection |
SCREEN | B | A |
| ||
|
| |
|
| SCREEN |
Rear projection |
| Ceiling rear projection |
Switching on the projector
MENU |
| OK |
| |
|
| VOLUME + |
|
|
PICTUREI | SIZEI – |
| PICTUREI | SIZEI + |
|
| VOLUME – |
|
|
| DATA | VIDEO |
| |
STANDBY |
|
|
| |
|
| SOURCE | AV MUTE | |
•Place the projector on a stable, level surface, out of direct sunlight and away from sources of excessive dust, dirt, heat, water, moisture, vibration and strong magnetic fields.
•Allow sufficient cooling of the product by keeping all air inlets and outlets clear from obstructions.
•Position the projector in such way that the viewers cannot watch into the projector light beam.
•Choose a screen size suitable for the number of viewers and the size of the room.
•Picture quality is best when you sit directly in front of the projector screen.
•The projector can be used for both front projection, rear projection and ceiling projection applications. As default factory setting, the projector has been set up for front projection.You can change to rear or ceiling projection via the ‘Mirror’ function in the ‘Set up’ menu.
•For more information on the projection properties of the projector, please check the ‘Projector Assistant’ programme on the
1Insert the mains lead into the projectors Mains inlet socket and connect it to the wall socket.
– The Standby indicator (on the y Standby button) lights up red, the projector is now in the Power/Standby mode.
2Remove the lens cap.
3Press the y Standby button on projector or any key on the remote control to switch on the projector.
–The Standby indicator starts blinking green.
–When the projection lamp is on, the Standby indicator lights up green and the
4Press the y Standby button to switch the projector back into the Power/Standby mode.
– The Standby Warning screen will appear for 20 seconds.
• The Standby Warning screen can be removed by pressing the OK button.
5Press the y Standby button again to confirm.
–The projector will now go into Power/Standby mode.
You can also press the Standby button twice in succession to switch the projector into Power/Standby mode immediately.
6To switch off the mains supply completely, disconnect the mains lead.
–Save energy! Please put the projector in the Power/Standby position if you are not going to use the projector for more than 15 minutes.
–Before disconnecting the mains lead, make sure that the cooling fan has stopped (about 3 minutes after the projector has been switched to Power/Standby).
Philips Multimedia Projector | 11 | English User guide bClever SV1 |
|
|
|