4.2Connecting to your audio equipment (analogue or digital)
Depending on your audio equipment, you might have several options to connect your
English
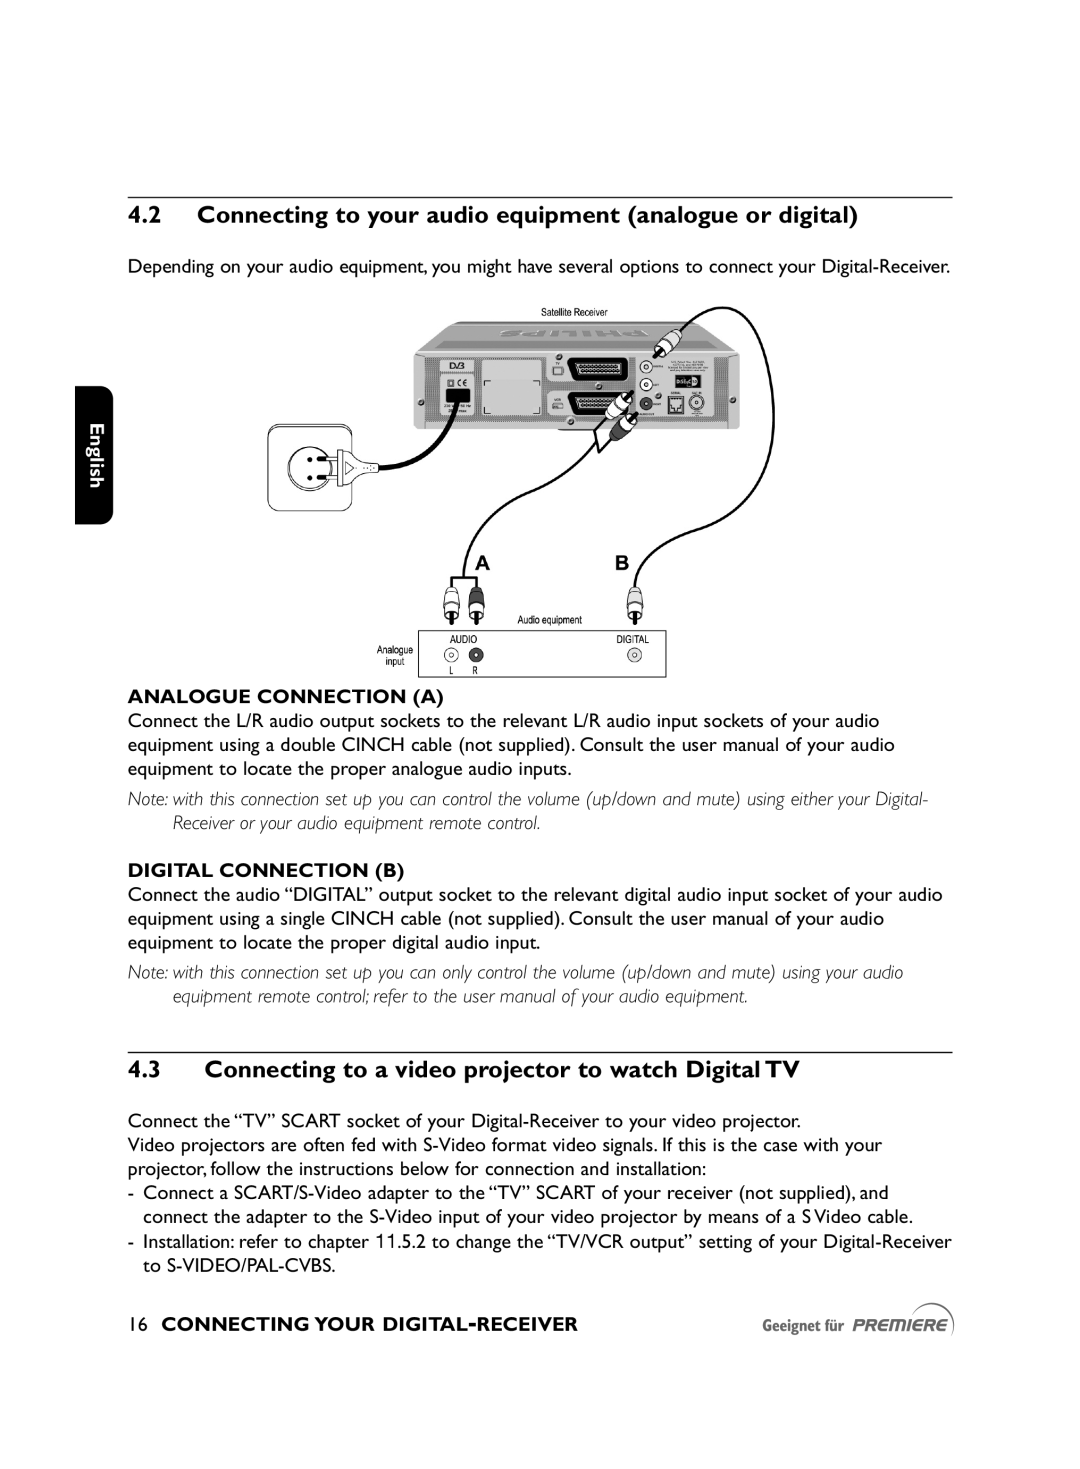
ANALOGUE CONNECTION (A)
Connect the L/R audio output sockets to the relevant L/R audio input sockets of your audio equipment using a double CINCH cable (not supplied). Consult the user manual of your audio equipment to locate the proper analogue audio inputs.
Note: with this connection set up you can control the volume (up/down and mute) using either your Digital- Receiver or your audio equipment remote control.
DIGITAL CONNECTION (B)
Connect the audio “DIGITAL” output socket to the relevant digital audio input socket of your audio equipment using a single CINCH cable (not supplied). Consult the user manual of your audio equipment to locate the proper digital audio input.
Note: with this connection set up you can only control the volume (up/down and mute) using your audio equipment remote control; refer to the user manual of your audio equipment.
4.3Connecting to a video projector to watch Digital TV
Connect the “TV” SCART socket of your
Video projectors are often fed with
- Connect a
-Installation: refer to chapter 11.5.2 to change the “TV/VCR output” setting of your