09Basic Adjustment Settings
PureCinema
Selections | Off | Deactivates the PureCinema. |
|
|
|
| Standard | Produces smooth and vivid moving |
|
| images (film specific) by automatically |
|
| detecting recorded image information |
|
| when displaying DVD or |
|
| images (e.g., movies) having 24 frames |
|
| per second. |
|
|
|
| Advanced | Produces smooth and quality moving |
|
| images (as shown on theatre screens) by |
|
| converting to 72 Hz when displaying DVD |
|
| images (e.g., movies) having 24 frames |
|
| per second. |
|
|
|
Item |
|
| button |
| button |
|
|
|
|
|
|
R Low | Fine adjustment For weaker red |
| For stronger red | ||
| for dark |
|
|
|
|
G Low |
| For weaker green |
| For stronger green | |
portions |
| ||||
|
|
|
| ||
B Low |
|
| For weaker blue |
| For stronger blue |
•To perform adjustment for another item, press RETURN, and then repeat steps 7 and 8.
•You may press ![]() /
/![]() to immediately change an item to be adjusted.
to immediately change an item to be adjusted.
9Press HOME MENU, INPUT 1 to INPUT 6 (INPUT) to exit the menu.
NOTE
•“Standard” is not selectable when 480p or 720p@60 Hz signals are input.
•“Advanced” is not selectable when PAL, SECAM, 576i, or 1080i@50 Hz signals are input.
•Neither “Standard” nor “Advanced” is selectable when 576p, 1080p or 720p@ 50 Hz signals are input.
Using Color Temp
1Press HOME MENU.
2Select “Picture” (![]() /
/![]() then ENTER (ENTER/DISP.)).
then ENTER (ENTER/DISP.)).
3Select “Pro Adjust” (![]() /
/![]() then ENTER (ENTER/DISP.)).
then ENTER (ENTER/DISP.)).
4Select “Color Detail” (![]() /
/![]() then ENTER (ENTER/DISP.)).
then ENTER (ENTER/DISP.)).
5Select “Color Temp” (![]() /
/![]() then ENTER (ENTER/DISP.)).
then ENTER (ENTER/DISP.)).
6Select the desired parameter (![]() /
/![]() then ENTER (ENTER/ DISP.)).
then ENTER (ENTER/ DISP.)).
•If you have selected a desired parameter in this step, skip steps 7 and 8.
•You may rather want to perform fine adjustment. To do this, select “Manual” first and then press and hold ENTER (ENTER/DISP.) for more than three seconds. The manual adjustment screen appears. Then go to step 7.
Color Temp
Adjusts the color temperature, resulting in a better white balance.
Selections | High | White with bluish tone |
|
|
|
| Intermediate tone between High and Mid | |
|
|
|
| Mid | Natural tone |
|
|
|
| Intermediate tone between Mid and Low | |
|
|
|
| Low | White with reddish tone |
|
|
|
| Manual | Color temperature adjusted to your |
|
| preference |
7Select an item to be adjusted (![]() /
/![]() then ENTER (ENTER/ DISP.)).
then ENTER (ENTER/ DISP.)).
8Select the desired level ( /
/ ).
).
Item |
| button | button | |
|
|
|
| |
R High | Fine adjustment For weaker red | For stronger red | ||
| for bright |
|
| |
G High | For weaker green | For stronger green | ||
portions | ||||
|
|
| ||
B High |
| For weaker blue | For stronger blue | |
26
Using CTI
1Press HOME MENU.
2Select “Picture” (![]() /
/![]() then ENTER (ENTER/DISP.)).
then ENTER (ENTER/DISP.)).
3Select “Pro Adjust” (![]() /
/![]() then ENTER (ENTER/DISP.)).
then ENTER (ENTER/DISP.)).
4Select “Color Detail” (![]() /
/![]() then ENTER (ENTER/DISP.)).
then ENTER (ENTER/DISP.)).
5Select “CTI” (![]() /
/![]() then ENTER (ENTER/DISP.)).
then ENTER (ENTER/DISP.)).
6Select the desired parameter (![]() /
/![]() then ENTER (ENTER/ DISP.)).
then ENTER (ENTER/ DISP.)).
CTI
Provides images with clearer color contours. The CTI stands for Color Transient Improvement.
Selections | Off | Deactivates the CTI. |
|
|
|
| On | Activates the CTI. |
7Press HOME MENU, INPUT 1 to INPUT 6 (INPUT) to exit the menu.
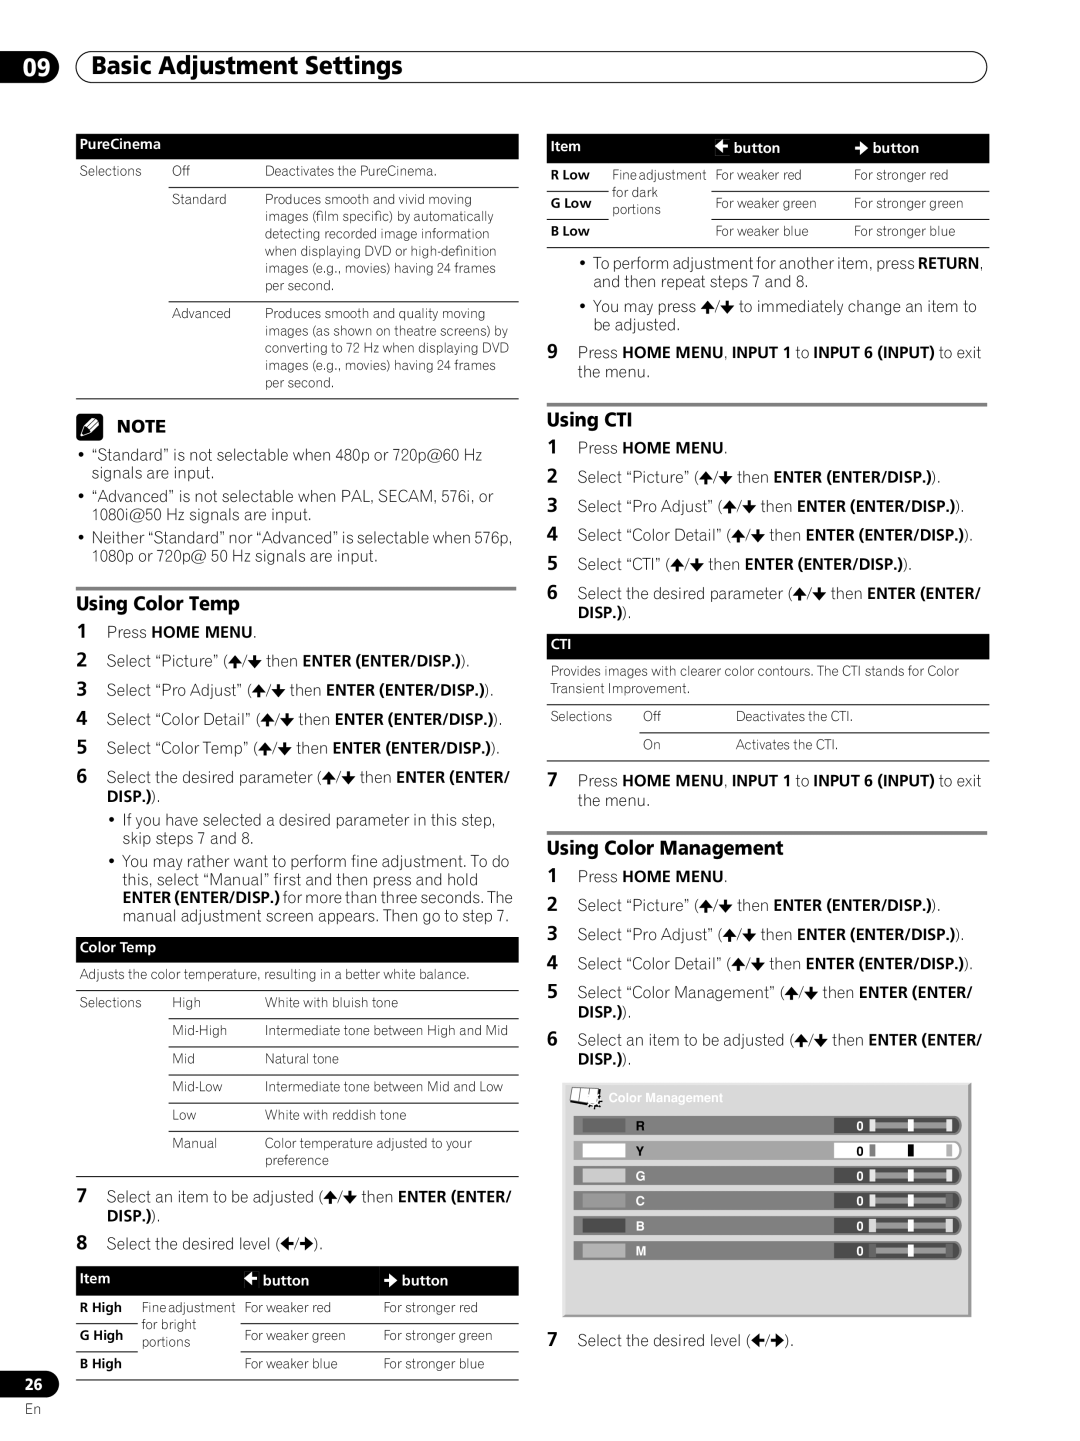
Using Color Management
1Press HOME MENU.
2Select “Picture” (![]() /
/![]() then ENTER (ENTER/DISP.)).
then ENTER (ENTER/DISP.)).
3Select “Pro Adjust” (![]() /
/![]() then ENTER (ENTER/DISP.)).
then ENTER (ENTER/DISP.)).
4Select “Color Detail” (![]() /
/![]() then ENTER (ENTER/DISP.)).
then ENTER (ENTER/DISP.)).
5Select “Color Management” (![]() /
/![]() then ENTER (ENTER/ DISP.)).
then ENTER (ENTER/ DISP.)).
6Select an item to be adjusted (![]() /
/![]() then ENTER (ENTER/ DISP.)).
then ENTER (ENTER/ DISP.)).
Color Management |
|
R | 0 |
Y | 0 |
G | 0 |
C | 0 |
B | 0 |
M | 0 |
7Select the desired level ( /
/ ).
).
En