07Controlling other equipment

Using System off

From the remote control Home menu press

SYSTEM OFF.

The command sequence you programmed will run, then all Pioneer components will switch off, followed by this amplifier.

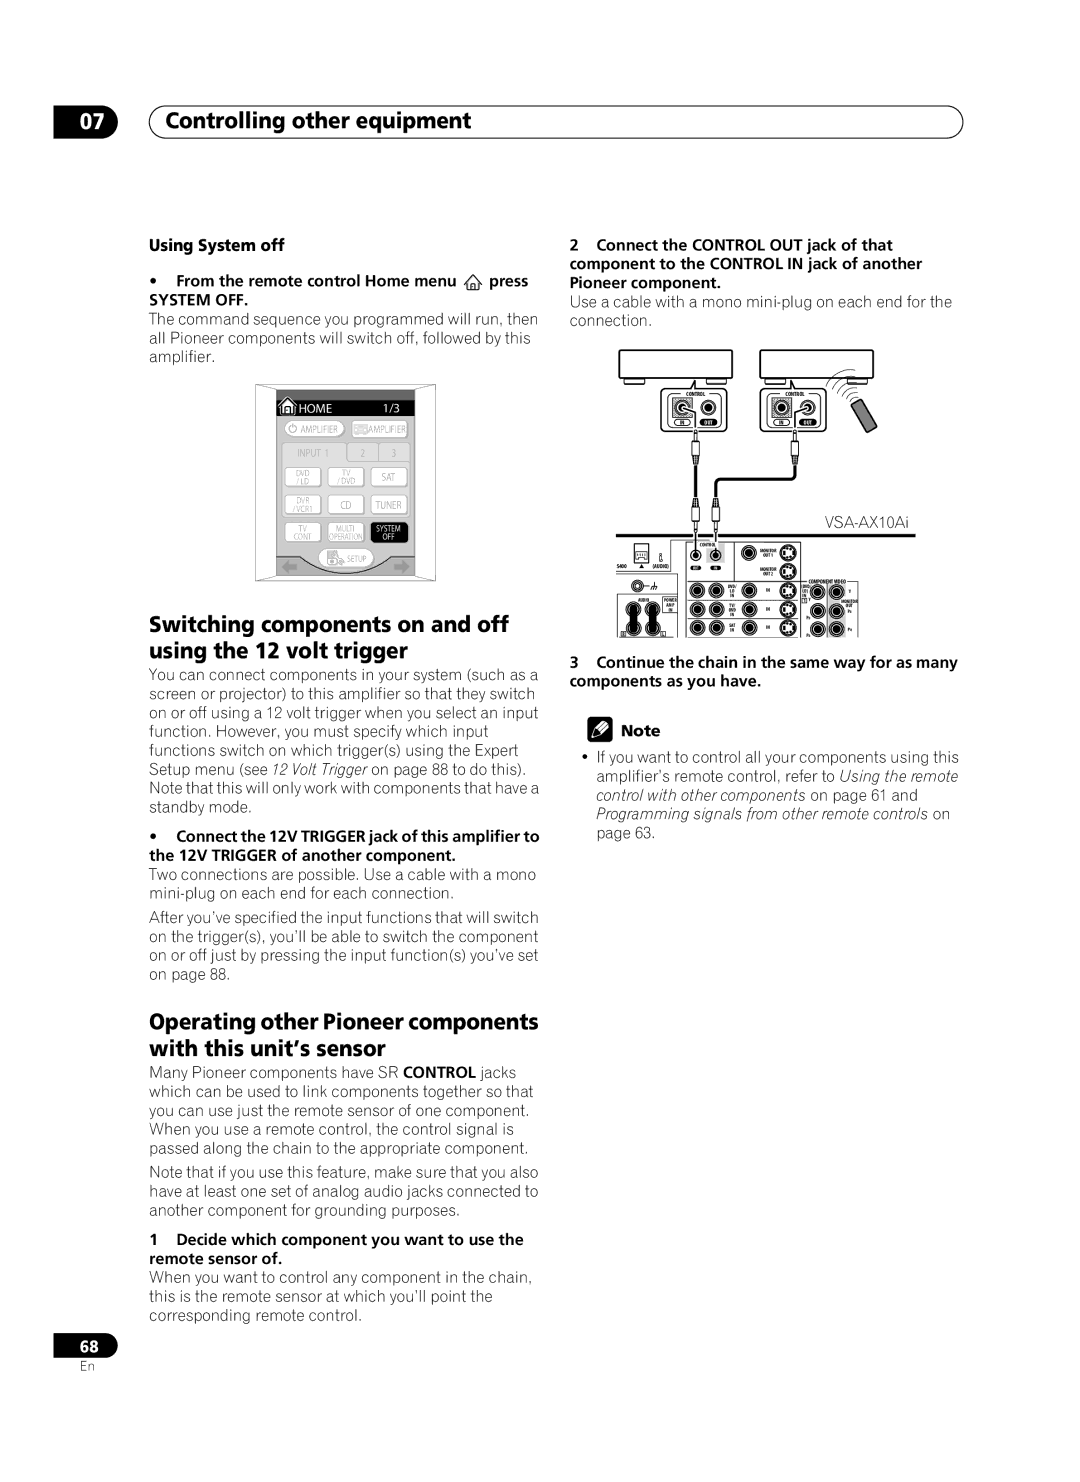
2Connect the CONTROL OUT jack of that component to the CONTROL IN jack of another Pioneer component.

Use a cable with a mono mini-plug on each end for the connection.

HOME 1/3

AMPLIFIER AMPLIFIER


CONTROL


CONTROL

IN

OUT

IN

OUT

INPUT 1

2

3

DVD

TV

SAT

/ LD

/ DVD


DVR

CD

TUNER

/ VCR1


TV

MULTI

SYSTEM


VSA-AX10Ai

CONT

OPERATION

OFF


CONTROL


MONITOR


SETUP


OUT 1


S400

(AUDIO)


OUT

IN

MONITOR


OUT 2


DVD/


COMPONENT VIDEO


IN

(DVD/


LD

LD)

Y


IN


IN


AUDIO

POWER


TV/


1 Y

MONITOR


AMP


IN


OUT

Switching components on and off


IN


DVD


PB

R

L


IN


PR

PR


IN


PB


SAT

IN


using the 12 volt trigger

3 Continue the chain in the same way for as many

You can connect components in your system (such as a

components as you have.


screen or projector) to this amplifier so that they switch


on or off using a 12 volt trigger when you select an input

Note


function. However, you must specify which input


functions switch on which trigger(s) using the Expert

• If you want to control all your components using this

Setup menu (see 12 Volt Trigger on page 88 to do this).

amplifier’s remote control, refer to Using the remote

Note that this will only work with components that have a

control with other components on page 61 and

standby mode.


Programming signals from other remote controls on


• Connect the 12V TRIGGER jack of this amplifier to

page 63.


the 12V TRIGGER of another component.


Two connections are possible. Use a cable with a mono


mini-plug on each end for each connection.


After you’ve specified the input functions that will switch on the trigger(s), you’ll be able to switch the component on or off just by pressing the input function(s) you’ve set on page 88.

Operating other Pioneer components with this unit’s sensor

Many Pioneer components have SR CONTROL jacks which can be used to link components together so that you can use just the remote sensor of one component. When you use a remote control, the control signal is passed along the chain to the appropriate component.

Note that if you use this feature, make sure that you also have at least one set of analog audio jacks connected to another component for grounding purposes.

1Decide which component you want to use the remote sensor of.

When you want to control any component in the chain, this is the remote sensor at which you’ll point the corresponding remote control.

68

En

Page 68
Image 68
Pioneer VSA-AX10Ai manual Switching components on and off, Using the 12 volt trigger, Using System off, System OFF

VSA-AX10Ai specifications

The Pioneer VSA-AX10Ai is a high-end, multi-channel home theater receiver that stands out for its robust performance and cutting-edge technologies. Launched as a flagship model, it combines advanced audio processing capabilities with a formidable power output, catering to both audiophiles and home theater enthusiasts.

One of the standout features of the VSA-AX10Ai is its Direct Energy HD Amplification technology, which incorporates a Class D amplifier design. This technology not only ensures high power efficiency but also minimizes distortion, delivering pristine sound quality at high volumes. The receiver boasts a substantial output of 200 watts per channel over eight channels, making it an ideal choice for driving large, demanding speaker systems.

In terms of audio decoding, the VSA-AX10Ai supports a multitude of formats, including Dolby TrueHD and DTS-HD Master Audio. This feature allows the receiver to provide a cinematic surround sound experience, ensuring that every detail of the soundtrack is delivered with accuracy and clarity. The device is also equipped with a high-quality 24-bit/192 kHz DAC, assuring top-notch sound reproduction from a variety of sources.

The VSA-AX10Ai features Pioneer’s sophisticated MCACC (Multi-Channel Acoustic Calibration System), which automatically calibrates the audio output to match the room's acoustics. By measuring sound from each speaker and adjusting levels, delays, and equalization, it ensures a balanced sound field, regardless of room shape or speaker placement.

Connectivity is extensive, with multiple HDMI inputs offering 4K pass-through and upscaling capabilities. This makes the receiver well-suited for modern home theater setups that require integration with 4K Ultra HD displays. It also includes legacy inputs, ensuring compatibility with older audio and video equipment.

Another noteworthy characteristic is the receiver’s build quality. The VSA-AX10Ai features a rigid chassis designed to minimize vibration as well as a premium-grade power supply, which contributes to its overall reliability and performance.

Overall, the Pioneer VSA-AX10Ai encapsulates the essence of high-fidelity home audio and video. With its extensive feature set, exceptional sound quality, and robust performance capabilities, it remains a top choice for those seeking a comprehensive and immersive home theater experience. Whether for music playback or movie watching, this receiver delivers an unparalleled audio experience that stands the test of time.