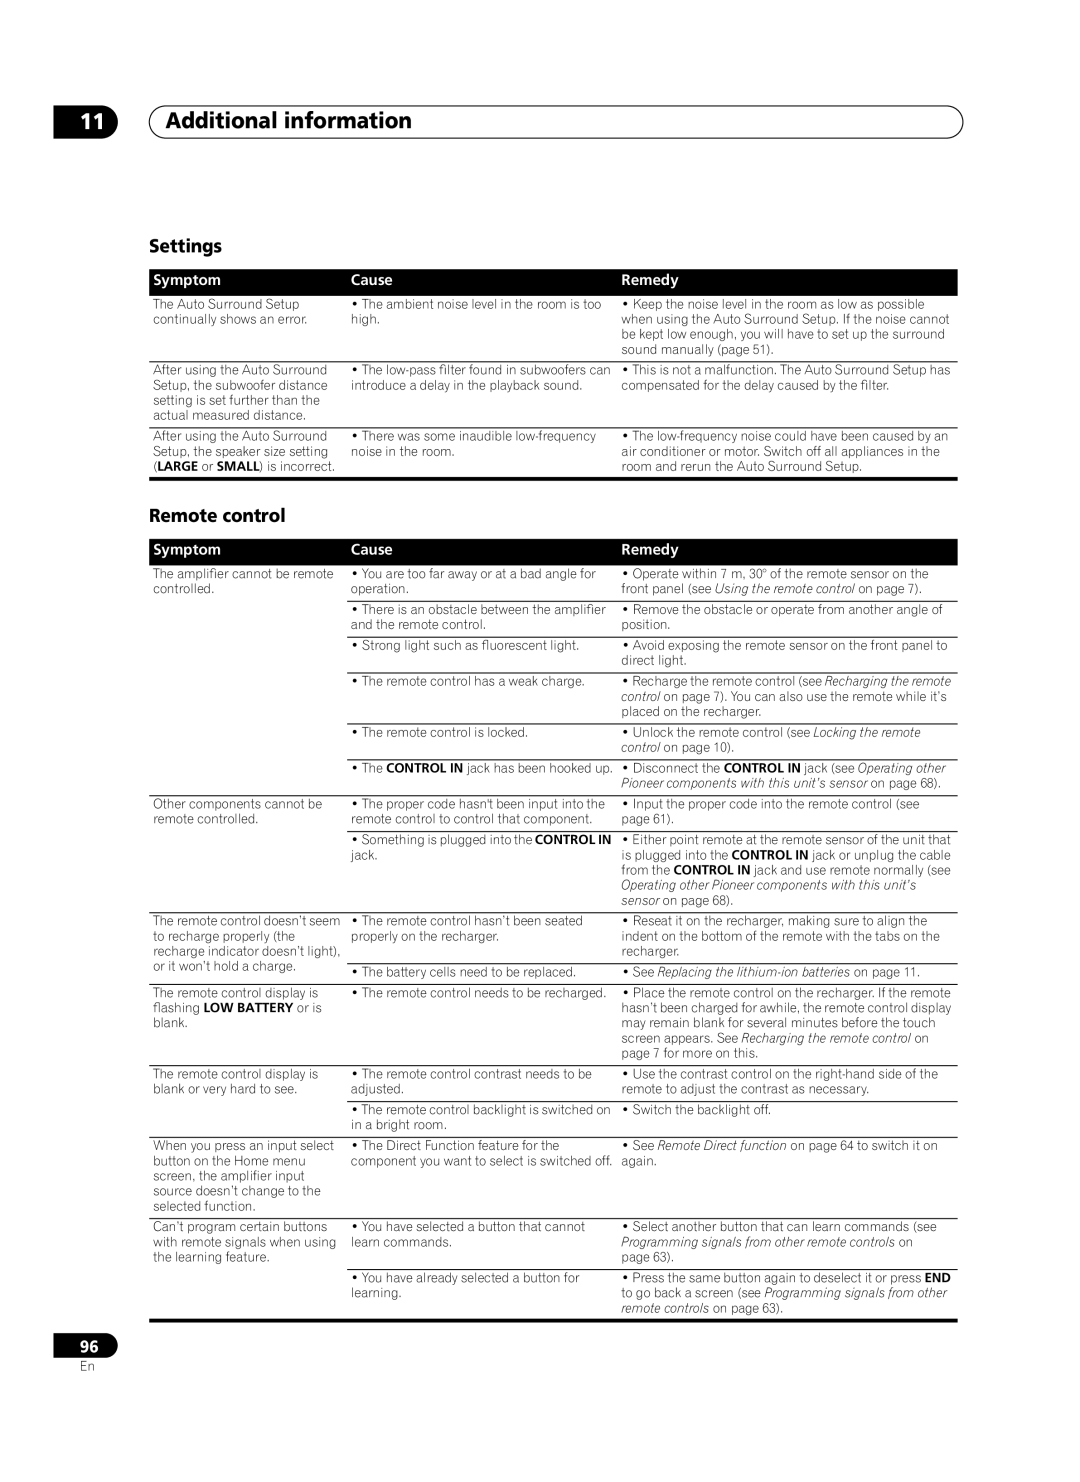
Pioneer VSA-AX10Ai manual Settings, Remote control

Models: VSA-AX10Ai

1 104
Download 104 pages 9.27 Kb
Page 96
Image 96

11Additional information

Settings

Symptom

Cause

Remedy

The Auto Surround Setup

• The ambient noise level in the room is too

continually shows an error.

high.

Keep the noise level in the room as low as possible when using the Auto Surround Setup. If the noise cannot be kept low enough, you will have to set up the surround sound manually (page 51).

After using the Auto Surround Setup, the subwoofer distance setting is set further than the actual measured distance.

The low-pass filter found in subwoofers can introduce a delay in the playback sound.

This is not a malfunction. The Auto Surround Setup has compensated for the delay caused by the filter.

After using the Auto Surround Setup, the speaker size setting (LARGE or SMALL) is incorrect.

There was some inaudible low-frequency noise in the room.

The low-frequency noise could have been caused by an air conditioner or motor. Switch off all appliances in the room and rerun the Auto Surround Setup.

Remote control

Symptom

Cause

Remedy

The amplifier cannot be remote controlled.

• You are too far away or at a bad angle for

• Operate within 7 m, 30° of the remote sensor on the

operation.

front panel (see Using the remote control on page 7).


• There is an obstacle between the amplifier

• Remove the obstacle or operate from another angle of

and the remote control.

position.


• Strong light such as fluorescent light.

• Avoid exposing the remote sensor on the front panel to


direct light.

• The remote control has a weak charge.

Recharge the remote control (see Recharging the remote control on page 7). You can also use the remote while it’s placed on the recharger.

• The remote control is locked.

Unlock the remote control (see Locking the remote control on page 10).

• The CONTROL IN jack has been hooked up. • Disconnect the CONTROL IN jack (see Operating other


Pioneer components with this unit’s sensor on page 68).


Other components cannot be

• The proper code hasn't been input into the

• Input the proper code into the remote control (see

remote controlled.

remote control to control that component.

page 61).


• Something is plugged into the CONTROL IN

• Either point remote at the remote sensor of the unit that


jack.

is plugged into the CONTROL IN jack or unplug the cable


from the CONTROL IN jack and use remote normally (see


Operating other Pioneer components with this unit’s


sensor on page 68).


The remote control doesn’t seem

• The remote control hasn’t been seated

• Reseat it on the recharger, making sure to align the

to recharge properly (the

properly on the recharger.

indent on the bottom of the remote with the tabs on the

recharge indicator doesn’t light),


recharger.

or it won’t hold a charge.


• The battery cells need to be replaced.

• See Replacing the lithium-ion batteries on page 11.


The remote control display is

• The remote control needs to be recharged.

• Place the remote control on the recharger. If the remote

flashing LOW BATTERY or is


hasn’t been charged for awhile, the remote control display

blank.


may remain blank for several minutes before the touch


screen appears. See Recharging the remote control on


page 7 for more on this.


The remote control display is

• The remote control contrast needs to be

• Use the contrast control on the right-hand side of the

blank or very hard to see.

adjusted.

remote to adjust the contrast as necessary.


• The remote control backlight is switched on

• Switch the backlight off.


in a bright room.


When you press an input select

• The Direct Function feature for the

• See Remote Direct function on page 64 to switch it on

button on the Home menu

component you want to select is switched off. again.

screen, the amplifier input


source doesn’t change to the selected function.

Can’t program certain buttons with remote signals when using the learning feature.

• You have selected a button that cannot

• Select another button that can learn commands (see

learn commands.

Programming signals from other remote controls on


page 63).


• You have already selected a button for

• Press the same button again to deselect it or press END

learning.

to go back a screen (see Programming signals from other


remote controls on page 63).

96

En

Page 96
Image 96
Pioneer VSA-AX10Ai manual Settings, Remote control

VSA-AX10Ai specifications

The Pioneer VSA-AX10Ai is a high-end, multi-channel home theater receiver that stands out for its robust performance and cutting-edge technologies. Launched as a flagship model, it combines advanced audio processing capabilities with a formidable power output, catering to both audiophiles and home theater enthusiasts.

One of the standout features of the VSA-AX10Ai is its Direct Energy HD Amplification technology, which incorporates a Class D amplifier design. This technology not only ensures high power efficiency but also minimizes distortion, delivering pristine sound quality at high volumes. The receiver boasts a substantial output of 200 watts per channel over eight channels, making it an ideal choice for driving large, demanding speaker systems.

In terms of audio decoding, the VSA-AX10Ai supports a multitude of formats, including Dolby TrueHD and DTS-HD Master Audio. This feature allows the receiver to provide a cinematic surround sound experience, ensuring that every detail of the soundtrack is delivered with accuracy and clarity. The device is also equipped with a high-quality 24-bit/192 kHz DAC, assuring top-notch sound reproduction from a variety of sources.

The VSA-AX10Ai features Pioneer’s sophisticated MCACC (Multi-Channel Acoustic Calibration System), which automatically calibrates the audio output to match the room's acoustics. By measuring sound from each speaker and adjusting levels, delays, and equalization, it ensures a balanced sound field, regardless of room shape or speaker placement.

Connectivity is extensive, with multiple HDMI inputs offering 4K pass-through and upscaling capabilities. This makes the receiver well-suited for modern home theater setups that require integration with 4K Ultra HD displays. It also includes legacy inputs, ensuring compatibility with older audio and video equipment.

Another noteworthy characteristic is the receiver’s build quality. The VSA-AX10Ai features a rigid chassis designed to minimize vibration as well as a premium-grade power supply, which contributes to its overall reliability and performance.

Overall, the Pioneer VSA-AX10Ai encapsulates the essence of high-fidelity home audio and video. With its extensive feature set, exceptional sound quality, and robust performance capabilities, it remains a top choice for those seeking a comprehensive and immersive home theater experience. Whether for music playback or movie watching, this receiver delivers an unparalleled audio experience that stands the test of time.