The System Setup menu

08

Listen to the reference speaker and use it to measure the target channel. From the listening position, face the two speakers with your arms outstretched pointing at each speaker. Try to make the two tones sound as if they are arriving simultaneously at a position slightly in front of you and between your arm span.

When it sounds like the delay settings are matched up, press ENTER to confirm and continue to the next channel.

For comparison purposes, the reference speaker will change depending on which speaker you select.

If you want to go back and adjust a

channel, simply use

to select it.

4When you're finished, press RETURN. You return to the Manual MCACC setup menu.

Acoustic Calibration EQ

Acoustic Calibration Equalization is a kind of room equalizer for your speakers (excluding the subwoofer). It works by measuring the acoustic characteristics of your room and neutralizing the ambient characteristics that can color the original source material. This provides a ‘flat’ equalization setting. If you’re not satisfied with the automatic adjustment, you can also adjust these settings manually to get a frequency balance that suits your tastes.

Setting the Acoustic Calibration EQ automatically

If you have already completed Automatically setting up for surround sound (MCACC) on page 9, ALL CH ADJUST and FRONT ALIGN (below) should already be set. Therefore, if you want to adjust your settings manually, you can skip to Setting the Acoustic Calibration EQ manually below.

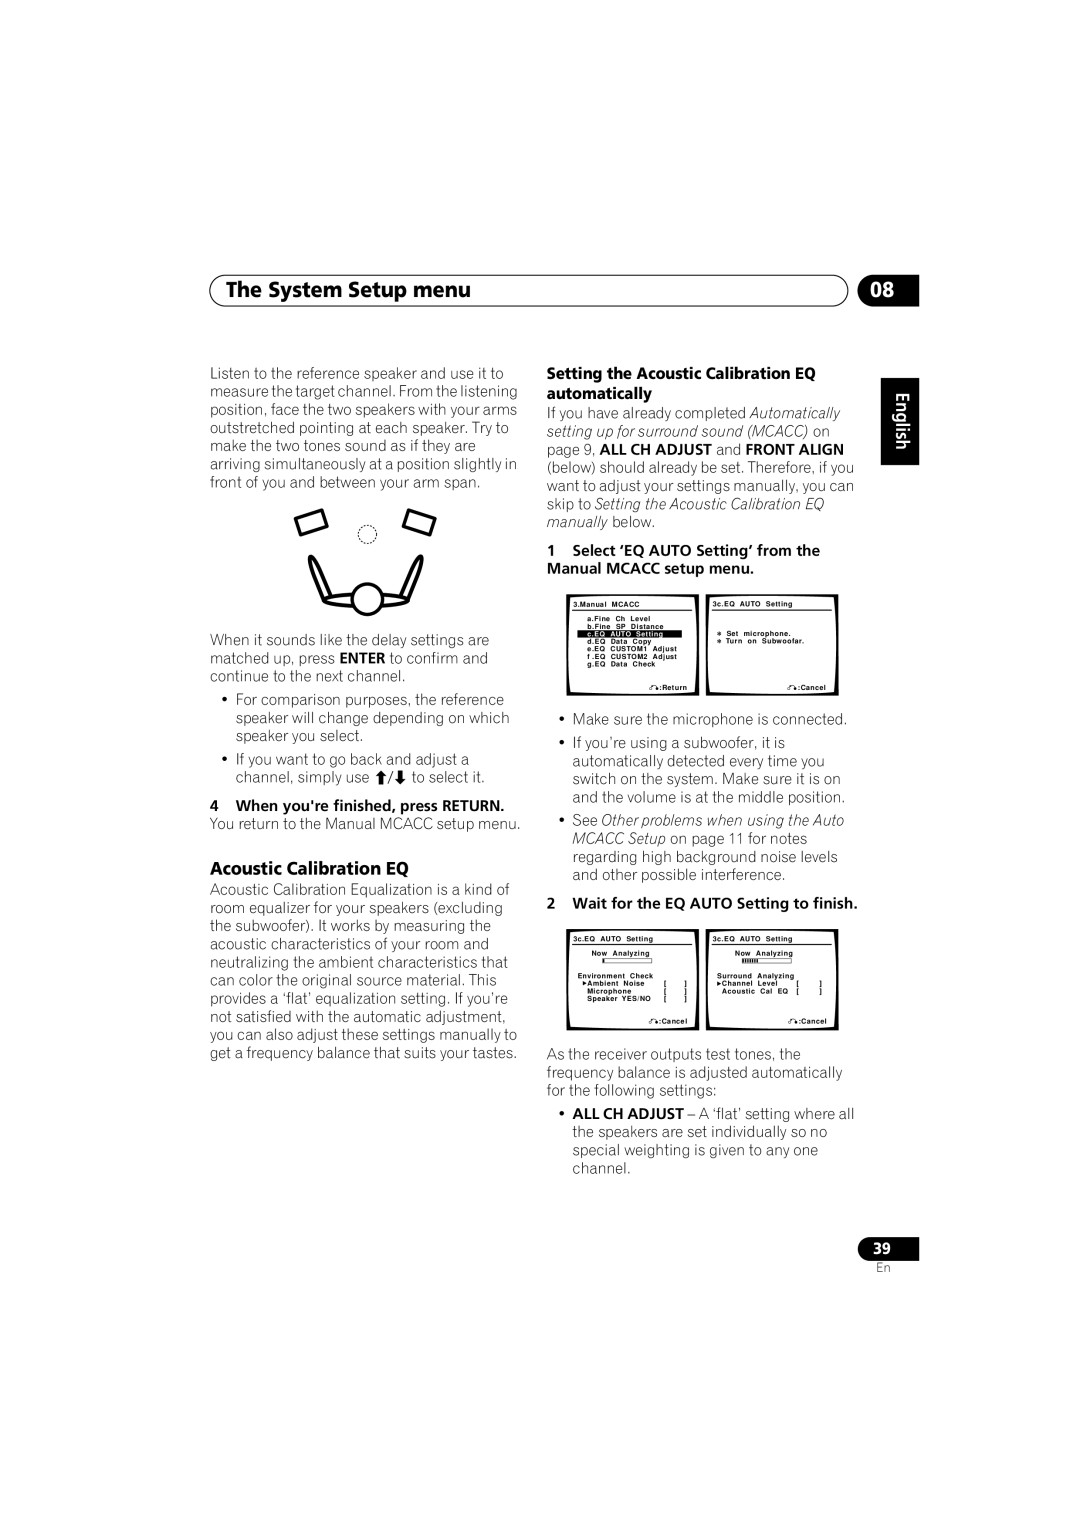
1Select ‘EQ AUTO Setting’ from the Manual MCACC setup menu.


3.Manual

MCACC


3c.EQ AUTO

Setting


a.Fine

Ch

Level


b.Fine SP

Distance


Set

microphone.


c.EQ

AUTO Setting


d.EQ

Data

Copy


Turn

on

Subwoofar.


e.EQ

CUSTOM1

Adjust


f .EQ

CUSTOM2

Adjust


g.EQ

Data

Check


:Return


:Cancel


Make sure the microphone is connected.

If you’re using a subwoofer, it is automatically detected every time you switch on the system. Make sure it is on and the volume is at the middle position.

See Other problems when using the Auto MCACC Setup on page 11 for notes regarding high background noise levels and other possible interference.

2 Wait for the EQ AUTO Setting to finish.


3c.EQ AUTO Setting


3c.EQ AUTO Setting


Now Analyzing


Now

Analyzing


Environment Check


Surround

Analyzing


Ambient Noise

[

]


Channel

Level

[

]


Microphone

[

]


Acoustic

Cal EQ

[

]


Speaker YES/NO

[

]


:Cancel


:Cancel


As the receiver outputs test tones, the frequency balance is adjusted automatically for the following settings:

ALL CH ADJUST – A ‘flat’ setting where all the speakers are set individually so no special weighting is given to any one channel.

English Deutsch Français Italiano Nederlands Español

39

En

Page 39
Image 39
Pioneer VSX-916-K, VSX-916-S Setting the Acoustic Calibration EQ automatically, Wait for the EQ Auto Setting to finish

VSX-916-K, VSX-916-S specifications

The Pioneer VSX-916-K and VSX-916-S are well-regarded AV receivers that cater to home theater enthusiasts seeking robust performance and versatile features. These models stand out due to their combination of advanced audio processing, ample connectivity options, and user-friendly interface.

One of the key features of the VSX-916 series is its support for Dolby Digital EX and DTS ES surround sound formats. This allows users to experience cinema-like audio with incredible clarity and depth. The receivers are equipped with a powerful amplifier section that delivers dynamic sound reproduction, making them ideal for both movies and music.

The Pioneer VSX-916 also supports 7.1 channel surround sound, providing an immersive audio experience. It features multiple audio modes and DSP settings, allowing users to customize their listening experience according to the content being played. For audiophiles, the receiver includes technologies like Direct Energy HD amplification, which ensures high-fidelity audio reproduction with minimal distortion.

Another notable aspect of these models is their robust connectivity options. They come with numerous HDMI inputs, enabling users to connect multiple devices like Blu-ray players, gaming consoles, and streaming devices. This makes it easy to switch between devices without the hassle of reconnecting cables. The receivers also feature component and composite video inputs, allowing integration with older equipment.

The Pioneer VSX-916-K and VSX-916-S are equipped with the Advanced MCACC (Multi-Channel Acoustic Calibration System) feature. This technology analyzes your room's acoustics and calibrates the audio settings accordingly, ensuring an optimized sound experience tailored to your specific environment.

Additionally, the receivers include a front-mounted USB port for easy playback of audio files from USB flash drives. They support various audio formats, making it convenient to enjoy your music collection without needing additional equipment.

The user interface is also designed for ease of use. The on-screen display provides intuitive access to setup menus and audio settings, which simplifies the configuration process for users of all skill levels.

In summary, the Pioneer VSX-916-K and VSX-916-S are excellent choices for anyone looking to enhance their home audio experience. With their impressive audio capabilities, extensive connectivity options, and user-friendly features, these AV receivers deliver an exceptional combination of performance and convenience. Whether you're watching movies or enjoying your favorite music, the VSX-916 series ensures a superior auditory experience.