ADVANCED DVD OPERATION
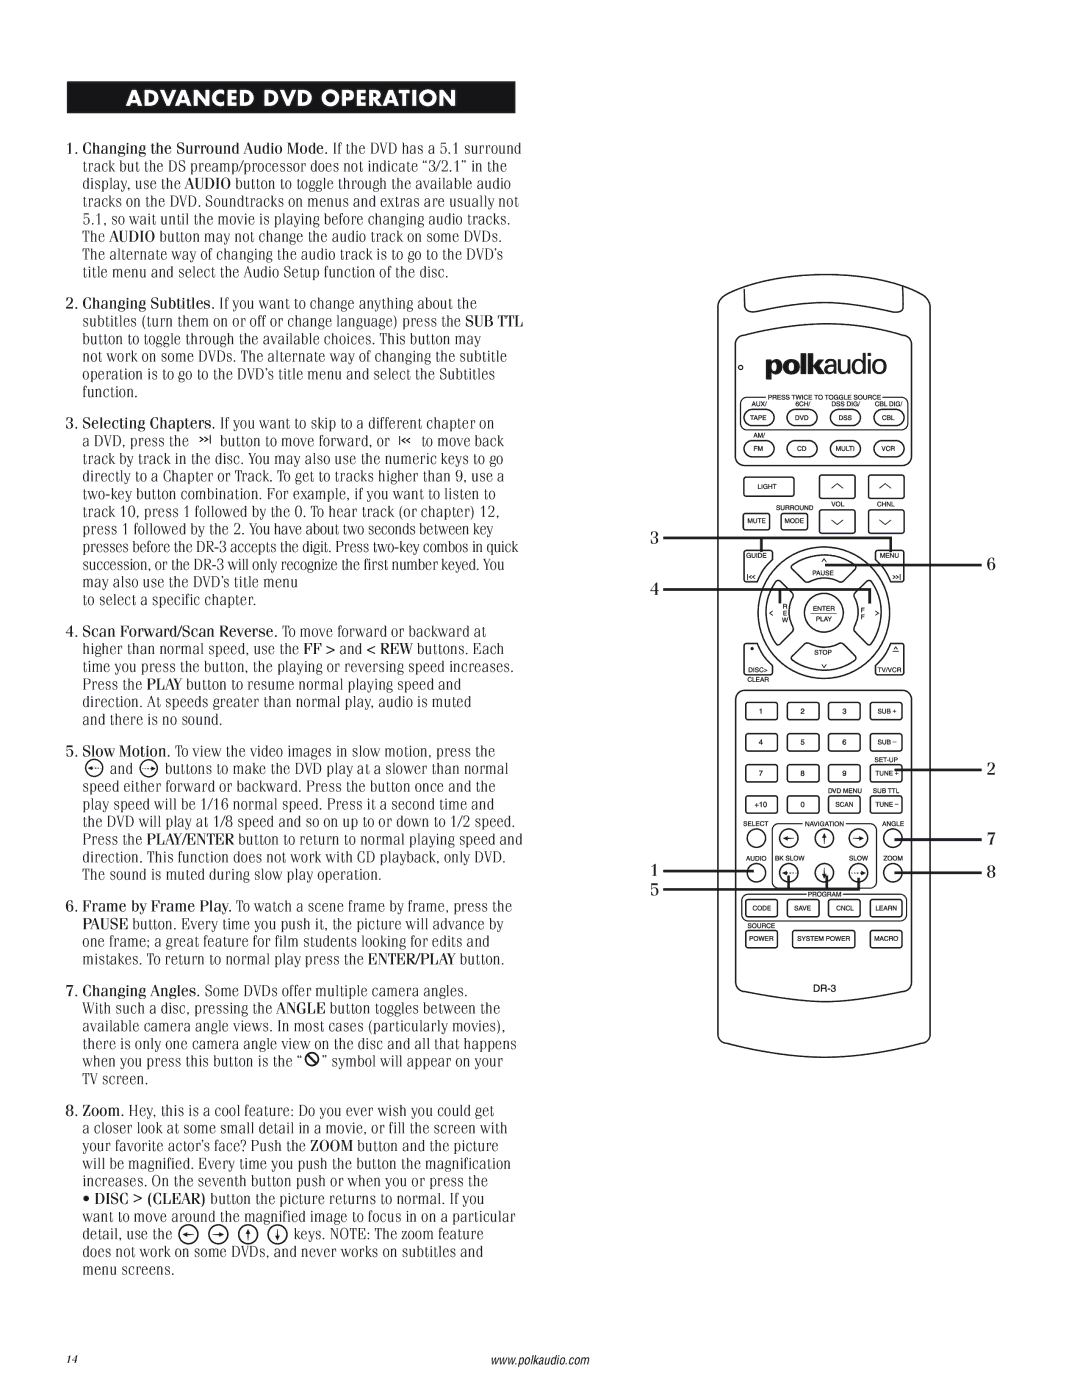
1.Changing the Surround Audio Mode. If the DVD has a 5.1 surround track but the DS preamp/processor does not indicate “3/2.1” in the display, use the AUDIO button to toggle through the available audio tracks on the DVD. Soundtracks on menus and extras are usually not 5.1, so wait until the movie is playing before changing audio tracks. The AUDIO button may not change the audio track on some DVDs. The alternate way of changing the audio track is to go to the DVD’s title menu and select the Audio Setup function of the disc.
2.Changing Subtitles. If you want to change anything about the subtitles (turn them on or off or change language) press the SUB TTL button to toggle through the available choices. This button may
not work on some DVDs. The alternate way of changing the subtitle operation is to go to the DVD’s title menu and select the Subtitles function.
3.Selecting Chapters. If you want to skip to a different chapter on
a DVD, press the ![]() button to move forward, or
button to move forward, or ![]() to move back track by track in the disc. You may also use the numeric keys to go directly to a Chapter or Track. To get to tracks higher than 9, use a
to move back track by track in the disc. You may also use the numeric keys to go directly to a Chapter or Track. To get to tracks higher than 9, use a
to select a specific chapter.
4.Scan Forward/Scan Reverse. To move forward or backward at higher than normal speed, use the FF > and < REW buttons. Each time you press the button, the playing or reversing speed increases. Press the PLAY button to resume normal playing speed and direction. At speeds greater than normal play, audio is muted
and there is no sound.
5.Slow Motion. To view the video images in slow motion, press the
![]() and
and ![]() buttons to make the DVD play at a slower than normal speed either forward or backward. Press the button once and the play speed will be 1/16 normal speed. Press it a second time and the DVD will play at 1/8 speed and so on up to or down to 1/2 speed. Press the PLAY/ENTER button to return to normal playing speed and direction. This function does not work with CD playback, only DVD. The sound is muted during slow play operation.
buttons to make the DVD play at a slower than normal speed either forward or backward. Press the button once and the play speed will be 1/16 normal speed. Press it a second time and the DVD will play at 1/8 speed and so on up to or down to 1/2 speed. Press the PLAY/ENTER button to return to normal playing speed and direction. This function does not work with CD playback, only DVD. The sound is muted during slow play operation.
6.Frame by Frame Play. To watch a scene frame by frame, press the PAUSE button. Every time you push it, the picture will advance by one frame; a great feature for film students looking for edits and mistakes. To return to normal play press the ENTER/PLAY button.
7.Changing Angles. Some DVDs offer multiple camera angles. With such a disc, pressing the ANGLE button toggles between the available camera angle views. In most cases (particularly movies),
there is only one camera angle view on the disc and all that happens when you press this button is the “ ![]() ” symbol will appear on your TV screen.
” symbol will appear on your TV screen.
8.Zoom. Hey, this is a cool feature: Do you ever wish you could get a closer look at some small detail in a movie, or fill the screen with your favorite actor’s face? Push the ZOOM button and the picture will be magnified. Every time you push the button the magnification
increases. On the seventh button push or when you or press the
•DISC > (CLEAR) button the picture returns to normal. If you want to move around the magnified image to focus in on a particular
detail, use the ![]()
![]()
![]()
![]() keys. NOTE: The zoom feature does not work on some DVDs, and never works on subtitles and menu screens.
keys. NOTE: The zoom feature does not work on some DVDs, and never works on subtitles and menu screens.
3
4
1
5
6
2
7
8
14 | www.polkaudio.com |
