Connect the Optional Equipment
software loaded on it. You can use it to show content (such as a slide presentation), but you cannot use it to annotate or perform other SMART Board and video conferencing functions.
Note You cannot connect both an integrated computer and a guest laptop to the Polycom Instructor RP at the same time. If you want to connect a guest laptop, skip this step and go to step 5.
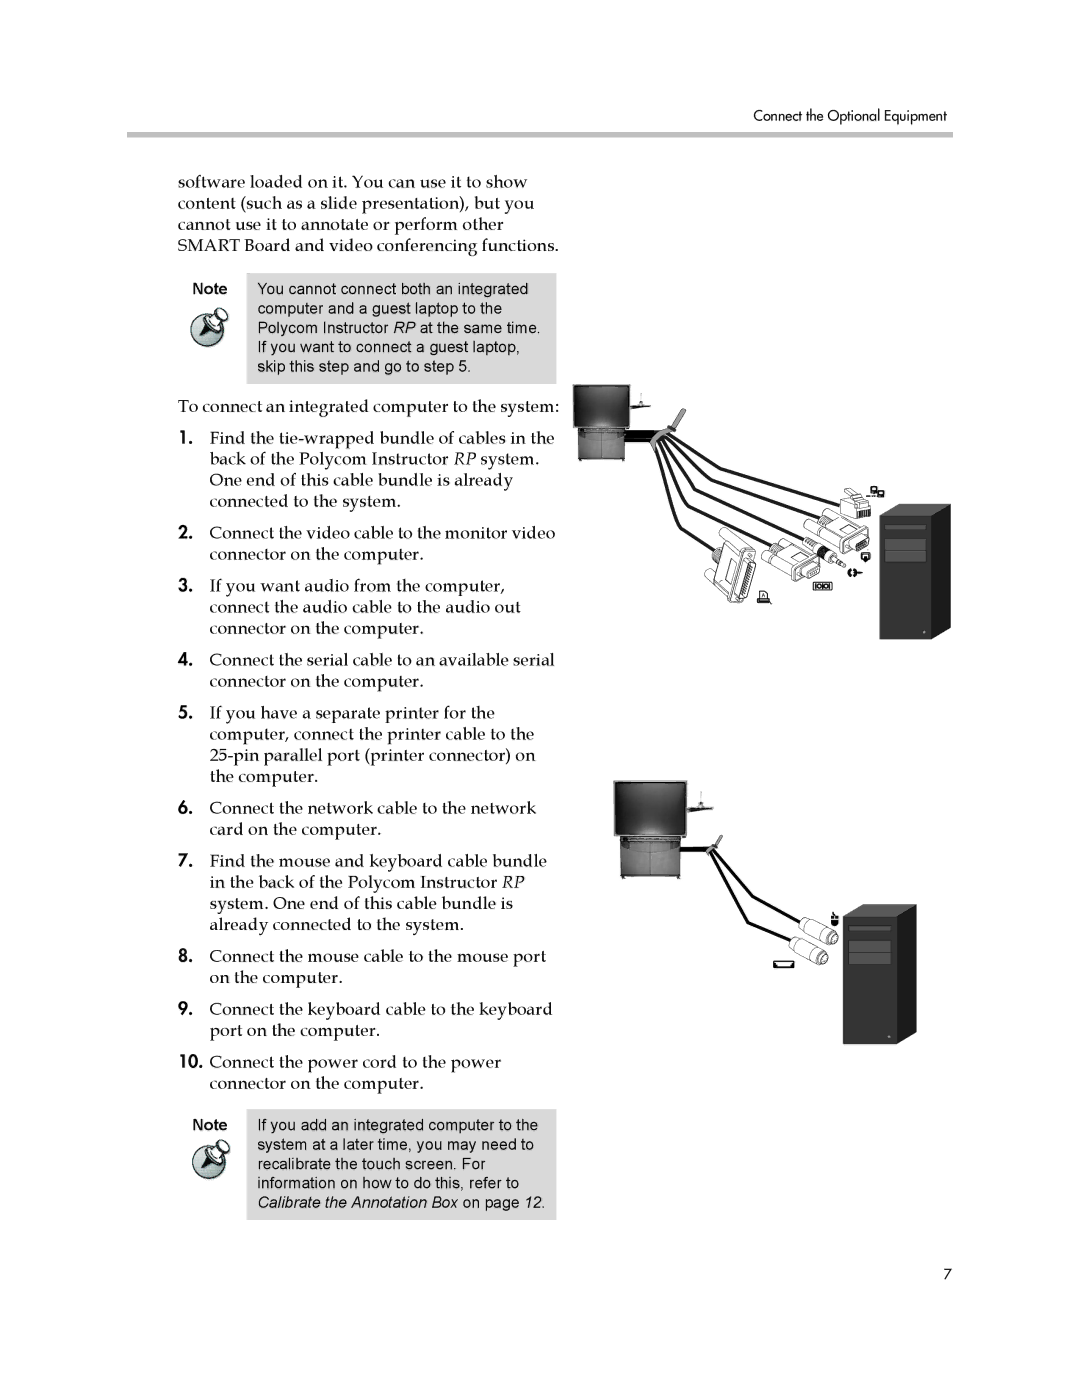
To connect an integrated computer to the system:
1.Find the
2.Connect the video cable to the monitor video connector on the computer.
3.If you want audio from the computer, connect the audio cable to the audio out connector on the computer.
4.Connect the serial cable to an available serial connector on the computer.
5.If you have a separate printer for the computer, connect the printer cable to the
6.Connect the network cable to the network card on the computer.
7.Find the mouse and keyboard cable bundle in the back of the Polycom Instructor RP system. One end of this cable bundle is already connected to the system.
8.Connect the mouse cable to the mouse port on the computer.
9.Connect the keyboard cable to the keyboard port on the computer.
10.Connect the power cord to the power connector on the computer.
Note If you add an integrated computer to the system at a later time, you may need to recalibrate the touch screen. For information on how to do this, refer to Calibrate the Annotation Box on page 12.
A
7