Setting Up the Polycom Instructor RP
To calibrate the touch screen for Camera 4:
1.On the Polycom remote control, press ![]() Camera and select 4.
Camera and select 4.
—If you have an integrated PC or a guest laptop, you will see the video from the PC or laptop as well as the whiteboard icon in the upper right corner of the screen.
—If you do not have an integrated PC or a guest laptop, you will see a blank whiteboard except for the whiteboard icon in the upper right corner of the screen.
2.Pick up a pen from the SMART tray.
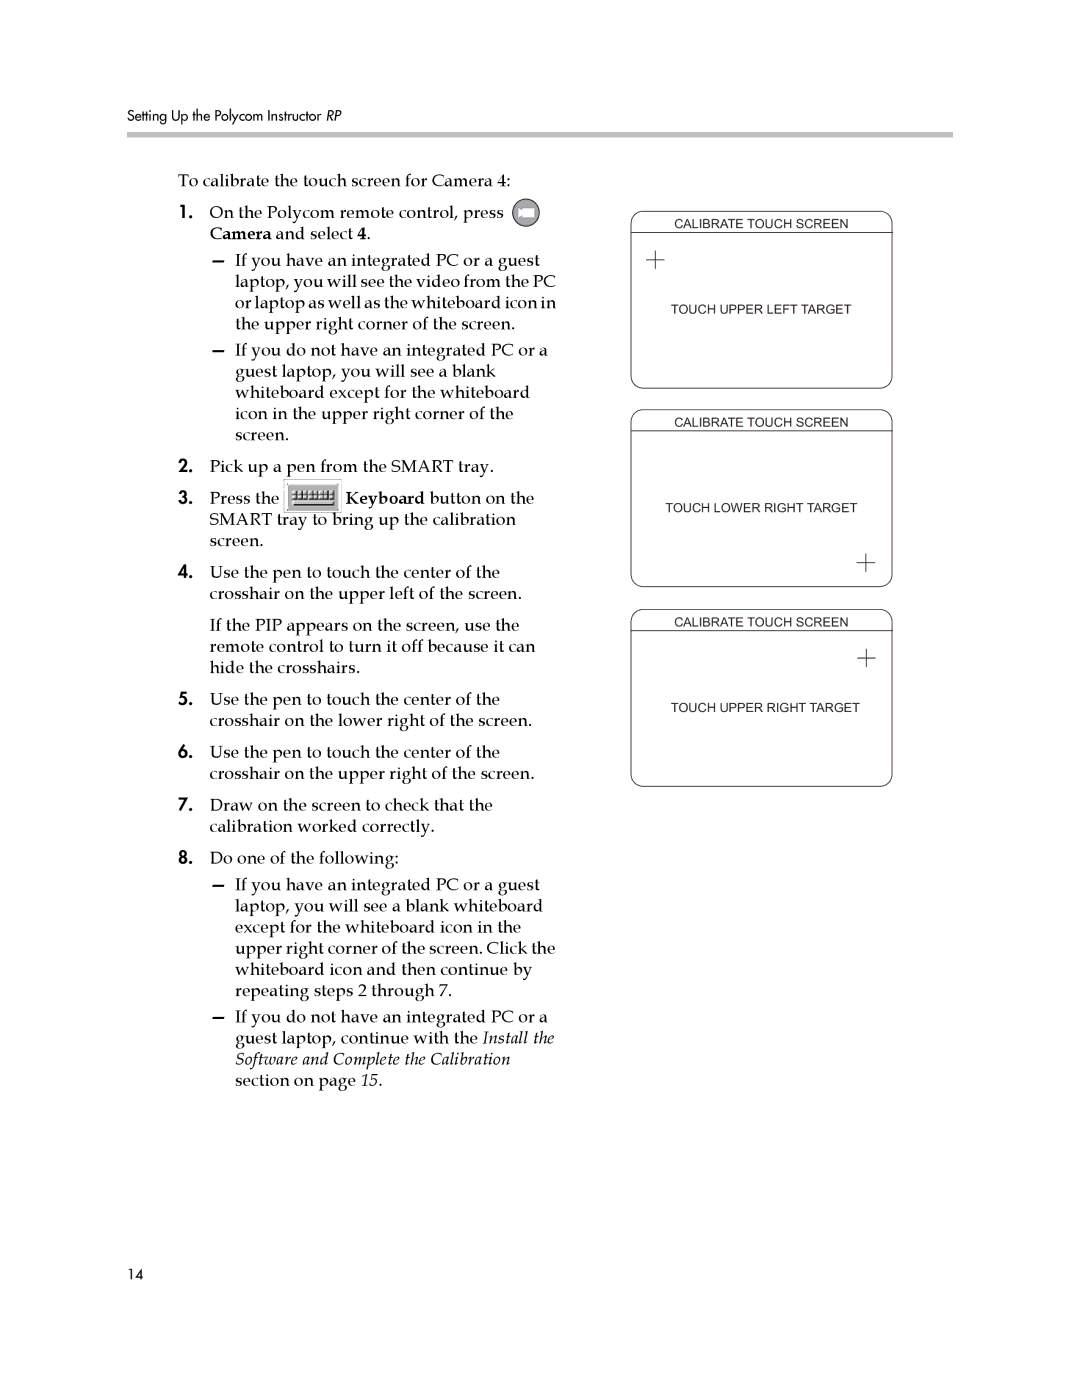
3. Press the | Keyboard button on the |
SMART tray to bring up the calibration | |
screen. |
|
4.Use the pen to touch the center of the crosshair on the upper left of the screen.
If the PIP appears on the screen, use the remote control to turn it off because it can hide the crosshairs.
5.Use the pen to touch the center of the crosshair on the lower right of the screen.
6.Use the pen to touch the center of the crosshair on the upper right of the screen.
7.Draw on the screen to check that the calibration worked correctly.
8.Do one of the following:
—If you have an integrated PC or a guest laptop, you will see a blank whiteboard except for the whiteboard icon in the upper right corner of the screen. Click the whiteboard icon and then continue by repeating steps 2 through 7.
—If you do not have an integrated PC or a guest laptop, continue with the Install the Software and Complete the Calibration section on page 15.
CALIBRATE TOUCH SCREEN
TOUCH UPPER LEFT TARGET
CALIBRATE TOUCH SCREEN
TOUCH LOWER RIGHT TARGET
CALIBRATE TOUCH SCREEN
TOUCH UPPER RIGHT TARGET
14