Polycom RMX 4000 Hardware Guide
Placing the RMX 4000 in a 23” Rack
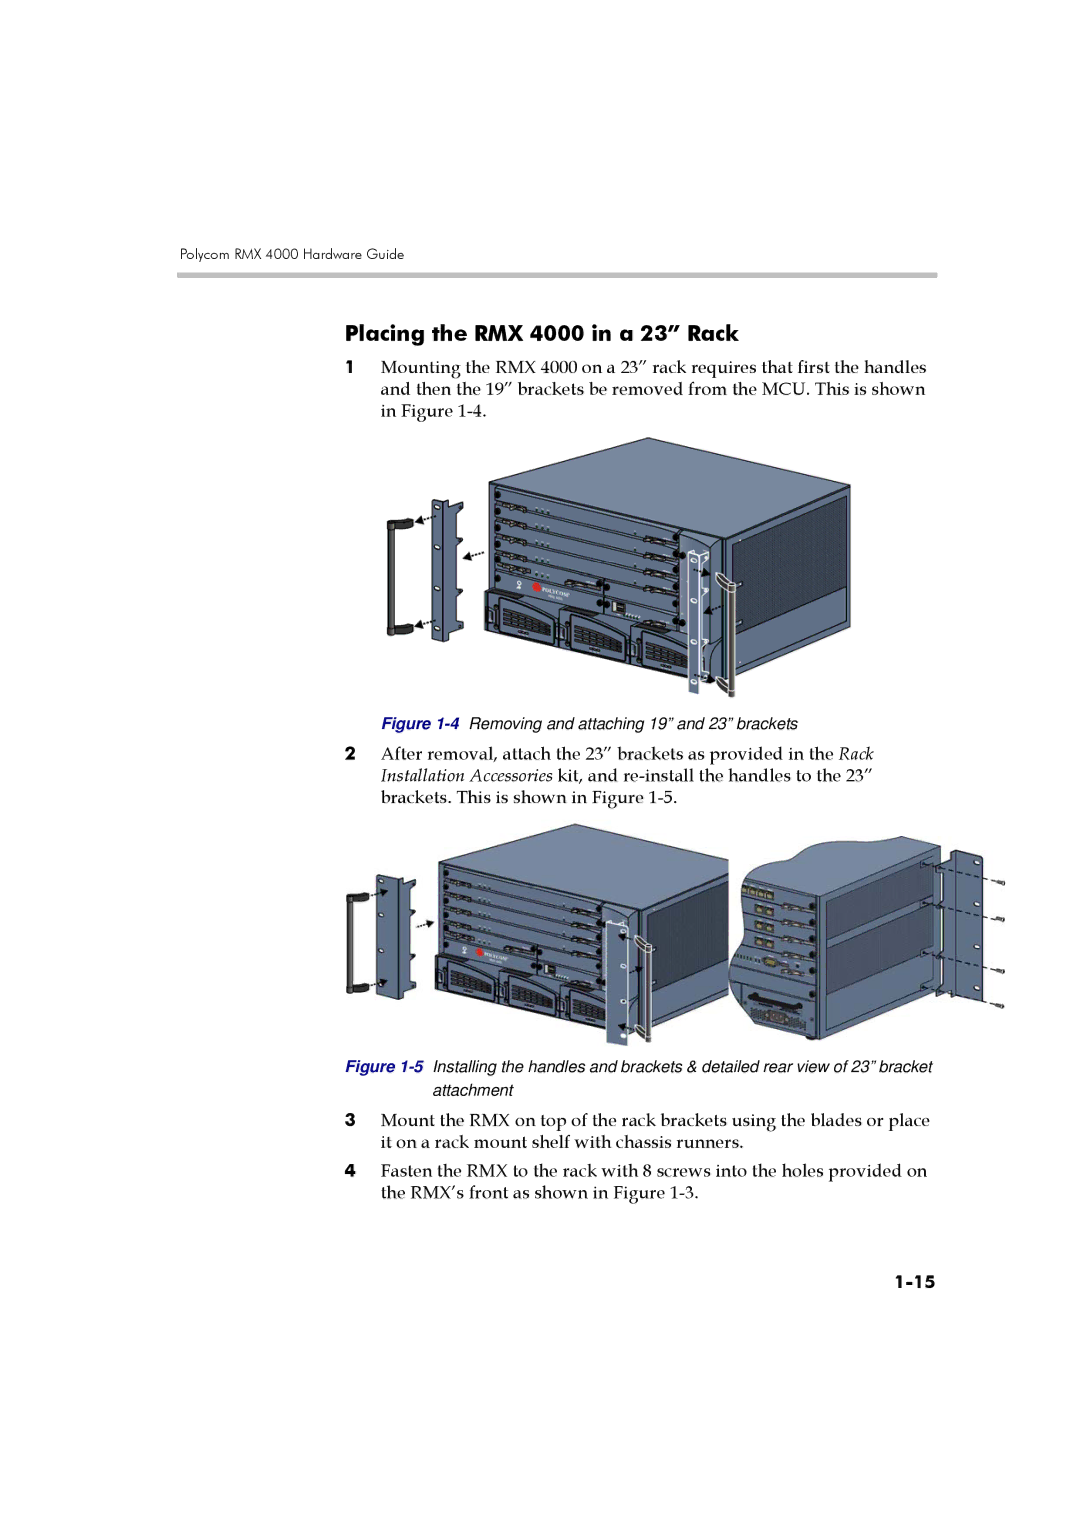
1Mounting the RMX 4000 on a 23” rack requires that first the handles and then the 19” brackets be removed from the MCU. This is shown in Figure
Figure 1-4 Removing and attaching 19” and 23” brackets
2After removal, attach the 23” brackets as provided in the Rack Installation Accessories kit, and
Figure 1-5 Installing the handles and brackets & detailed rear view of 23” bracket attachment
3Mount the RMX on top of the rack brackets using the blades or place it on a rack mount shelf with chassis runners.
4Fasten the RMX to the rack with 8 screws into the holes provided on the RMX’s front as shown in Figure