ROUTING THE CABLES
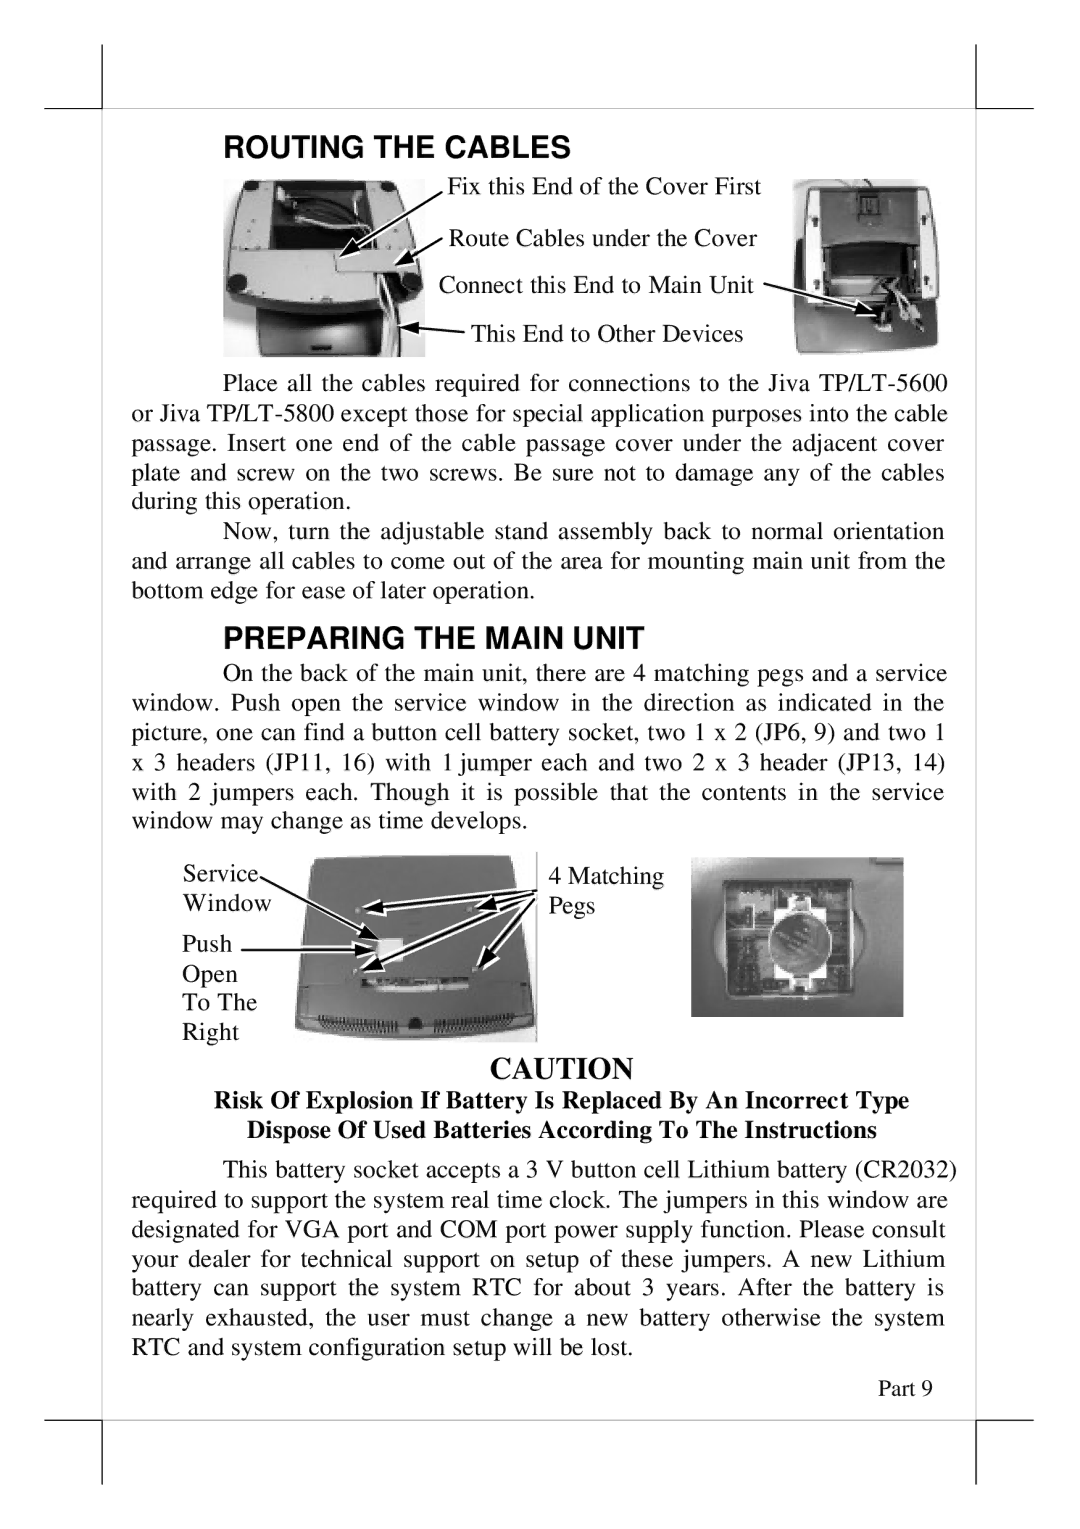
Fix this End of the Cover First
![]() Route Cables under the Cover
Route Cables under the Cover
Connect this End to Main Unit ![]()
![]()
![]() This End to Other Devices
This End to Other Devices
Place all the cables required for connections to the Jiva
Now, turn the adjustable stand assembly back to normal orientation and arrange all cables to come out of the area for mounting main unit from the bottom edge for ease of later operation.
PREPARING THE MAIN UNIT
On the back of the main unit, there are 4 matching pegs and a service window. Push open the service window in the direction as indicated in the picture, one can find a button cell battery socket, two 1 x 2 (JP6, 9) and two 1 x 3 headers (JP11, 16) with 1 jumper each and two 2 x 3 header (JP13, 14) with 2 jumpers each. Though it is possible that the contents in the service window may change as time develops.
Service | 4 Matching | |
Window | Pegs | |
Push |
|
|
|
| |
Open |
| |
To The |
| |
Right |
| |
CAUTION
Risk Of Explosion If Battery Is Replaced By An Incorrect Type
Dispose Of Used Batteries According To The Instructions
This battery socket accepts a 3 V button cell Lithium battery (CR2032) required to support the system real time clock. The jumpers in this window are designated for VGA port and COM port power supply function. Please consult your dealer for technical support on setup of these jumpers. A new Lithium battery can support the system RTC for about 3 years. After the battery is nearly exhausted, the user must change a new battery otherwise the system RTC and system configuration setup will be lost.