JOINING MAIN UNIT AND STAND
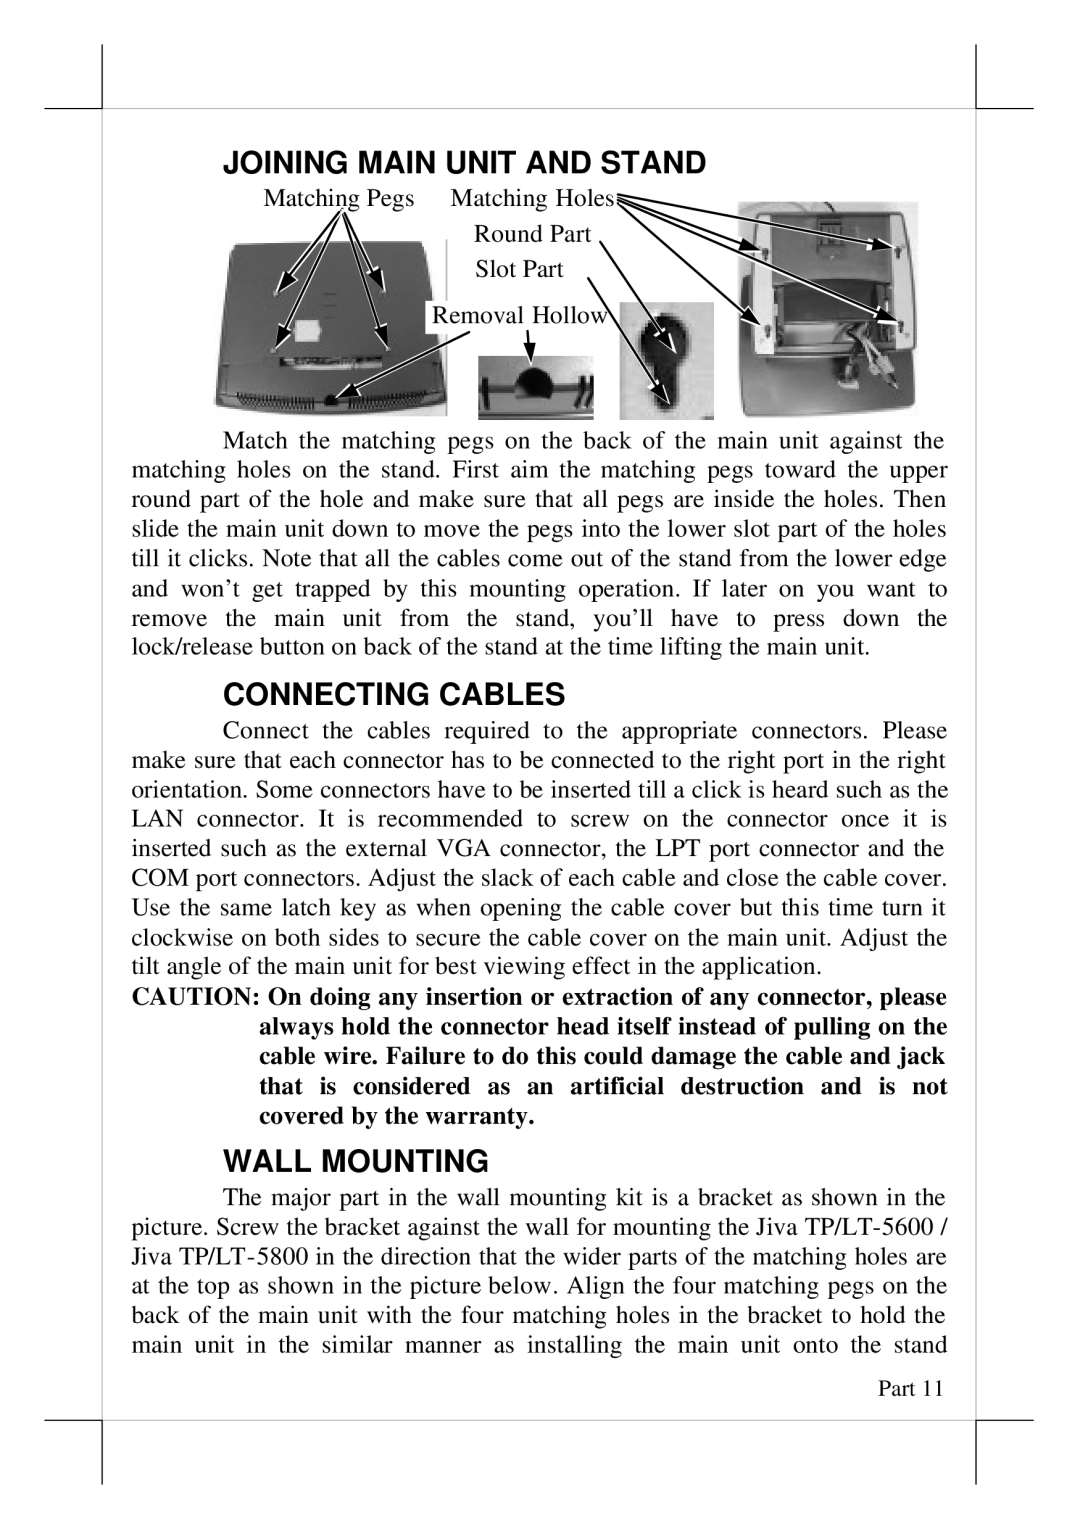
Matching Pegs Matching Holes
Round Part
Slot Part
Removal Hollow
Match the matching pegs on the back of the main unit against the matching holes on the stand. First aim the matching pegs toward the upper round part of the hole and make sure that all pegs are inside the holes. Then slide the main unit down to move the pegs into the lower slot part of the holes till it clicks. Note that all the cables come out of the stand from the lower edge and won’t get trapped by this mounting operation. If later on you want to remove the main unit from the stand, you’ll have to press down the lock/release button on back of the stand at the time lifting the main unit.
CONNECTING CABLES
Connect the cables required to the appropriate connectors. Please make sure that each connector has to be connected to the right port in the right orientation. Some connectors have to be inserted till a click is heard such as the LAN connector. It is recommended to screw on the connector once it is inserted such as the external VGA connector, the LPT port connector and the COM port connectors. Adjust the slack of each cable and close the cable cover. Use the same latch key as when opening the cable cover but this time turn it clockwise on both sides to secure the cable cover on the main unit. Adjust the tilt angle of the main unit for best viewing effect in the application.
CAUTION: On doing any insertion or extraction of any connector, please always hold the connector head itself instead of pulling on the cable wire. Failure to do this could damage the cable and jack that is considered as an artificial destruction and is not covered by the warranty.
WALL MOUNTING
The major part in the wall mounting kit is a bracket as shown in the picture. Screw the bracket against the wall for mounting the Jiva