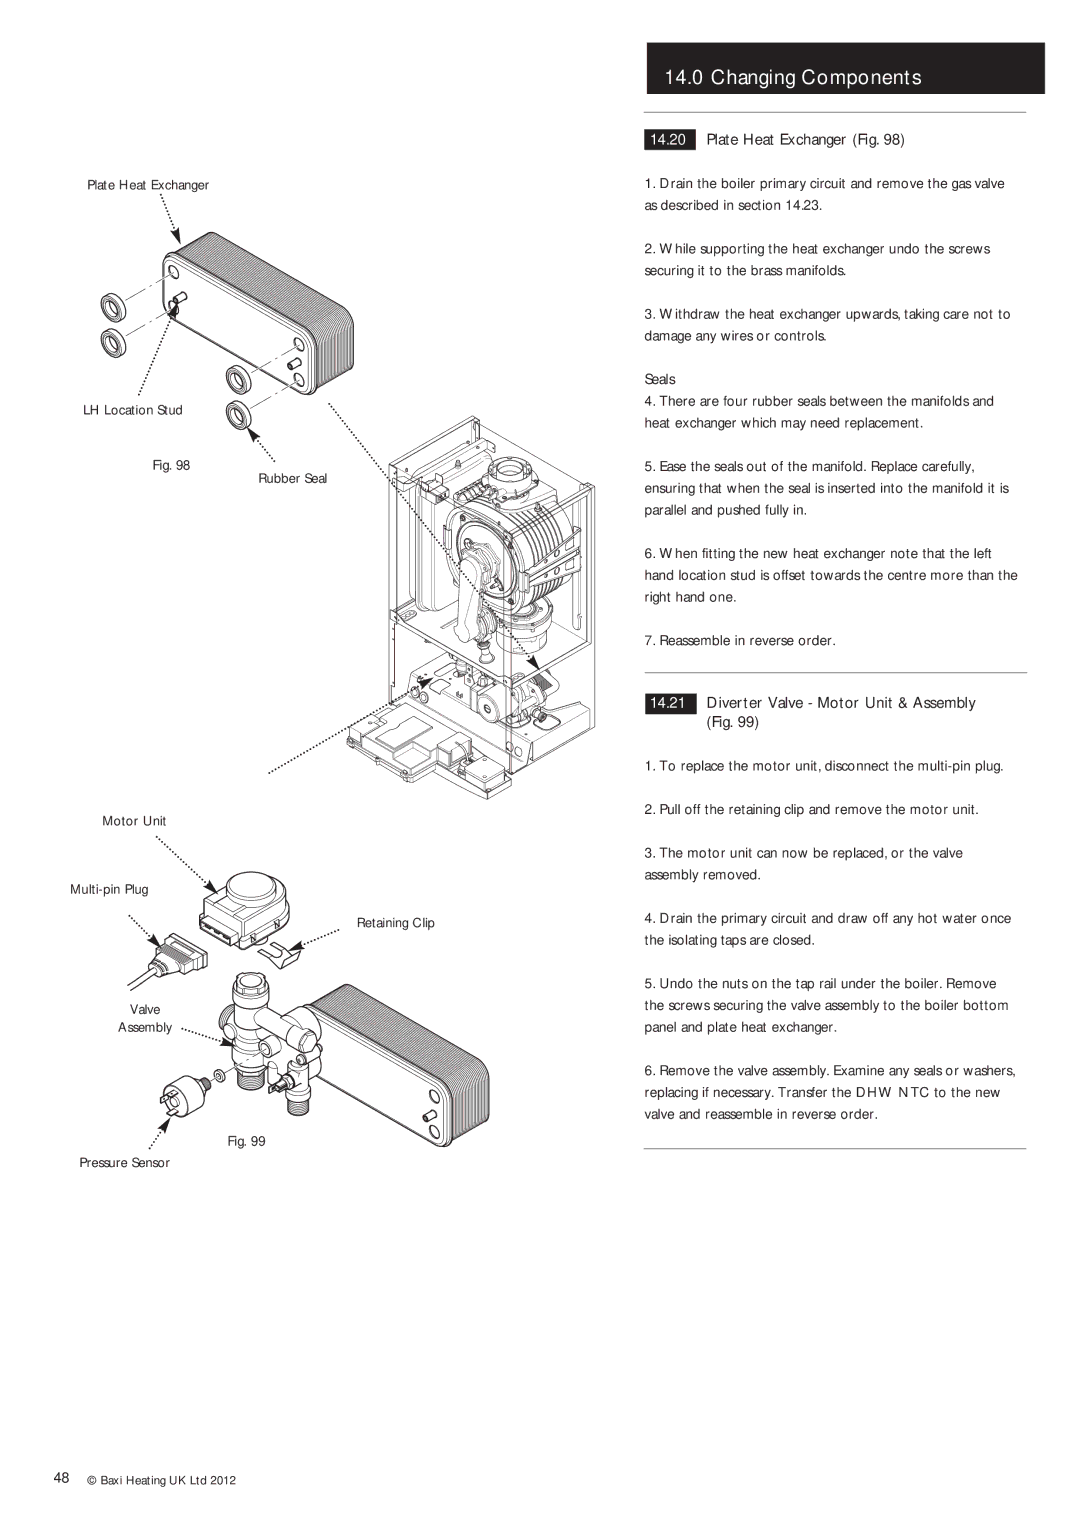
Plate Heat Exchanger
LH Location Stud
Fig. 98
Rubber Seal
Motor Unit
Retaining Clip
Valve
Assembly
Fig. 99
Pressure Sensor
14.0Changing Components
14.20Plate Heat Exchanger (Fig. 98)
1.Drain the boiler primary circuit and remove the gas valve as described in section 14.23.
2.While supporting the heat exchanger undo the screws securing it to the brass manifolds.
3.Withdraw the heat exchanger upwards, taking care not to damage any wires or controls.
Seals
4.There are four rubber seals between the manifolds and heat exchanger which may need replacement.
5.Ease the seals out of the manifold. Replace carefully, ensuring that when the seal is inserted into the manifold it is parallel and pushed fully in.
6.When fitting the new heat exchanger note that the left hand location stud is offset towards the centre more than the right hand one.
7.Reassemble in reverse order.
14.21Diverter Valve - Motor Unit & Assembly (Fig. 99)
1.To replace the motor unit, disconnect the
2.Pull off the retaining clip and remove the motor unit.
3.The motor unit can now be replaced, or the valve assembly removed.
4.Drain the primary circuit and draw off any hot water once the isolating taps are closed.
5.Undo the nuts on the tap rail under the boiler. Remove the screws securing the valve assembly to the boiler bottom panel and plate heat exchanger.
6.Remove the valve assembly. Examine any seals or washers, replacing if necessary. Transfer the DHW NTC to the new valve and reassemble in reverse order.
48© Baxi Heating UK Ltd 2012