| 10 |
Time Pointer | 9 |
| |
| 8 |
Constant |
|
Timed | 7 |
| |
Off | AM |
0 | 5 |
| |
IN | 4 |
3 | Fig. 71a |
2 |
|
Rotate to adjust time |
|
2 | 1 | 12 |
| ||
3 |
| 11 |
4 |
| 10 |
|
| 9 |
PM |
| 8 |
7 |
| 7 |
|
| |
8 |
| AM |
9 |
| 0 |
10 |
| 4 |
|
| |
11 |
| 3 |
12 | 1 | 2 |
On Position
| 12 |
Off Position | 11 |
| |
| 10 |
| 9 |
Time Pointer | Fig. 71b |
11.0Commissioning
11.3Setting the Timer
NOTE: If the integral timer is not required fit the blanking plate supplied in the installation kit.
The
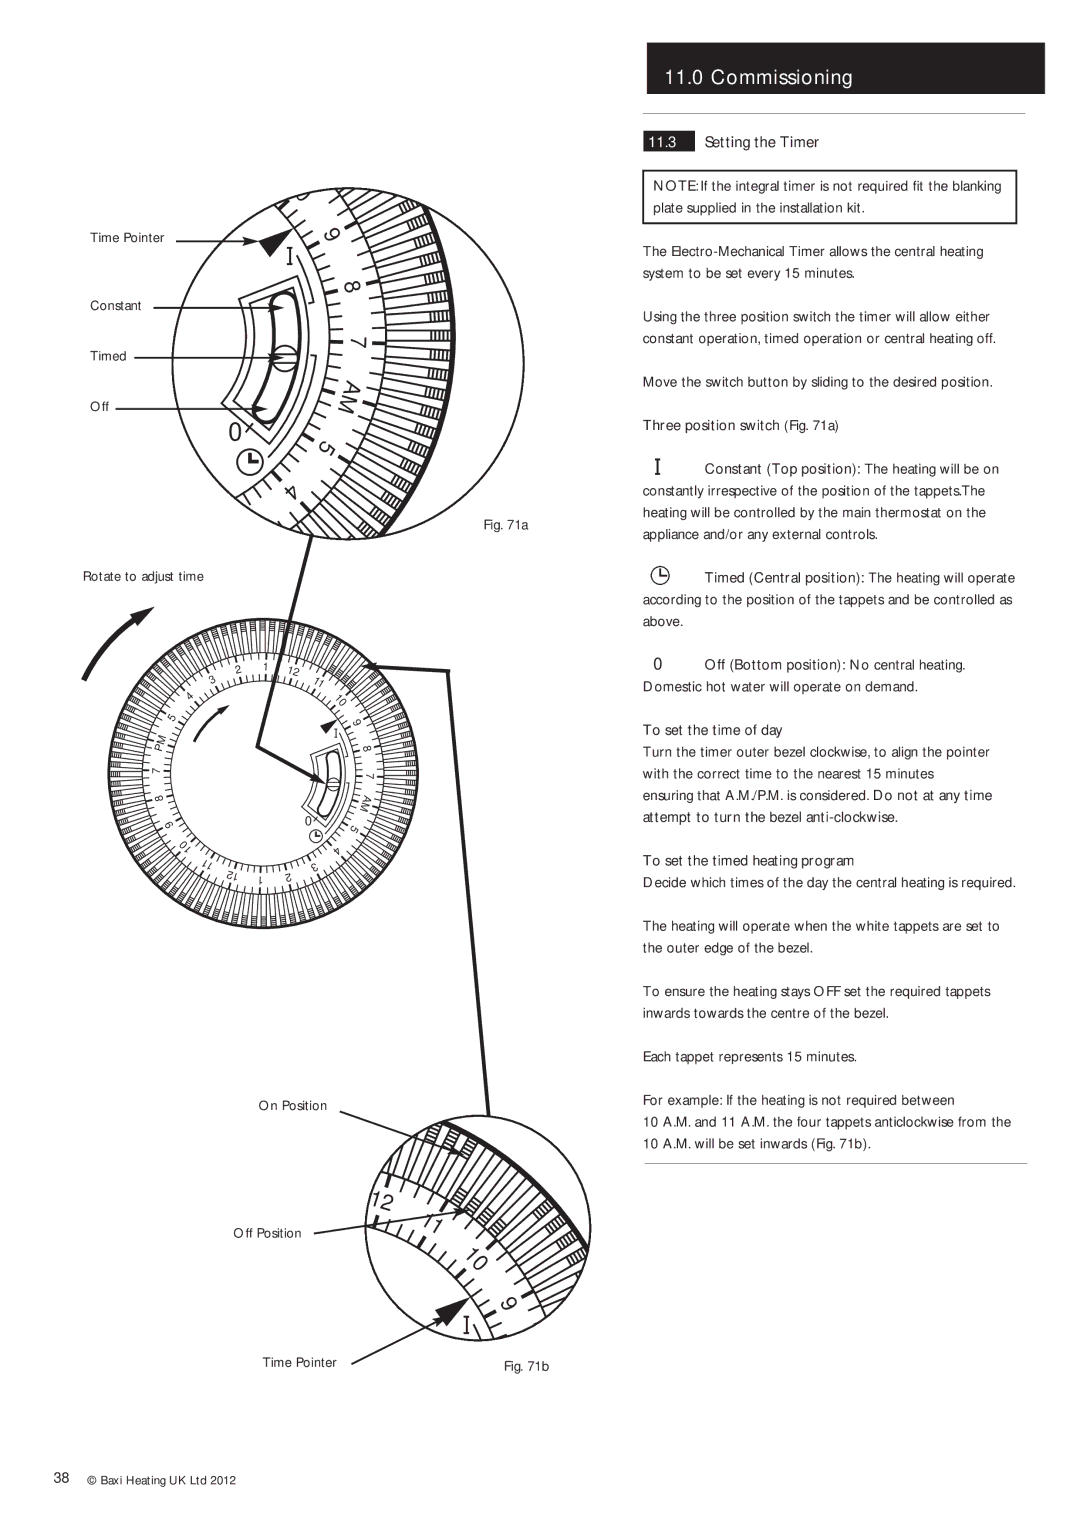
Using the three position switch the timer will allow either constant operation, timed operation or central heating off.
Move the switch button by sliding to the desired position.
Three position switch (Fig. 71a)
![]() Constant (Top position): The heating will be on constantly irrespective of the position of the tappets.The heating will be controlled by the main thermostat on the appliance and/or any external controls.
Constant (Top position): The heating will be on constantly irrespective of the position of the tappets.The heating will be controlled by the main thermostat on the appliance and/or any external controls.
![]() Timed (Central position): The heating will operate according to the position of the tappets and be controlled as above.
Timed (Central position): The heating will operate according to the position of the tappets and be controlled as above.
0Off (Bottom position): No central heating. Domestic hot water will operate on demand.
To set the time of day
Turn the timer outer bezel clockwise, to align the pointer with the correct time to the nearest 15 minutes ensuring that A.M./P.M. is considered. Do not at any time attempt to turn the bezel
To set the timed heating program
Decide which times of the day the central heating is required.
The heating will operate when the white tappets are set to the outer edge of the bezel.
To ensure the heating stays OFF set the required tappets inwards towards the centre of the bezel.
Each tappet represents 15 minutes.
For example: If the heating is not required between
10 A.M. and 11 A.M. the four tappets anticlockwise from the 10 A.M. will be set inwards (Fig. 71b).
38© Baxi Heating UK Ltd 2012
