SLIDING TABLE ADJUSTMENT
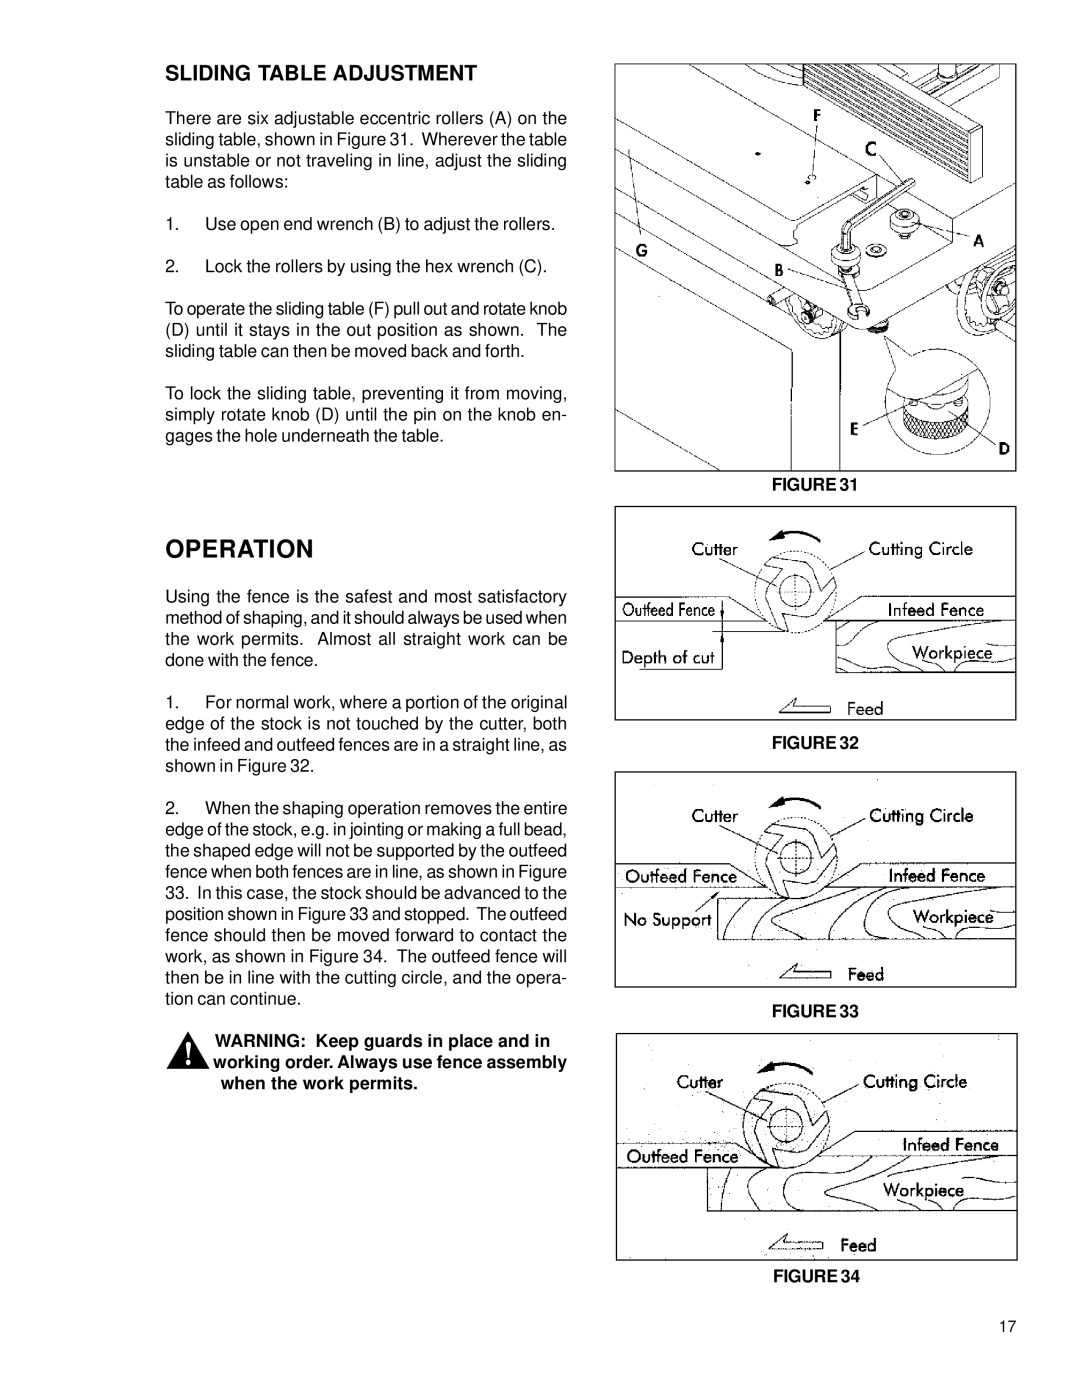
There are six adjustable eccentric rollers (A) on the sliding table, shown in Figure 31. Wherever the table is unstable or not traveling in line, adjust the sliding table as follows:
1.Use open end wrench (B) to adjust the rollers.
2.Lock the rollers by using the hex wrench (C).
To operate the sliding table (F) pull out and rotate knob
(D)until it stays in the out position as shown. The sliding table can then be moved back and forth.
To lock the sliding table, preventing it from moving, simply rotate knob (D) until the pin on the knob en- gages the hole underneath the table.
OPERATION
Using the fence is the safest and most satisfactory method of shaping, and it should always be used when the work permits. Almost all straight work can be done with the fence.
1.For normal work, where a portion of the original edge of the stock is not touched by the cutter, both the infeed and outfeed fences are in a straight line, as shown in Figure 32.
2.When the shaping operation removes the entire edge of the stock, e.g. in jointing or making a full bead, the shaped edge will not be supported by the outfeed fence when both fences are in line, as shown in Figure
33.In this case, the stock should be advanced to the position shown in Figure 33 and stopped. The outfeed fence should then be moved forward to contact the work, as shown in Figure 34. The outfeed fence will then be in line with the cutting circle, and the opera- tion can continue.
WARNING: Keep guards in place and in
!working order. Always use fence assembly when the work permits.
FIGURE 31
FIGURE 32
FIGURE 33
FIGURE 34
17
