C O M M E R C I A L P R O D U C T S D I V I S I O N
Diagram 5 | Route the cable. |
| Display cable |
| Right side |
| mounting |
| bracket |
| Route cable |
| through hole. |
| Right side |
| upright support |
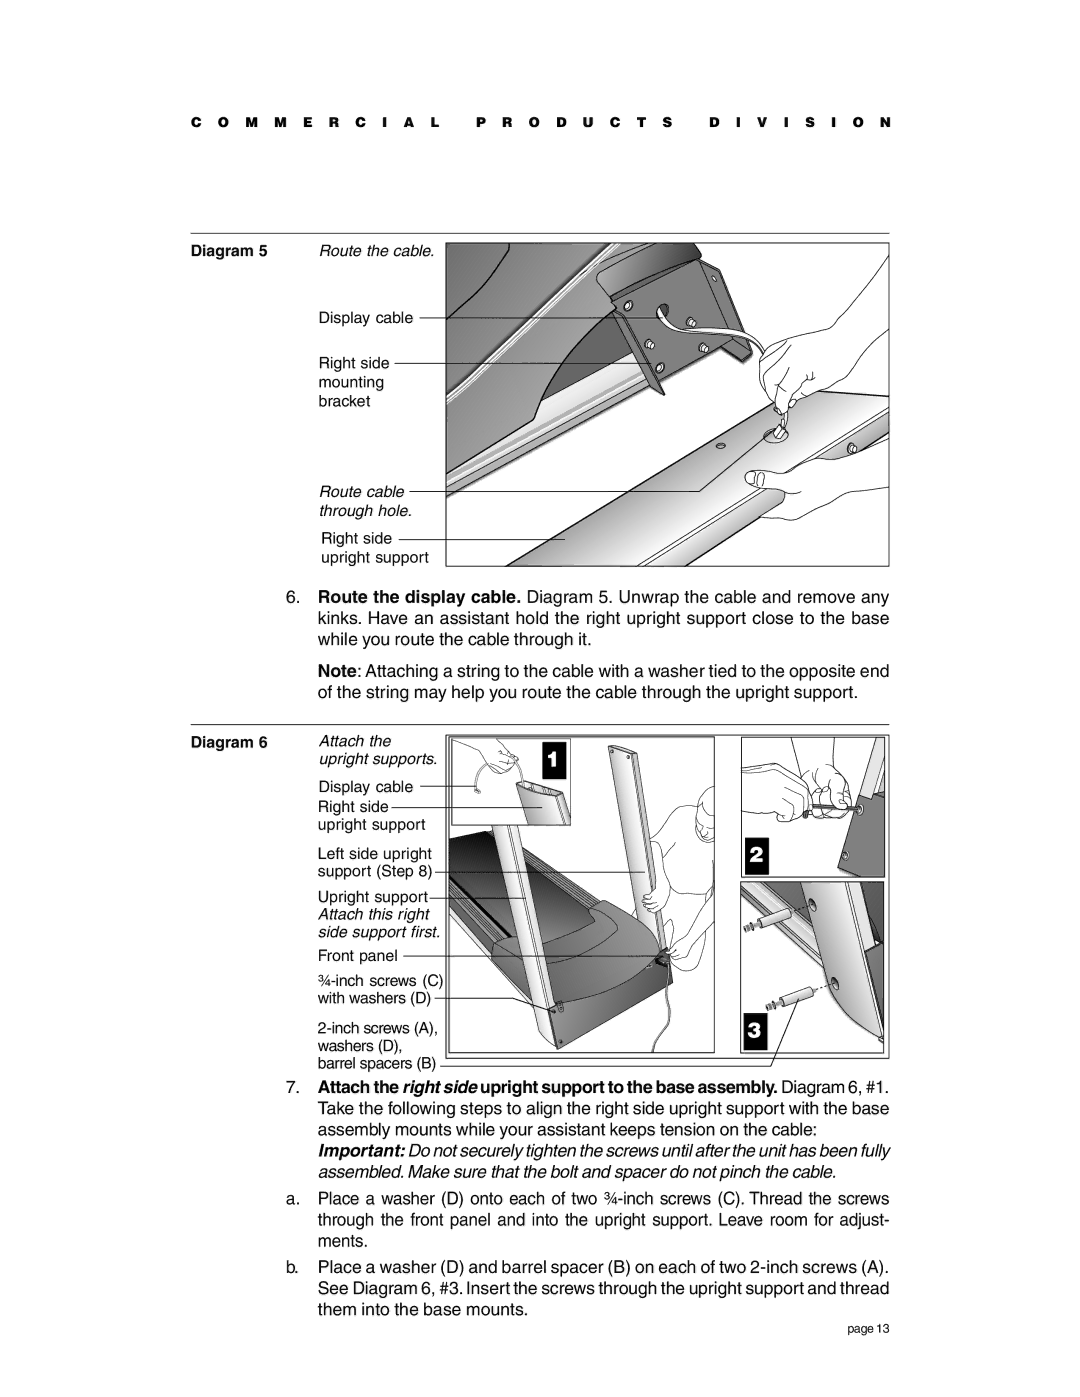
6.Route the display cable. Diagram 5. Unwrap the cable and remove any kinks. Have an assistant hold the right upright support close to the base while you route the cable through it.
Note: Attaching a string to the cable with a washer tied to the opposite end of the string may help you route the cable through the upright support.
Diagram 6 | Attach the | 1 |
| upright supports. |
Display cable ![]() Right side
Right side
upright support
Left side upright support (Step 8)
Upright support Attach this right side support first.
Front panel
with washers (D)![]()
2
3
7.Attach the right side upright support to the base assembly. Diagram 6, #1. Take the following steps to align the right side upright support with the base assembly mounts while your assistant keeps tension on the cable:
Important: Do not securely tighten the screws until after the unit has been fully assembled. Make sure that the bolt and spacer do not pinch the cable.
a.Place a washer (D) onto each of two
b.Place a washer (D) and barrel spacer (B) on each of two
page 13
