TOC | INDEX |
Centering Test Print
NOTE: Your printer comes from the factory
If you ever wish to verify your
1.Verify that a disc and a color ink cartridge are installed in the unit. It is important to use the same disc you normally use for your publishing because different brands of discs may vary slightly in size. Also, verify that the unit is powered ON and that it is connected to your computer.
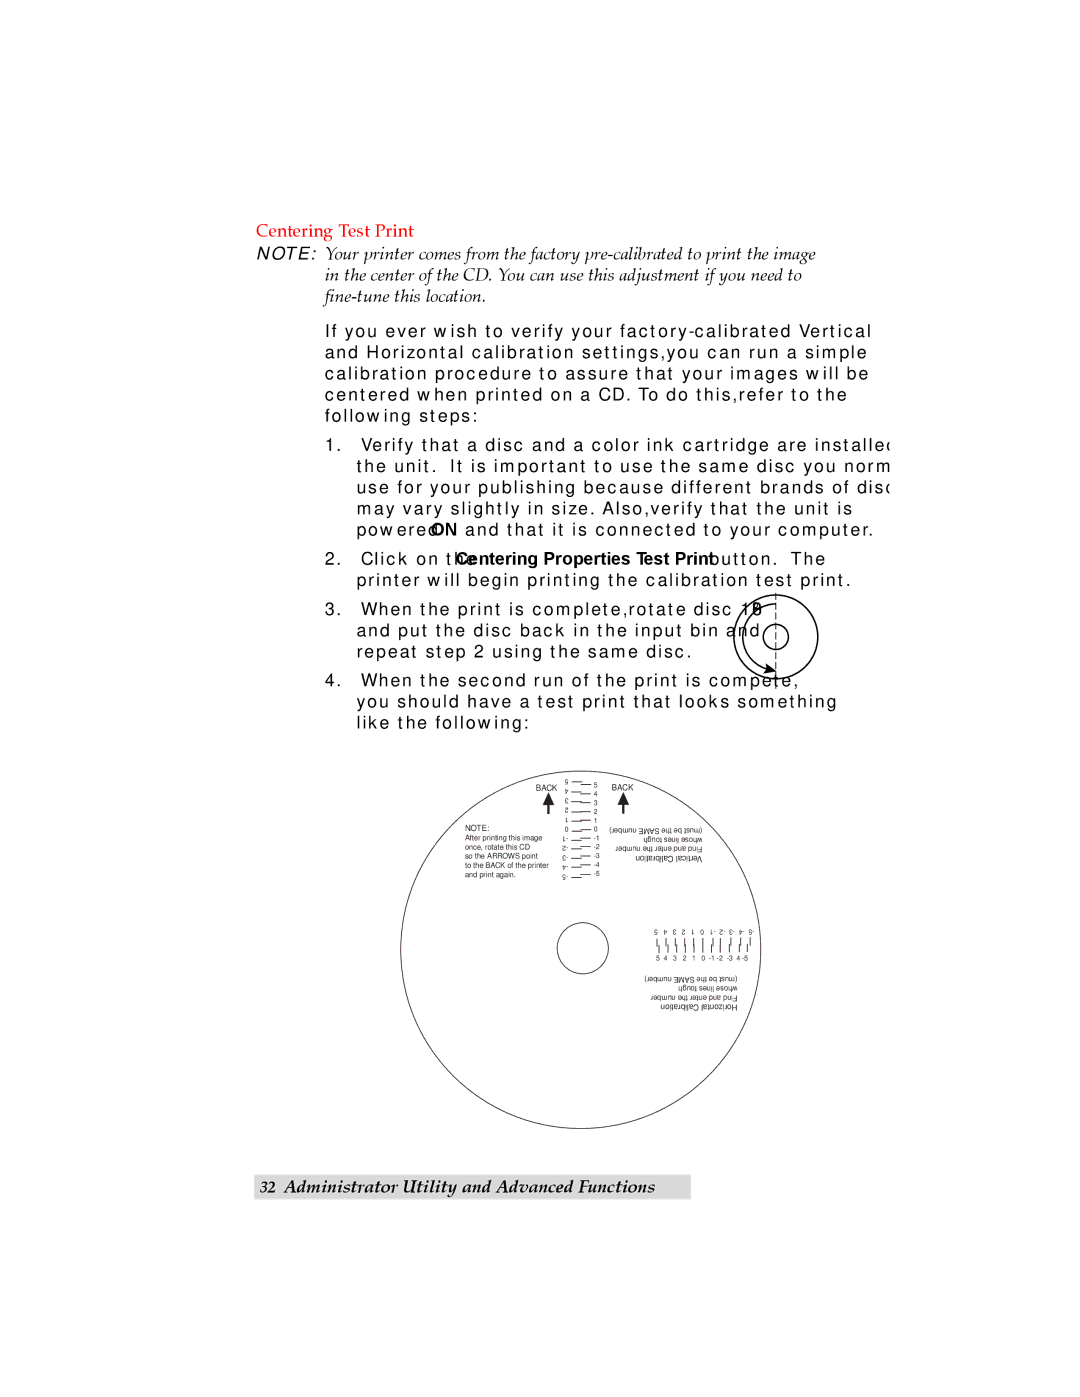
2.Click on the Centering Properties Test Print button. The printer will begin printing the calibration test print.
3.When the print is complete, rotate disc 180º and put the disc back in the input bin and repeat step 2 using the same disc.
4.When the second run of the print is compete, you should have a test print that looks something like the following:
BACK
NOTE:
After printing this image once, rotate this CD so the ARROWS point
to the BACK of the printer and print again.
5 4 3 2 1 0 1- 2- 3- 4- 5-
5BACK
![]() 4
4
3 |
|
| |
2 |
|
| |
|
| ||
1 |
|
| |
0 | number) SAME the be (must | ||
| tough lines whose | ||
| |||
number the enter and Find | |||
| Calibration Vertical | ||
| |||
|
| ||
|
| ||
5 4 3 2 1 0 1- 2- 3- | 4- | 5- | |||||||||
|
|
|
|
|
|
|
|
|
|
|
|
|
|
|
|
|
|
|
|
|
|
|
|
5 4 3 2 1 0 |
| ||||||||||
number) SAME the be (must |
|
| |||||||||
|
|
| tough lines whose |
|
| ||||||
number the enter and Find |
|
| |||||||||
| Calibration Horizontal |
|
| ||||||||
32Administrator Utility and Advanced Functions