TOC | INDEX |
Section 2: Hardware and Software Setup
Setup
This section will describe the
A. HARDWARE SETUP
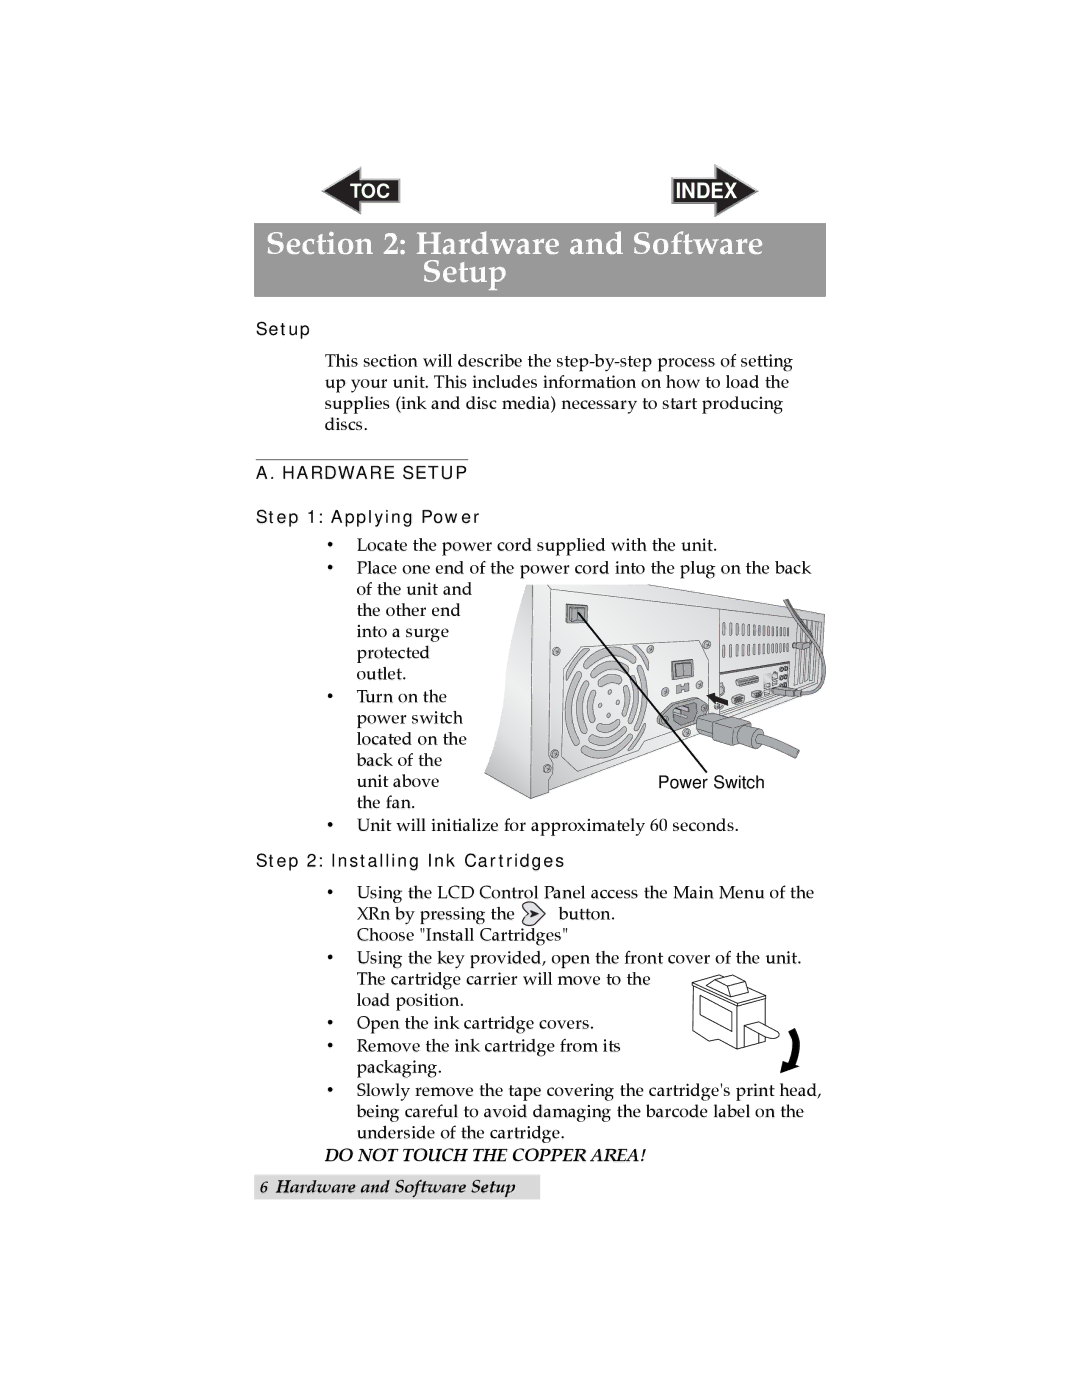
Step 1: Applying Power
•Locate the power cord supplied with the unit.
•Place one end of the power cord into the plug on the back of the unit and
the other end
into a surge |
|
protected |
|
outlet. |
|
• Turn on the |
|
power switch |
|
located on the |
|
back of the |
|
unit above | Power Switch |
the fan. |
|
•Unit will initialize for approximately 60 seconds.
Step 2: Installing Ink Cartridges
•Using the LCD Control Panel access the Main Menu of the
XRn by pressing the ![]() button.
button.
Choose "Install Cartridges"
•Using the key provided, open the front cover of the unit. The cartridge carrier will move to the
load position.
•Open the ink cartridge covers.
•Remove the ink cartridge from its packaging.
•Slowly remove the tape covering the cartridge's print head, being careful to avoid damaging the barcode label on the underside of the cartridge.
DO NOT TOUCH THE COPPER AREA!
6Hardware and Software Setup