6
See pages 17-19 for the correct sequence for turning on various equipment.
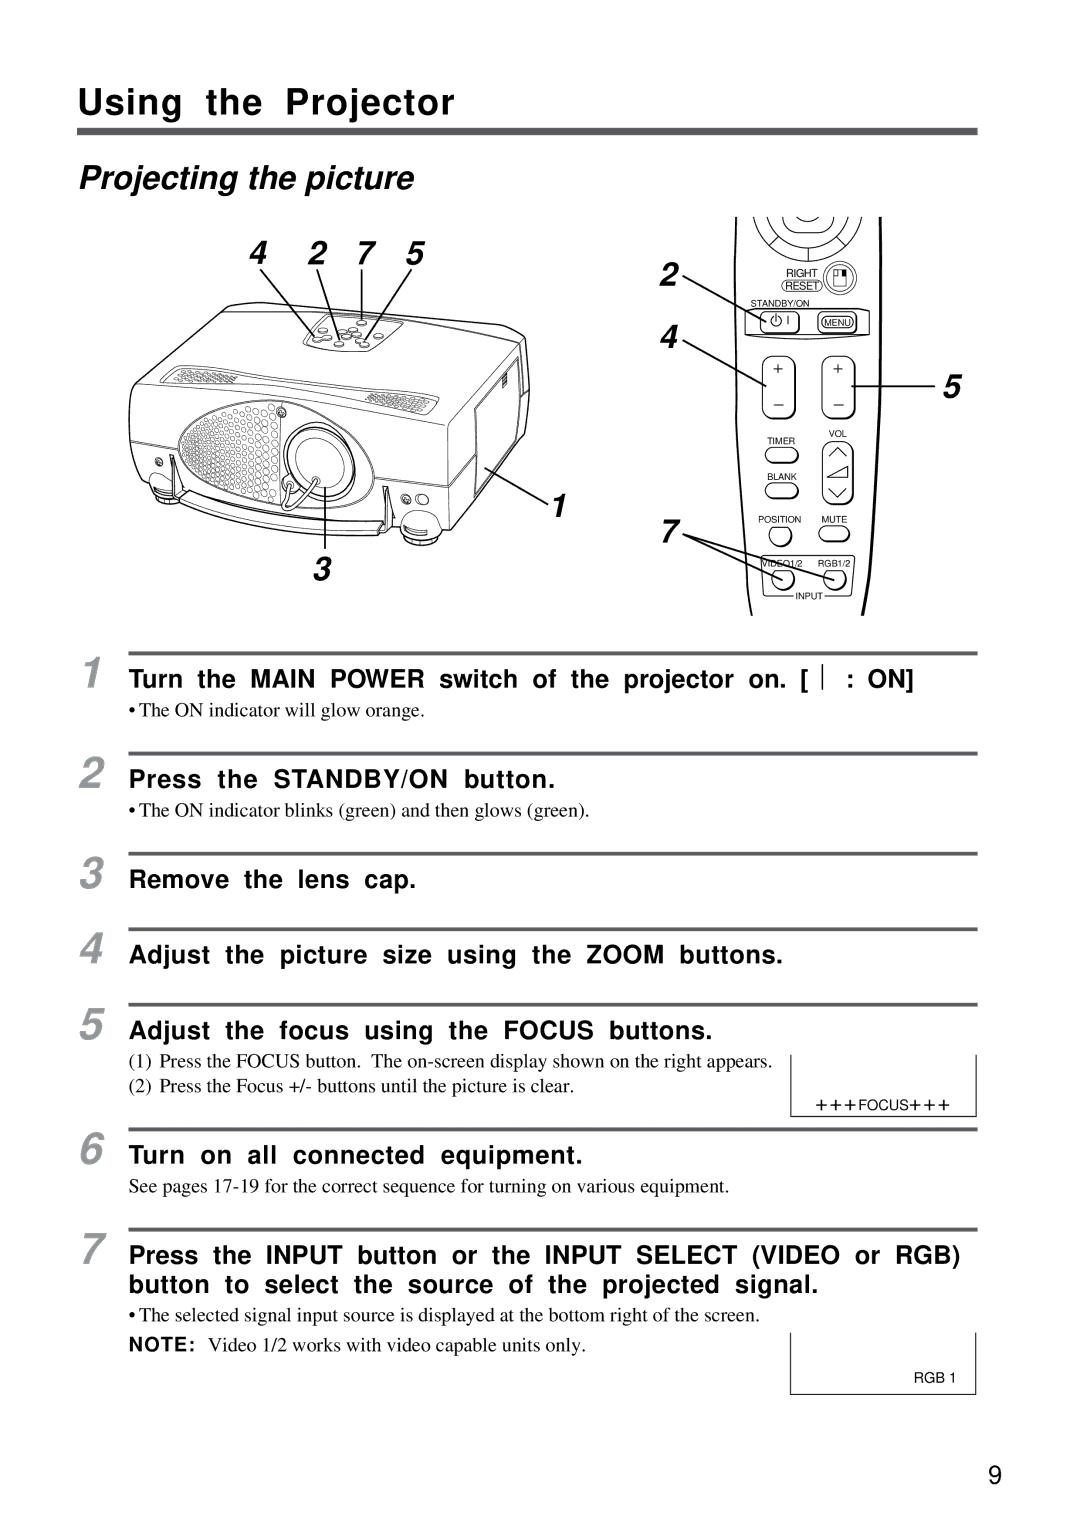
7 Press the INPUT button or the INPUT SELECT (VIDEO or RGB) button to select the source of the projected signal.
• The selected signal input source is displayed at the bottom right of the screen.
Turn on all connected equipment.
2
+++FOCUS+++
• The ON indicator blinks (green) and then glows (green).
3 Remove the lens cap.
4 Adjust the picture size using the ZOOM buttons.
5 Adjust the focus using the FOCUS buttons.
Press the STANDBY/ON button.
• The ON indicator will glow orange.
1
Using the Projector
Projecting the picture
4 2 7 5
2 4
![]() 1
1
7
3
RIGHT
RESETISET
STANDBY/ON
MENU
ZOOM FOCUS | 5 |
VOL
TIMER
BLANK
POSITION MUTE
VIDEO1/2 RGB1/2
INPUT
Turn the MAIN POWER switch of the projector on. [ ⎢ : ON]
(1)Press the FOCUS button. The
(2)Press the Focus +/- buttons until the picture is clear.
NOTE: Video 1/2 works with video capable units only.
RGB 1
9