Installation
Projector and screen setup
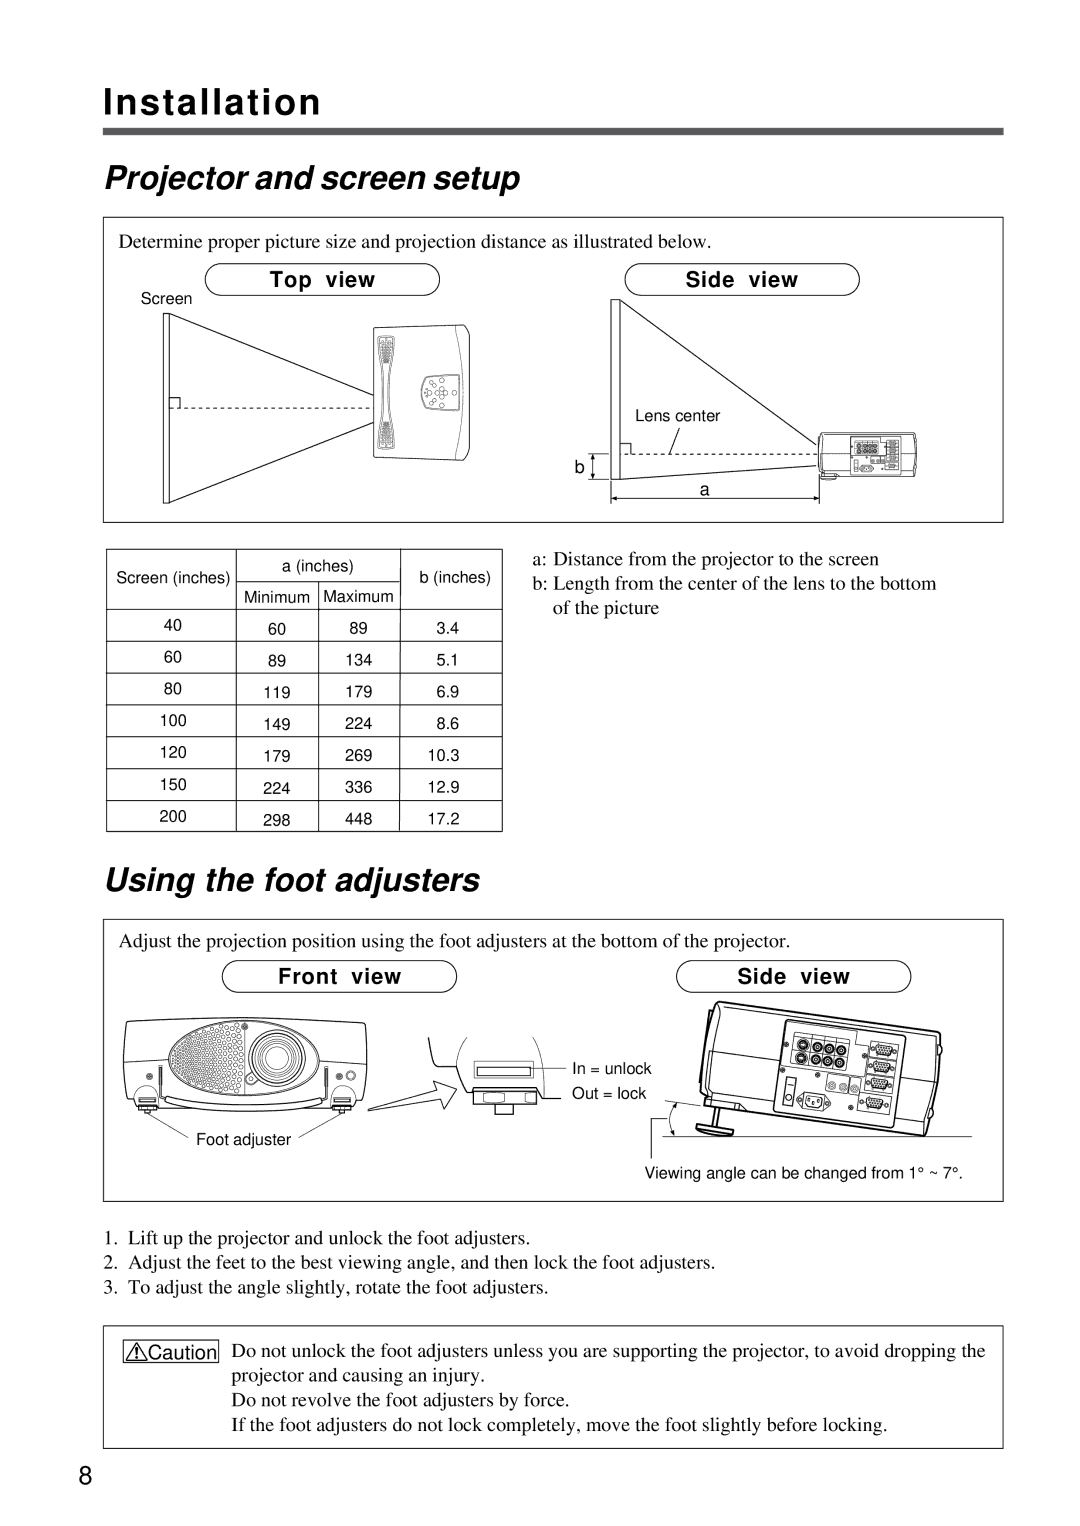
Determine proper picture size and projection distance as illustrated below.
Top view | Side view |
Screen
b
Lens center
a
Screen (inches) | a (inches) | b (inches) | |
|
| ||
| Minimum | Maximum |
|
|
|
|
|
40 | 60 | 89 | 3.4 |
|
|
|
|
60 | 89 | 134 | 5.1 |
|
|
|
|
80 | 119 | 179 | 6.9 |
|
|
|
|
100 | 149 | 224 | 8.6 |
|
|
|
|
120 | 179 | 269 | 10.3 |
|
|
|
|
150 | 224 | 336 | 12.9 |
|
|
|
|
200 | 298 | 448 | 17.2 |
Using the foot adjusters
a:Distance from the projector to the screen
b:Length from the center of the lens to the bottom of the picture
Adjust the projection position using the foot adjusters at the bottom of the projector.
Front view | Side view |
![]()
![]()
![]() In = unlock
In = unlock
Out = lock
Foot adjuster
Viewing angle can be changed from 1° ~ 7°.
1.Lift up the projector and unlock the foot adjusters.
2.Adjust the feet to the best viewing angle, and then lock the foot adjusters.
3.To adjust the angle slightly, rotate the foot adjusters.
![]()
![]() Caution
Caution
Do not unlock the foot adjusters unless you are supporting the projector, to avoid dropping the projector and causing an injury.
Do not revolve the foot adjusters by force.
If the foot adjusters do not lock completely, move the foot slightly before locking.
8
