Digital Video Recorder User Manual
2.2 Front Panel
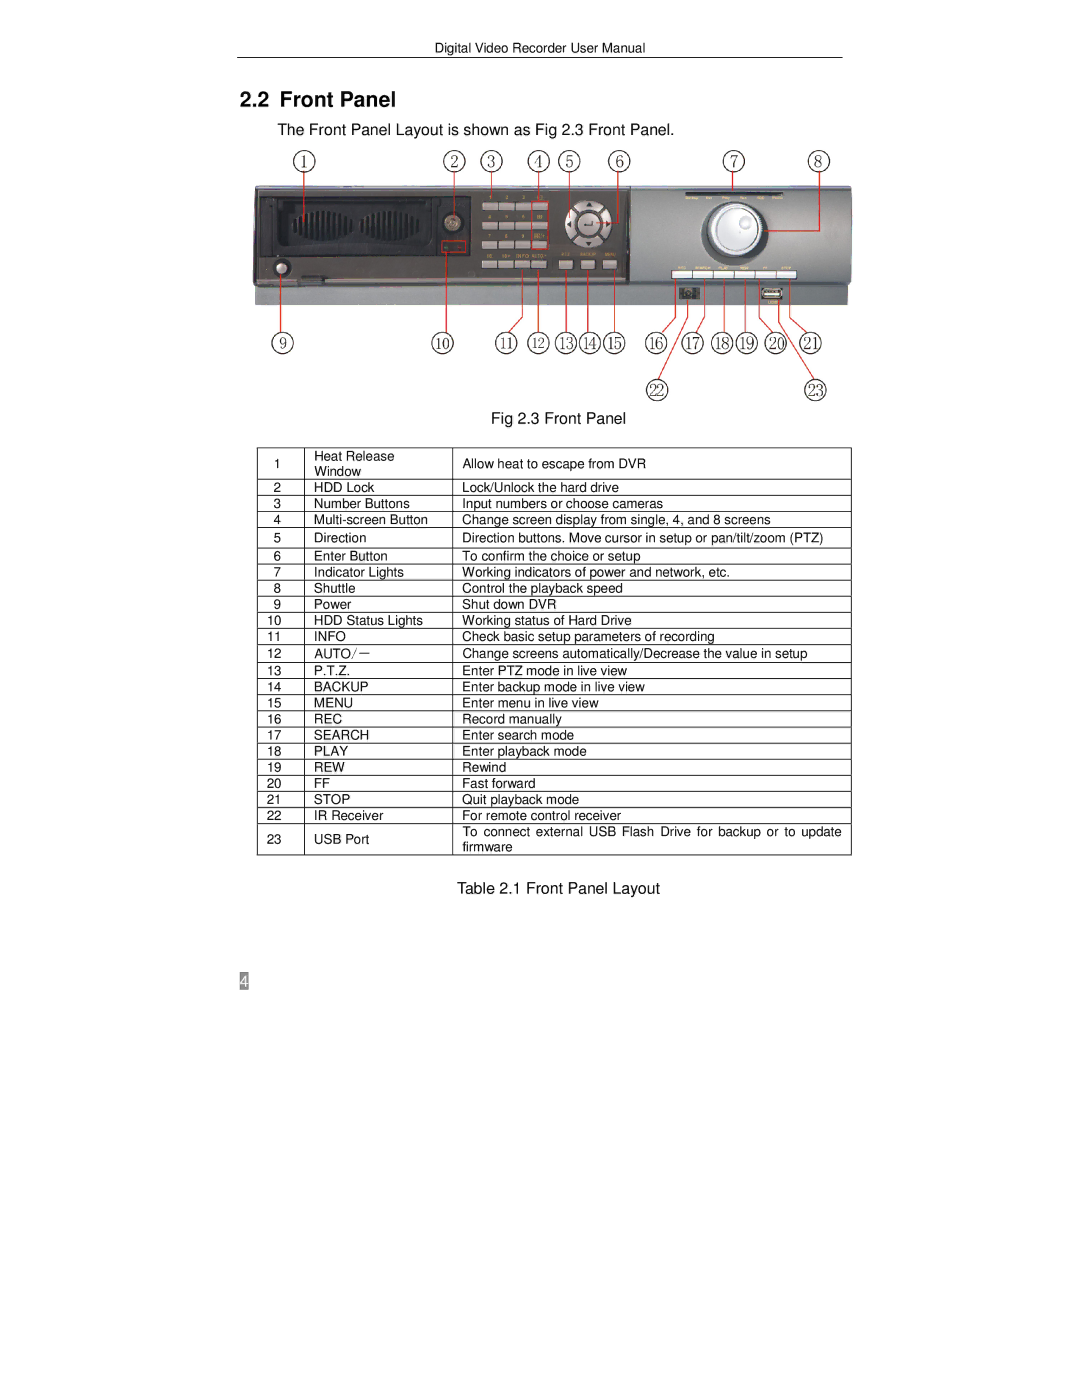
The Front Panel Layout is shown as Fig 2.3 Front Panel.
|
|
| Fig 2.3 Front Panel | |
|
|
| ||
1 | Heat Release | Allow heat to escape from DVR | ||
Window | ||||
|
| |||
2 | HDD Lock | Lock/Unlock the hard drive | ||
3 | Number Buttons | Input numbers or choose cameras | ||
4 | Change screen display from single, 4, and 8 screens | |||
5 | Direction | Direction buttons. Move cursor in setup or pan/tilt/zoom (PTZ) | ||
|
|
| ||
6 | Enter Button | To confirm the choice or setup | ||
7 | Indicator Lights | Working indicators of power and network, etc. | ||
8 | Shuttle | Control the playback speed | ||
9 | Power | Shut down DVR | ||
10 | HDD Status Lights | Working status of Hard Drive | ||
11 | INFO |
| Check basic setup parameters of recording | |
12 | AUTO |
| Change screens automatically/Decrease the value in setup | |
13 | P.T.Z. | /- | Enter PTZ mode in live view | |
| ||||
14 | BACKUP | Enter backup mode in live view | ||
15 | MENU | Enter menu in live view | ||
16 | REC |
| Record manually | |
17 | SEARCH | Enter search mode | ||
18 | PLAY |
| Enter playback mode | |
19 | REW |
| Rewind | |
20 | FF |
| Fast forward | |
21 | STOP |
| Quit playback mode | |
22 | IR Receiver | For remote control receiver | ||
23 | USB Port | To connect external USB Flash Drive for backup or to update | ||
firmware | ||||
|
|
| ||
|
|
| Table 2.1 Front Panel Layout | |
