QSTD2400 Series DVR User’s Manual
3.3Recording
3.3.1Record Setup
Users need to install and format a HDD, unless the unit came with a hard drive already installed, and set all the recording parameters before recording. There are four recording modes. Users can enable them simultaneously. They have different priorities as below.
Motion detection recording > Sensor recording > Manual recording > Scheduled recording
Press right mouse to show the control bar, refer to Fig 4.1 Control Bar. Enter
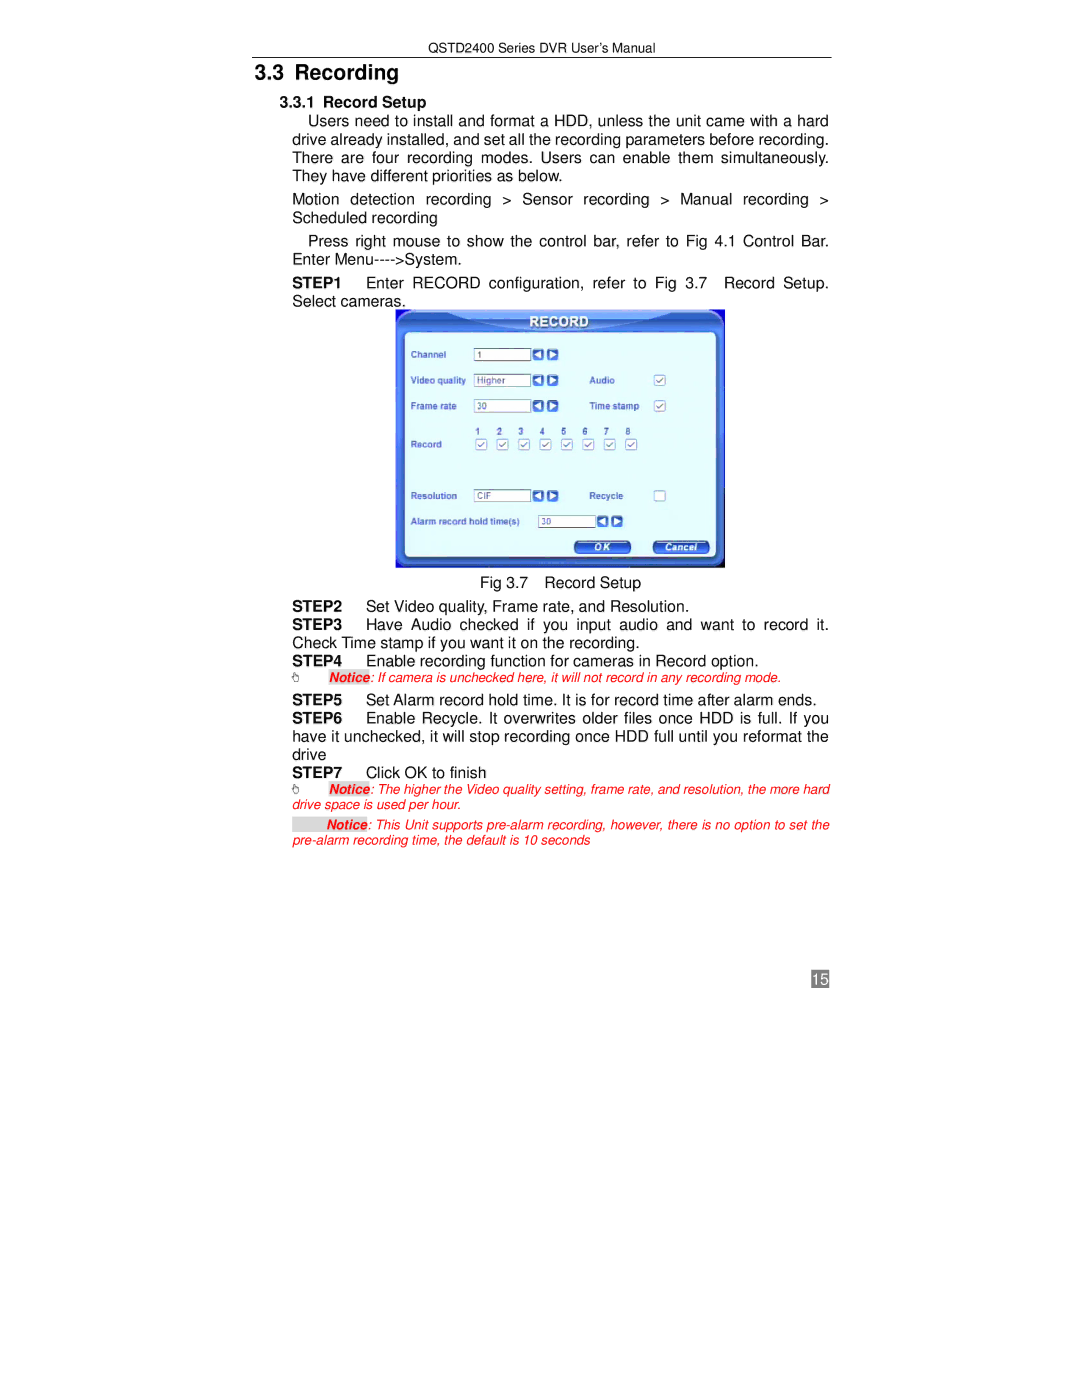
STEP1 Enter RECORD configuration, refer to Fig 3.7 Record Setup. Select cameras.
Fig 3.7 Record Setup
STEP2 Set Video quality, Frame rate, and Resolution.
STEP3 Have Audio checked if you input audio and want to record it. Check Time stamp if you want it on the recording.
STEP4 Enable recording function for cameras in Record option.
Notice: If camera is unchecked here, it will not record in any recording mode.
STEP5 Set Alarm record hold time. It is for record time after alarm ends. STEP6 Enable Recycle. It overwrites older files once HDD is full. If you have it unchecked, it will stop recording once HDD full until you reformat the drive
STEP7
![]() Notice: The higher the Video quality setting, frame rate, and resolution, the more hard drive space is used per hour.
Notice: The higher the Video quality setting, frame rate, and resolution, the more hard drive space is used per hour.
Notice: This Unit supports
15