Preparing for Installation
Setting the Elevation and Attaching the Fine Tuning Adjustment
Use the elevation setting coordinate you wrote down on page 8 to preset the elevation of the dish, and then attach the fine tuning adjustment tool.
1.Use a 1/4” x 1/2” carriage bolt, a washer, and a flange nut to attach the
2.Rotate the support sleeve so that the elevation indicator (white line), NOT the bolt or the
3.Tighten the flange nut securely and then secure a second 1/4” x 1/2” carriage bolt, washer and flange nut on the opposite side.
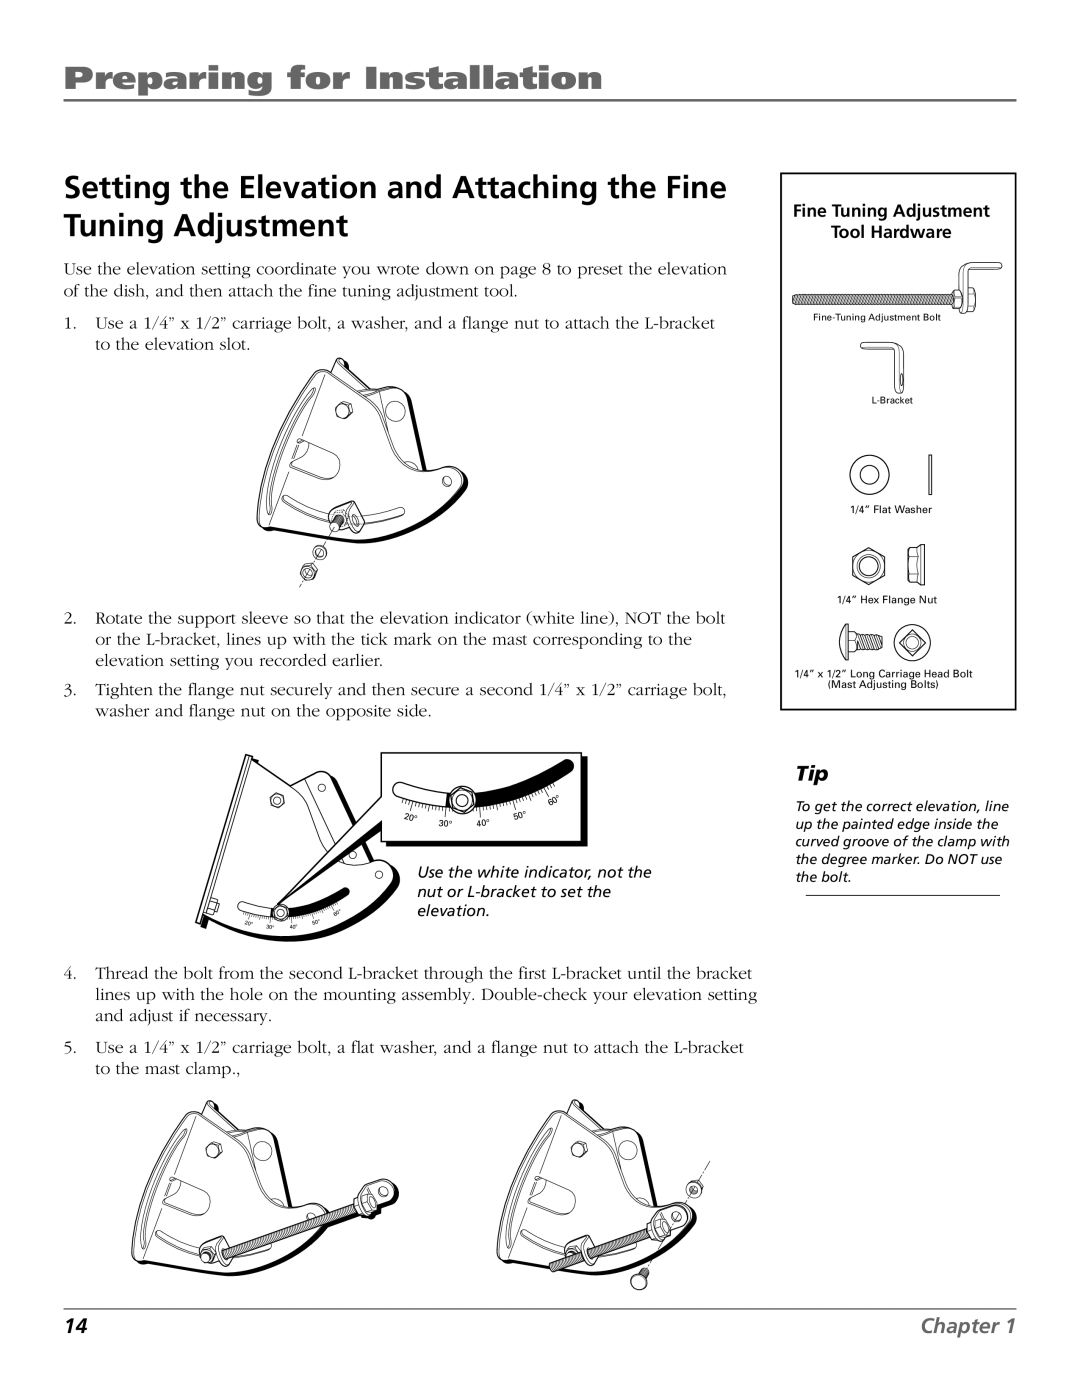
Fine Tuning Adjustment |
Tool Hardware |
1/4” Flat Washer |
1/4” Hex Flange Nut |
1/4” x 1/2” Long Carriage Head Bolt |
(Mast Adjusting Bolts) |
20° | 30° |
|
40°
° 0 6
50°
° 0 6
20° |
|
| 0° |
30° | 40° | 5 |
Use the white indicator, not the nut or
Tip
To get the correct elevation, line up the painted edge inside the curved groove of the clamp with the degree marker. Do NOT use the bolt.
4.Thread the bolt from the second
5.Use a 1/4” x 1/2” carriage bolt, a flat washer, and a flange nut to attach the
14 | Chapter 1 |