Preparing for Installation
Attaching the Mast Clamp to the DIRECTV PLUS™ Antenna
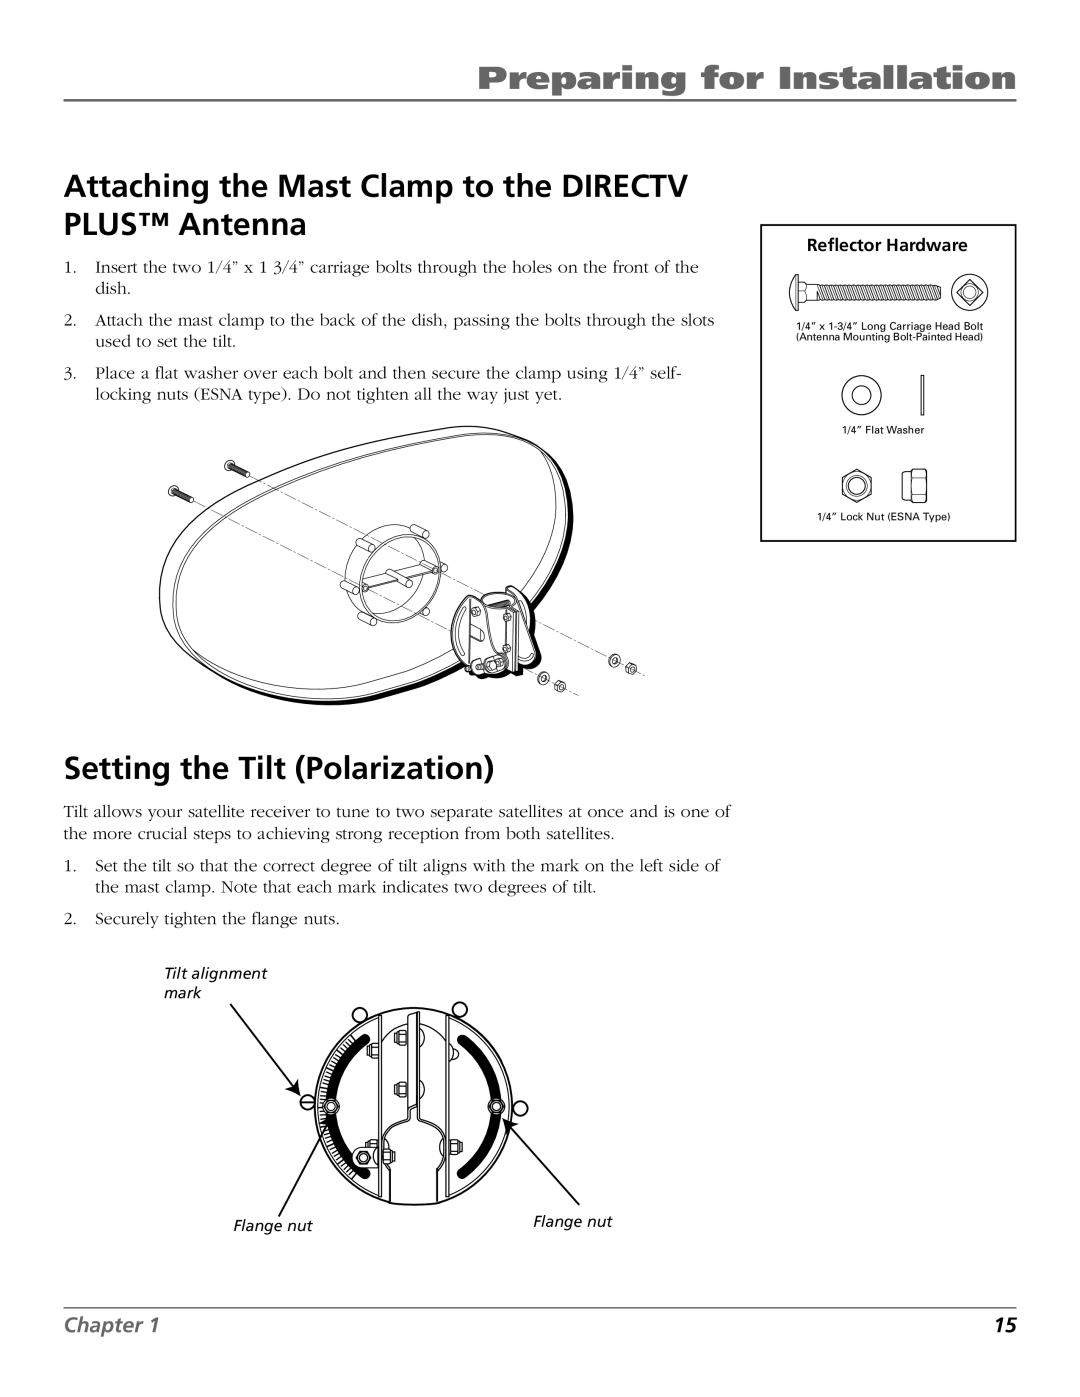
1.Insert the two 1/4” x 1 3/4” carriage bolts through the holes on the front of the dish.
2.Attach the mast clamp to the back of the dish, passing the bolts through the slots used to set the tilt.
3.Place a flat washer over each bolt and then secure the clamp using 1/4” self- locking nuts (ESNA type). Do not tighten all the way just yet.
Reflector Hardware
1/4” x
1/4” Flat Washer
1/4” Lock Nut (ESNA Type)
Setting the Tilt (Polarization)
Tilt allows your satellite receiver to tune to two separate satellites at once and is one of the more crucial steps to achieving strong reception from both satellites.
1.Set the tilt so that the correct degree of tilt aligns with the mark on the left side of the mast clamp. Note that each mark indicates two degrees of tilt.
2.Securely tighten the flange nuts.
Tilt alignment mark
Flange nut | Flange nut |
Chapter 1 | 15 |
