Connections & Setup
The Jacks on the Back of the DVD Player
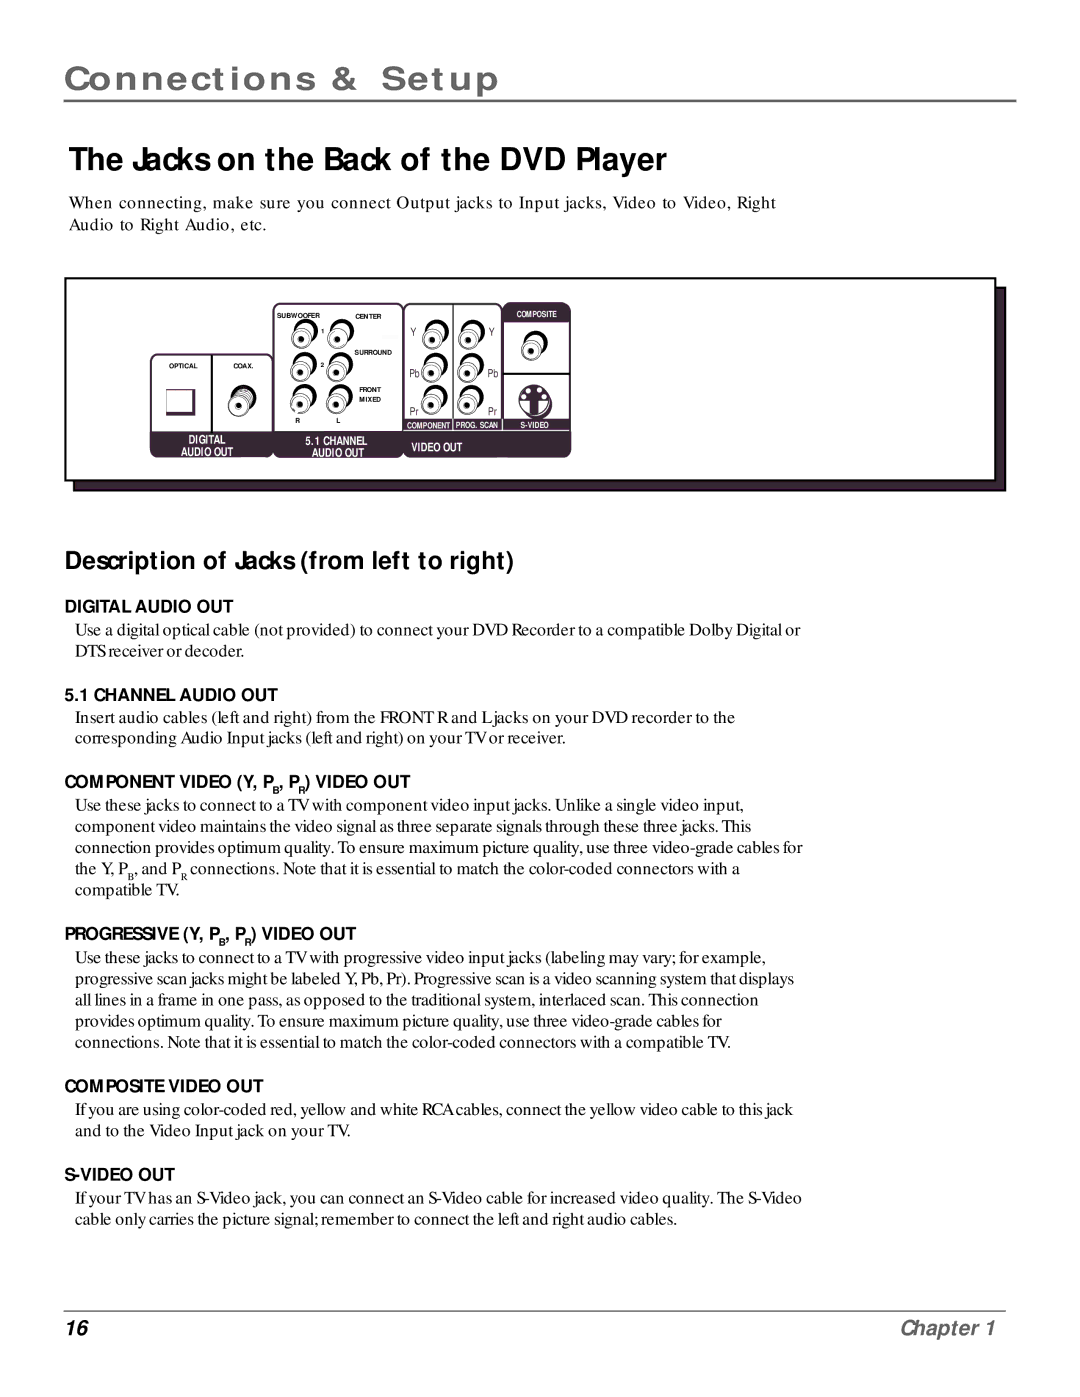
When connecting, make sure you connect Output jacks to Input jacks, Video to Video, Right Audio to Right Audio, etc.
| SUBWOOFER | CENTER | |
|
|
| 1 |
|
|
| SURROUND |
OPTICAL | COAX. |
| 2 |
| Pb |
| FRONT |
|
|
| MIXED |
| R |
| L |
DIGITAL |
| 5.1 CHANNEL | |
AUDIO OUT |
| AUDIO OUT | |
COMPOSITE
Y ![]()
![]() Y
Y
Pb![]()
![]() Pb
Pb
Pr | Pr |
|
COMPONENT | PROG. SCAN |
VIDEO OUT
Description of Jacks (from left to right)
DIGITAL AUDIO OUT
Use a digital optical cable (not provided) to connect your DVD Recorder to a compatible Dolby Digital or DTS receiver or decoder.
5.1 CHANNEL AUDIO OUT
Insert audio cables (left and right) from the FRONT R and L jacks on your DVD recorder to the corresponding Audio Input jacks (left and right) on your TV or receiver.
COMPONENT VIDEO (Y, PB, PR) VIDEO OUT
Use these jacks to connect to a TV with component video input jacks. Unlike a single video input, component video maintains the video signal as three separate signals through these three jacks. This connection provides optimum quality. To ensure maximum picture quality, use three
PROGRESSIVE (Y, PB, PR) VIDEO OUT
Use these jacks to connect to a TV with progressive video input jacks (labeling may vary; for example, progressive scan jacks might be labeled Y, Pb, Pr). Progressive scan is a video scanning system that displays all lines in a frame in one pass, as opposed to the traditional system, interlaced scan. This connection provides optimum quality. To ensure maximum picture quality, use three
COMPOSITE VIDEO OUT
If you are using
S-VIDEO OUT
If your TV has an
16 | Chapter 1 |
