Chapter 1: Before You Begin
STAND RELEASE | MIC |
|
|
|
Stand |
| RECORD | ON/OFF | BACK |
STAND RELEASE | Microphone | RECORD | ON/OFF button | BACK |
button |
| button | (also used for | button |
|
|
| STOP) |
|
Top View
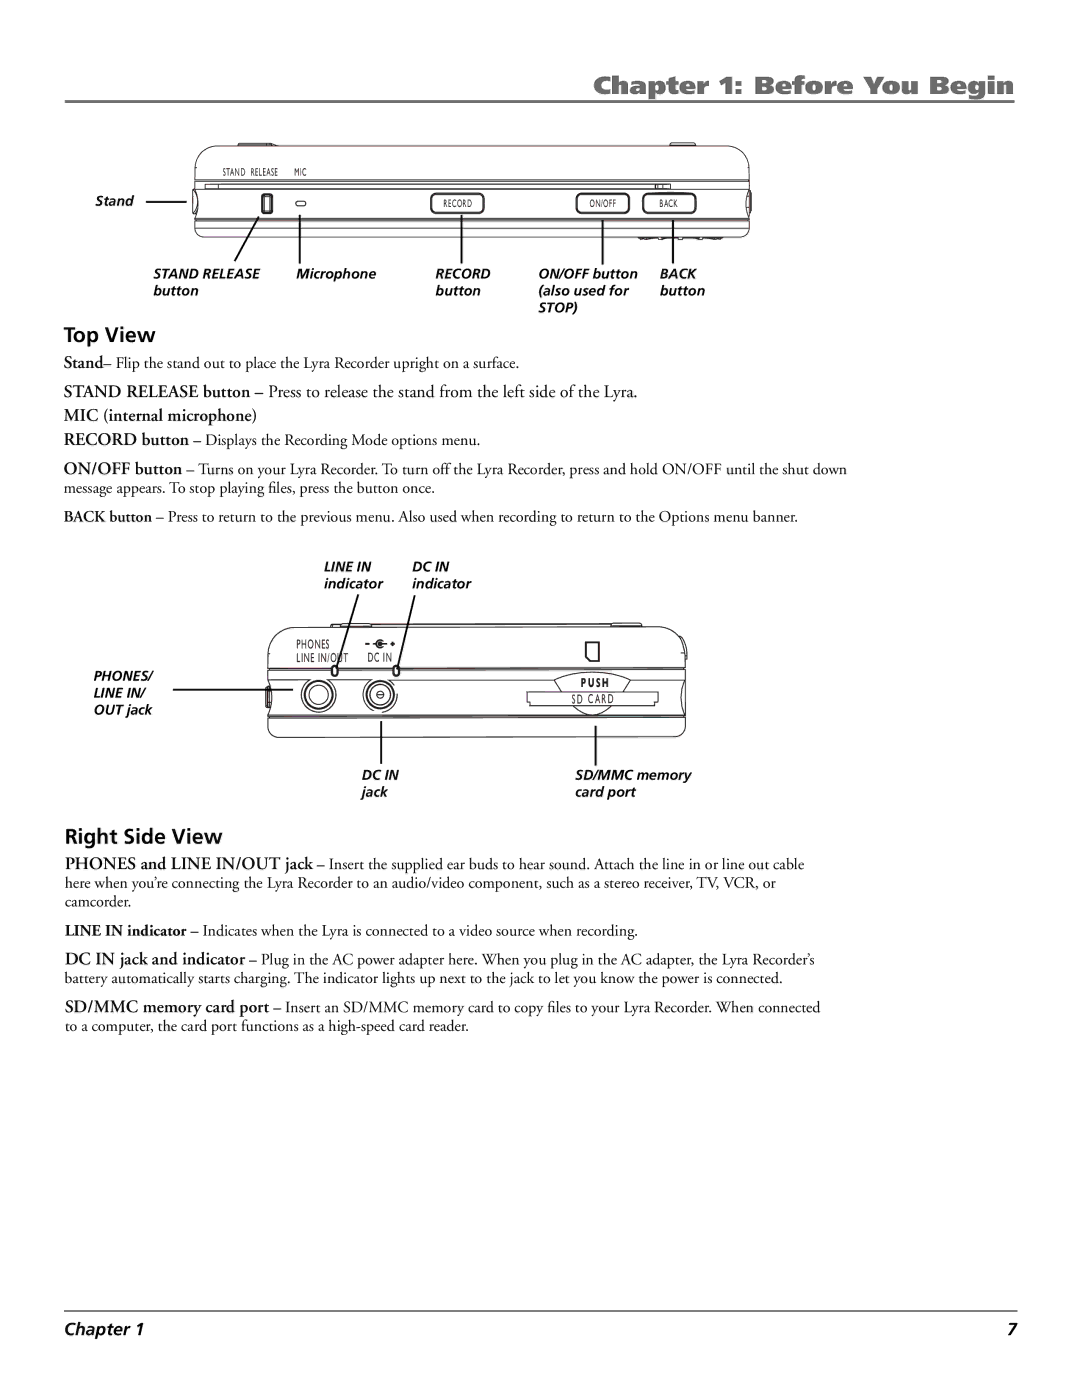
Stand– Flip the stand out to place the Lyra Recorder upright on a surface.
STAND RELEASE button – Press to release the stand from the left side of the Lyra.
MIC (internal microphone)
RECORD button – Displays the Recording Mode options menu.
ON/OFF button – Turns on your Lyra Recorder. To turn off the Lyra Recorder, press and hold ON/OFF until the shut down message appears. To stop playing files, press the button once.
BACK button – Press to return to the previous menu. Also used when recording to return to the Options menu banner.
LINE IN | DC IN |
indicator | indicator |
PHONES | DC IN |
LINE IN/OUT |
PHONES/
LINE IN/
OUT jack
PUSH
SD CARD
DC IN | SD/MMC memory |
jack | card port |
Right Side View
PHONES and LINE IN/OUT jack – Insert the supplied ear buds to hear sound. Attach the line in or line out cable here when you’re connecting the Lyra Recorder to an audio/video component, such as a stereo receiver, TV, VCR, or camcorder.
LINE IN indicator – Indicates when the Lyra is connected to a video source when recording.
DC IN jack and indicator – Plug in the AC power adapter here. When you plug in the AC adapter, the Lyra Recorder’s battery automatically starts charging. The indicator lights up next to the jack to let you know the power is connected.
SD/MMC memory card port – Insert an SD/MMC memory card to copy files to your Lyra Recorder. When connected to a computer, the card port functions as a
Chapter 1 | 7 |
