Editing Individual Song and Track Events
Version 2 provides a pair of screens that let you edit a song in very precise ways. The screens operate the same way, but do different things. The
•SONG MICROSCOPE
•SONG MASTER TRACK
A knowledge of MIDI is helpful in taking full advantage of these screens. See InFocus An Introduction to MIDI booklet for more information.
To display the screens, press PART VIEW to show the SONG TRACK screen, and then
•select the track/part you want to edit, highlight “MICRO,” and press
This screen shows you a list of all of the note events and other MIDI events on the selected track/part.
If you find the list a bit overwhelming, you can filter out things you don’t want to see. Press the MENU button to open the VIEW SELECT window in which you can uncheck anything you’d like the
•highlight “MASTER” and press
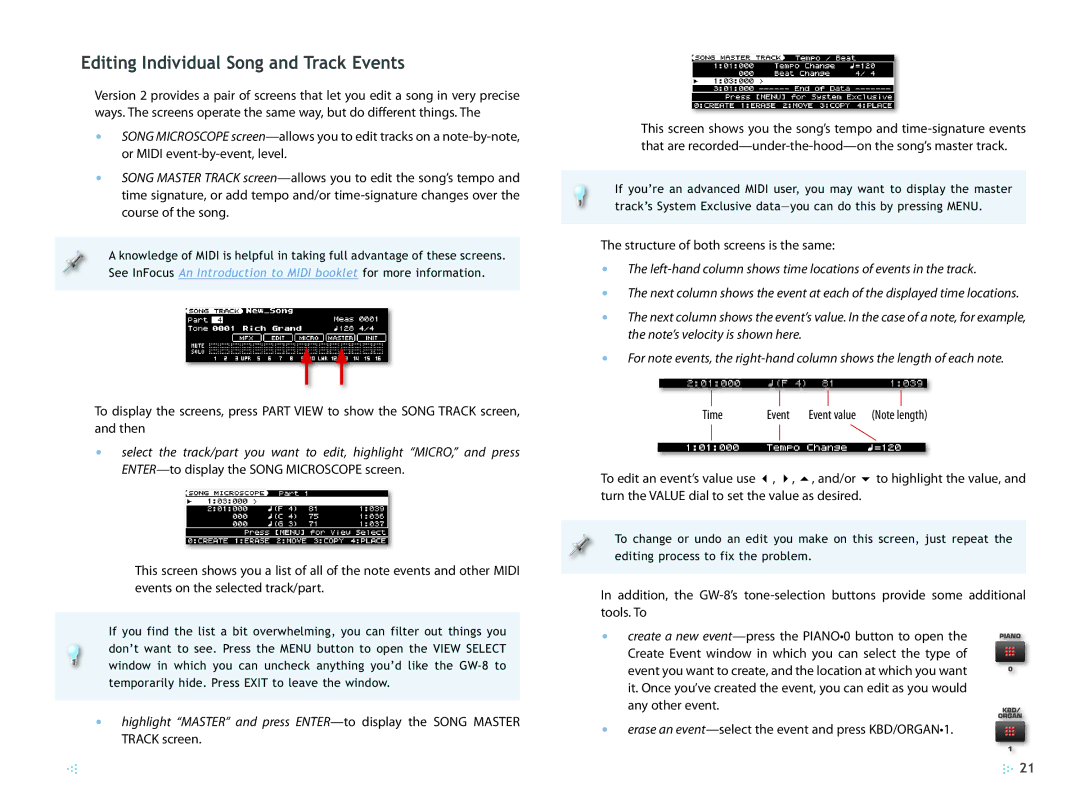
This screen shows you the song’s tempo and
If you’re an advanced MIDI user, you may want to display the master track’s System Exclusive
The structure of both screens is the same:
•The
•The next column shows the event at each of the displayed time locations.
•The next column shows the event’s value. In the case of a note, for example, the note’s velocity is shown here.
•For note events, the
Time | Event | Event value | (Note length) | ||
|
|
|
|
|
|
|
|
|
|
|
|
To edit an event’s value use 3, 4, 5, and/or 6 to highlight the value, and turn the VALUE dial to set the value as desired.
To change or undo an edit you make on this screen, just repeat the editing process to fix the problem.
In addition, the
• create a new
• erase an
![]() 21
21