SETTING UP THE FUNCTION
Setting up the function by using the LCD panel
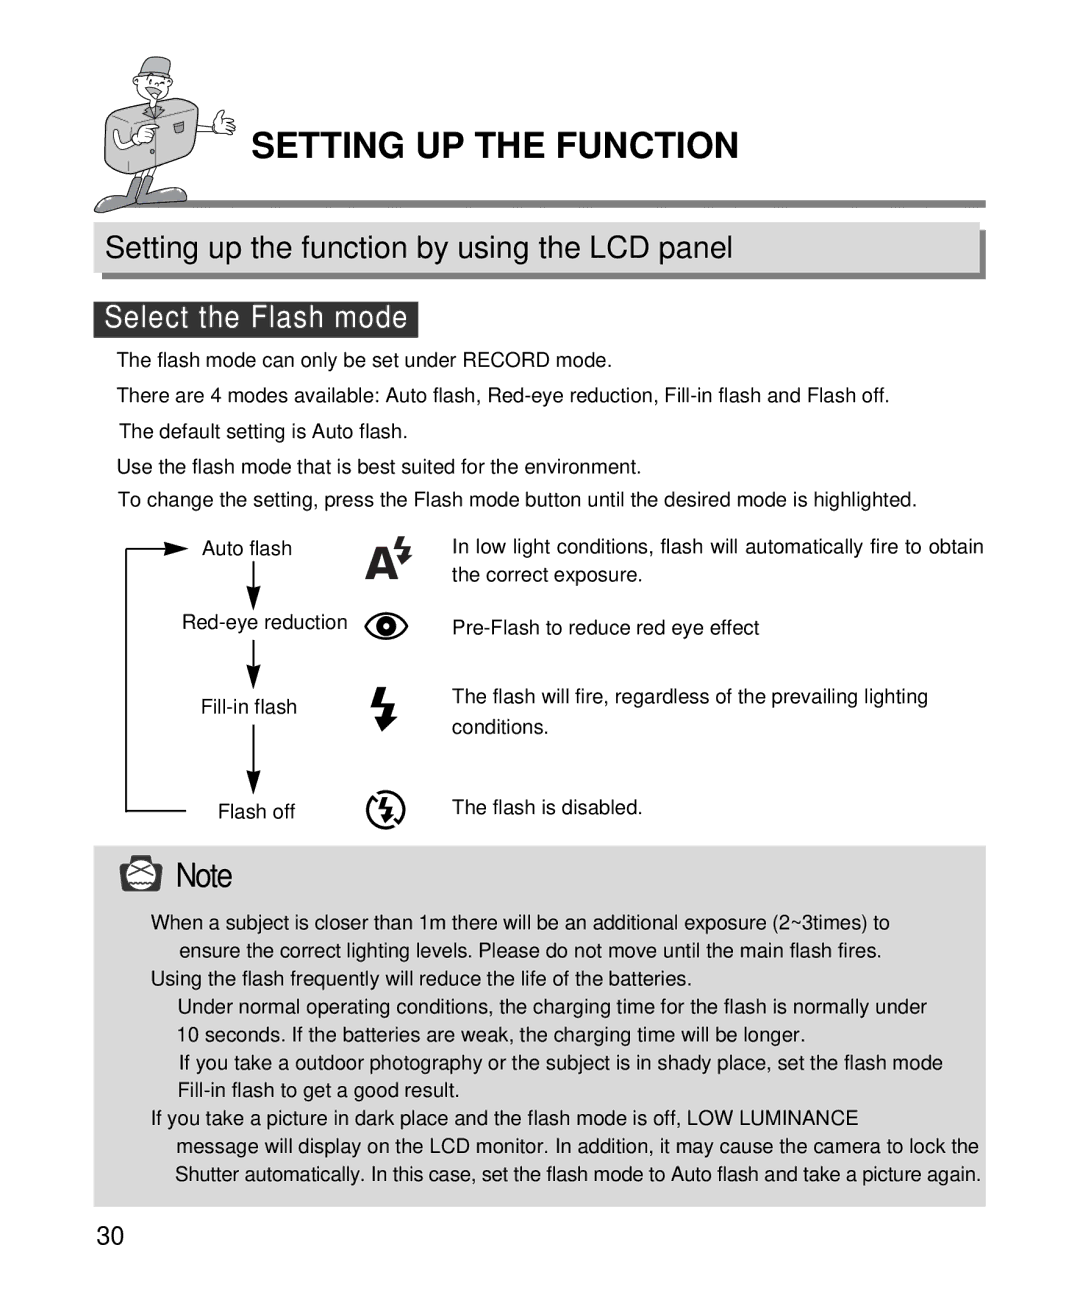
Select the Flash mode
![]() The flash mode can only be set under RECORD mode.
The flash mode can only be set under RECORD mode.
![]() There are 4 modes available: Auto flash,
There are 4 modes available: Auto flash,
![]() Use the flash mode that is best suited for the environment.
Use the flash mode that is best suited for the environment.
To change the setting, press the Flash mode button until the desired mode is highlighted.
Auto flash |
Flash off |
In low light conditions, flash will automatically fire to obtain the correct exposure.
The flash will fire, regardless of the prevailing lighting conditions.
The flash is disabled.
![]() Note
Note
![]() When a subject is closer than 1m there will be an additional exposure (2~3times) to ensure the correct lighting levels. Please do not move until the main flash fires.
When a subject is closer than 1m there will be an additional exposure (2~3times) to ensure the correct lighting levels. Please do not move until the main flash fires.
![]() Using the flash frequently will reduce the life of the batteries.
Using the flash frequently will reduce the life of the batteries.
![]() Under normal operating conditions, the charging time for the flash is normally under 10 seconds. If the batteries are weak, the charging time will be longer.
Under normal operating conditions, the charging time for the flash is normally under 10 seconds. If the batteries are weak, the charging time will be longer.
![]() If you take a outdoor photography or the subject is in shady place, set the flash mode
If you take a outdoor photography or the subject is in shady place, set the flash mode
![]() If you take a picture in dark place and the flash mode is off, LOW LUMINANCE
If you take a picture in dark place and the flash mode is off, LOW LUMINANCE
message will display on the LCD monitor. In addition, it may cause the camera to lock the Shutter automatically. In this case, set the flash mode to Auto flash and take a picture again.
30