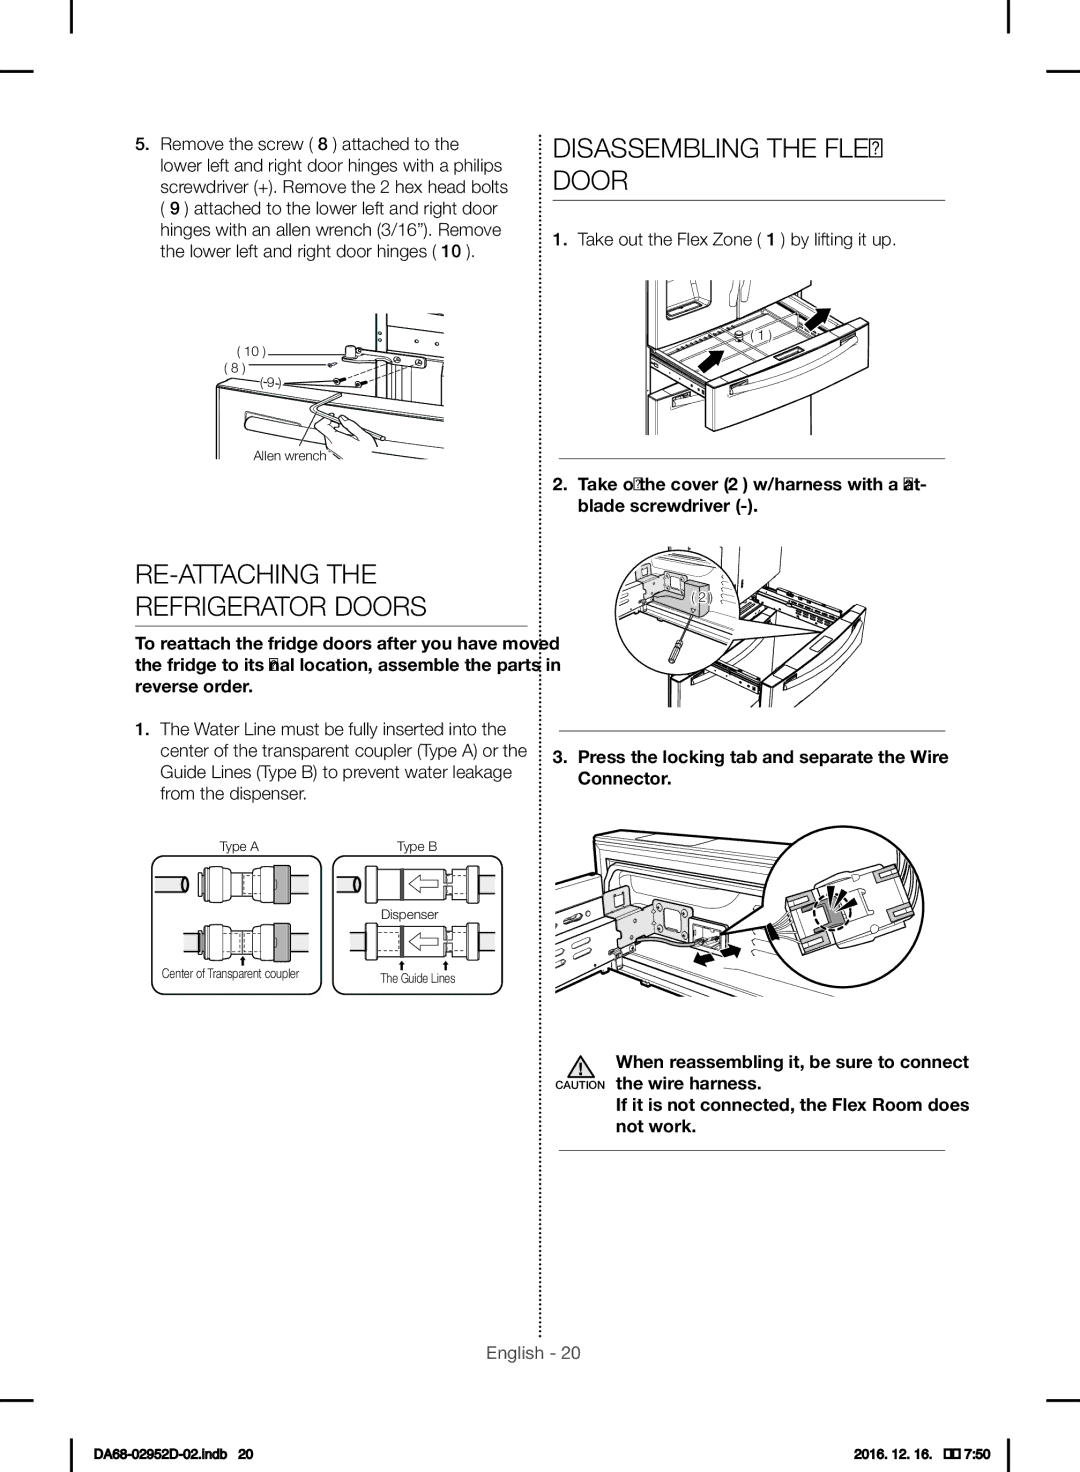
5.Remove the screw ( 8 ) attached to the lower left and right door hinges with a philips screwdriver (+). Remove the 2 hex head bolts ( 9 ) attached to the lower left and right door hinges with an allen wrench (3/16”). Remove the lower left and right door hinges ( 10 ).
DISASSEMBLING THE FLEX DOOR
1.Take out the Flex Zone ( 1 ) by lifting it up.
![]() ( 1 )
( 1 )
( 10 )
( 8 ) ![]()
![]()
![]() ( 9 )
( 9 ) ![]()
Allen wrench
2.Take off the cover (2 ) w/harness with a flat- blade screwdriver
RE-ATTACHING THE REFRIGERATOR DOORS
To reattach the fridge doors after you have moved the fridge to its final location, assemble the parts in reverse order.
1.The Water Line must be fully inserted into the center of the transparent coupler (Type A) or the Guide Lines (Type B) to prevent water leakage from the dispenser.
Type A |
|
|
|
|
| Type B | |||||
|
|
|
|
|
|
|
|
|
|
|
|
|
|
|
|
|
|
|
|
|
|
|
|
|
|
|
|
|
|
|
|
|
|
|
|
Dispenser
![]()
![]() ( 2 )
( 2 ) ![]()
3.Press the locking tab and separate the Wire Connector.
Center of Transparent coupler | The Guide Lines |
|
When reassembling it, be sure to connect CAUTION the wire harness.
If it is not connected, the Flex Room does not work.
English - 20
2016. 12. 16. |
��![]()
![]()
![]() 7:50
7:50
