
SCX-1100 specifications
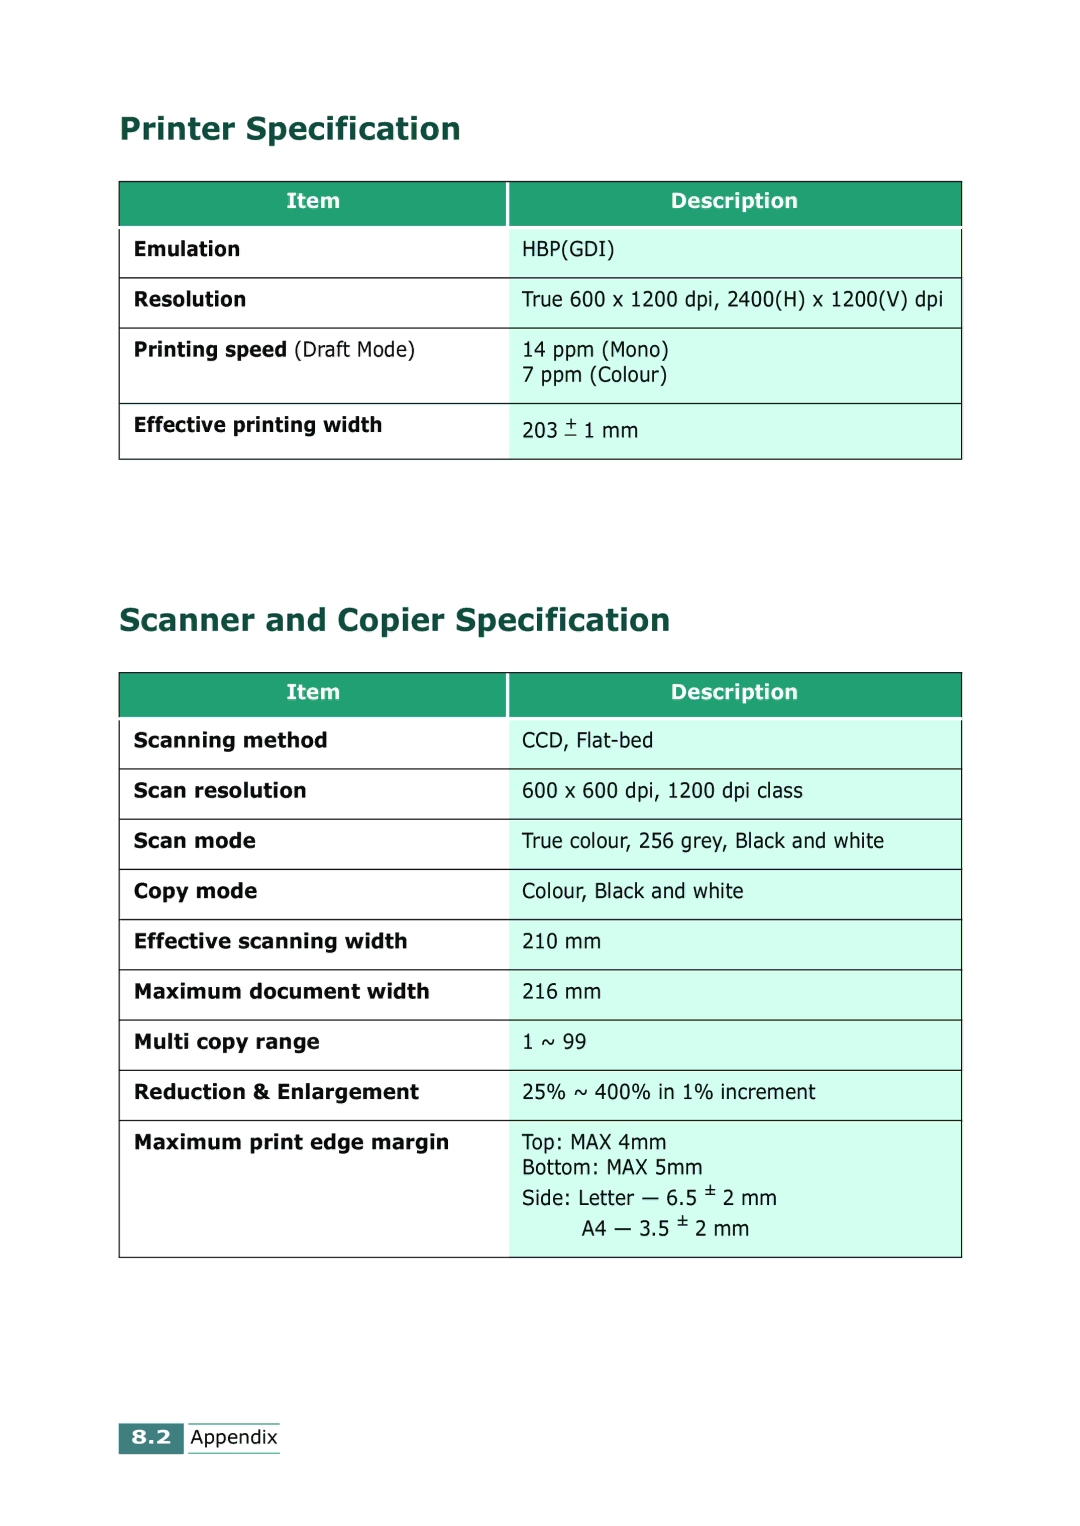
The Samsung SCX-1100 is an all-in-one monochrome laser printer known for its compact design and efficiency, making it an ideal choice for both home and small office use. This multi-functional device combines printing, scanning, and copying capabilities, allowing users to streamline their tasks in one machine without compromising on quality.One of the standout features of the SCX-1100 is its print speed. It can produce up to 14 pages per minute (ppm), which is impressive for a printer in this category. This speed is complemented by a first page out time of less than 14 seconds, ensuring that users don’t have to wait long for their documents. The printer has a maximum resolution of 1200 x 1200 dots per inch (dpi), providing sharp and clear text that meets the demands of professional documents.
In terms of scanning, the SCX-1100 includes a flatbed scanner with a resolution of up to 600 x 1200 dpi, which allows for high-quality image capturing and document reproduction. This feature is particularly beneficial for users who need to digitize paperwork, share documents electronically, or create copies. The printer supports a variety of media sizes, including letter, legal, and executive sizes, making it versatile for different printing tasks.
The SCX-1100 is equipped with advanced technologies that enhance user experience. One such technology is Easy Eco Driver, which helps users save on toner by allowing them to select eco-friendly print settings. This function not only reduces consumption but also helps lower operational costs. Another technology feature is the Samsung Smart Panel, which provides an intuitive interface for monitoring printer status, alerts, and troubleshooting.
The printer comes with a front-loading paper tray that has a capacity of up to 150 sheets, which is suitable for moderate print jobs. Additionally, the automatic GDI (Graphic Device Interface) ensures that processing tasks are handled efficiently, contributing to the overall speed and reliability of the printer.
Overall, the Samsung SCX-1100 stands out as a reliable and efficient multi-functional printer. Its combination of fast printing speeds, high-quality output, and user-friendly technologies make it a valuable asset for individuals and small businesses looking for an affordable solution to their printing, scanning, and copying needs.