ENGLISH
Using the CAMCORDER - Advanced Recording
Audio Dubbing
✤The AUDIO DUBBING function only works in PLAYER Mode.
✤You can add sound to the original sound on a
✤Use the internal and external microphones or other audio equipment.
✤The original sound will not be erased.
Dubbing Sound
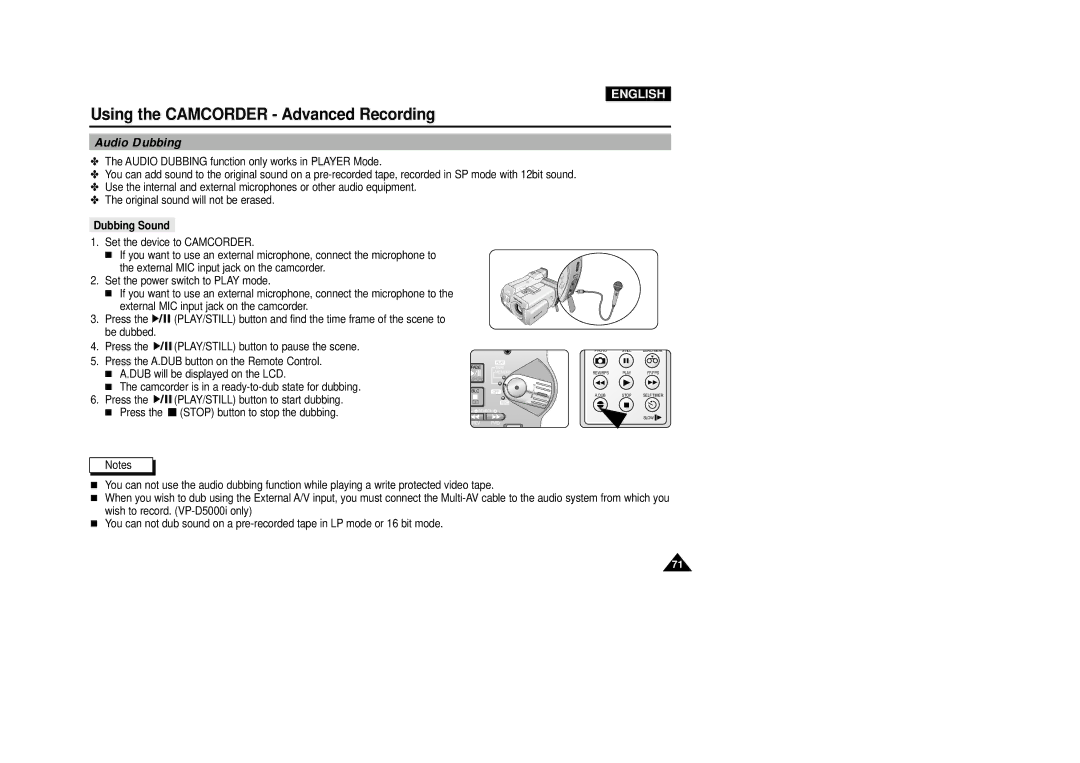
1.Set the device to CAMCORDER.
■If you want to use an external microphone, connect the microphone to the external MIC input jack on the camcorder.
2.Set the power switch to PLAY mode.
■If you want to use an external microphone, connect the microphone to the external MIC input jack on the camcorder.
3.Press the ![]()
![]()
![]()
![]()
![]() (PLAY/STILL) button and find the time frame of the scene to be dubbed.
(PLAY/STILL) button and find the time frame of the scene to be dubbed.
4.Press the ![]()
![]()
![]()
![]()
![]() (PLAY/STILL) button to pause the scene.
(PLAY/STILL) button to pause the scene.
5.Press the A.DUB button on the Remote Control.
■A.DUB will be displayed on the LCD.
■The camcorder is in a
6.Press the ![]()
![]()
![]()
![]()
![]() (PLAY/STILL) button to start dubbing.
(PLAY/STILL) button to start dubbing.
■Press the ![]() (STOP) button to stop the dubbing.
(STOP) button to stop the dubbing.
| PLAY |
FADE | TAPE |
| MEMORY |
S.SHOW |
|
BLC | OFF |
| REC |
REV FWD
PHOTO | STILL | ZERO MEM. |
REW/RPS | PLAY | FF/FPS |
A.DUB | STOP | SELF TIMER |
|
| SLOW |
Notes
■You can not use the audio dubbing function while playing a write protected video tape.
■When you wish to dub using the External A/V input, you must connect the
■You can not dub sound on a
71