SETTING THE RECORDING METHOD

Post-alarm recording
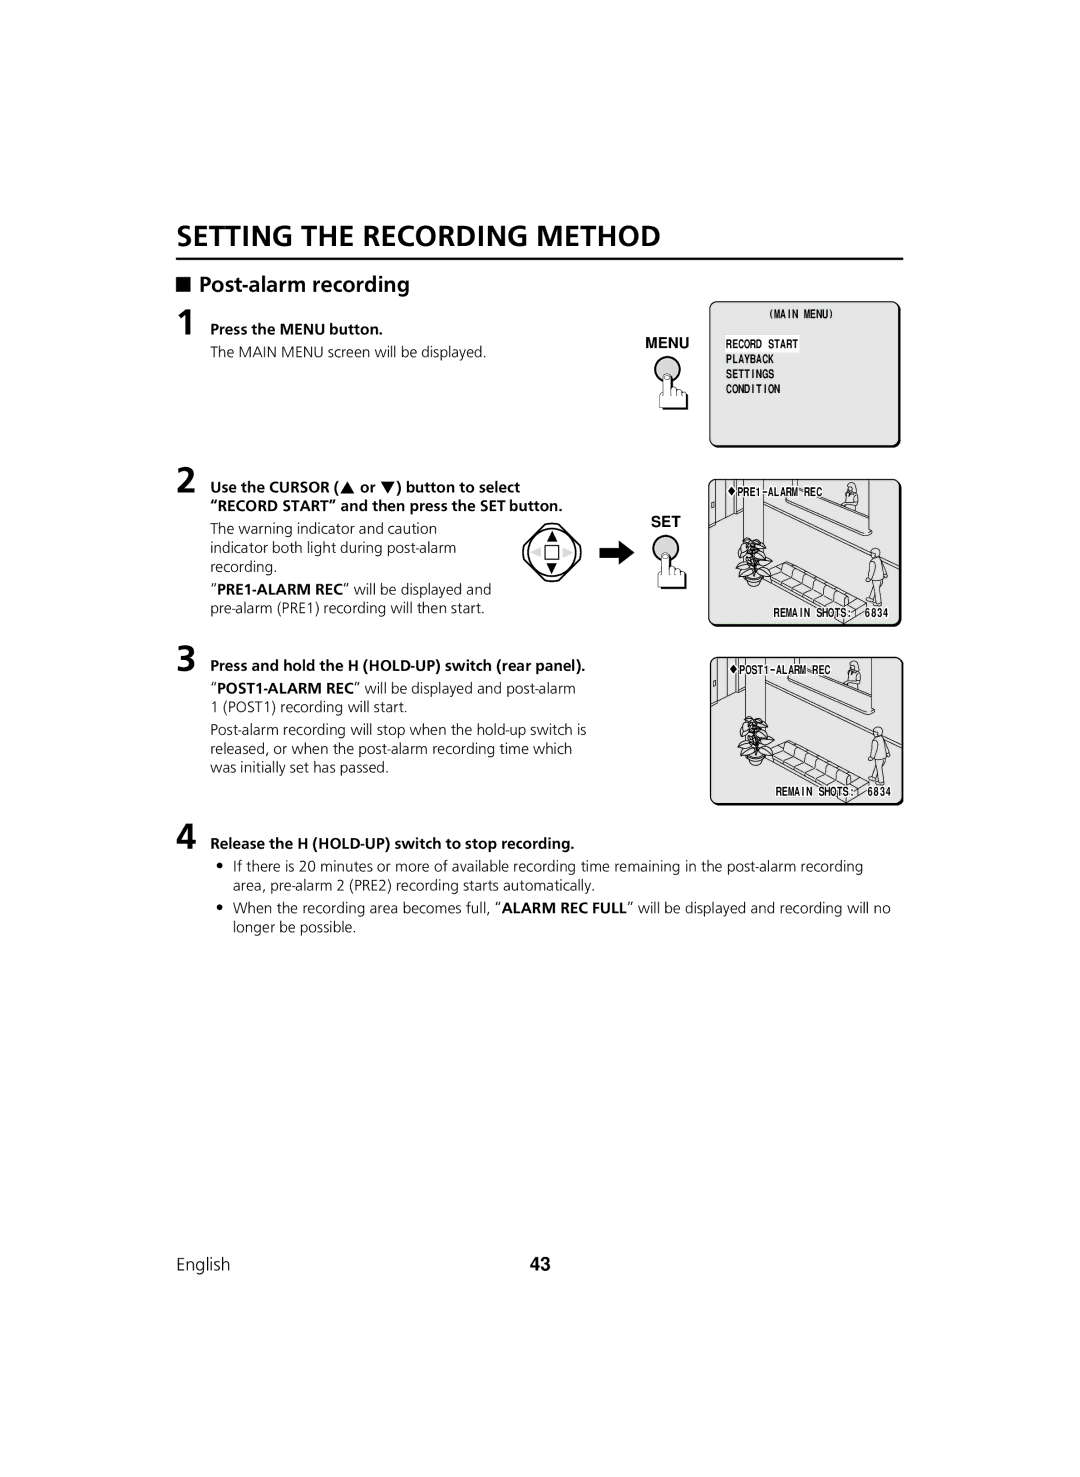
1Press the MENU button.
The MAIN MENU screen will be displayed.
2Use the CURSOR (jor l) button to select “RECORD START” and then press the SET button.
The warning indicator and caution indicator both light during
3Press and hold the H (HOLD-UP) switch (rear panel).
MENU
SET
(MAIN MENU)
RECORD START
PLAYBACK
SETTINGS
CONDITION
![]() PRE1-ALARM
PRE1-ALARM
REMAIN SHOTS: 6834
![]() POST1-ALARM
POST1-ALARM
REMAIN SHOTS: 6834
4Release the H (HOLD-UP) switch to stop recording.
•
•
If there is 20 minutes or more of available recording time remaining in the
When the recording area becomes full, “ALARM REC FULL” will be displayed and recording will no longer be possible.
English | 43 |