INSTALLATION, CONNECTION & SETTING THE CHANNEL
NOTE:
-Do not connect the mains lead to an AC outlet until all connections have been made.
-Please refer to the instruction manuals for the equipments that you are connecting (TV, VCR, Subwoofer and speakers, etc.).
-When you connect the unit to your TV and other equipment, be sure to turn off the power and disconnect all of the equipments from the AC outlet until all the connections have been made.
Follow the procedure below to prepare to use the DVD recorder.
Connect to a TV and various AV equipment. (See pages 9 to 13.)
L
Start initial setting by connecting the Mains Lead. (See page 14.)
L
Set the language and initial settings. (See page 14.)
L
Automatically set the channel. (See page 15.)
L
Set the clock. (See page 15.)
L
Manually set the channel. (See pages 15 to 16.)
Connecting to a TV and Various AV Equipment
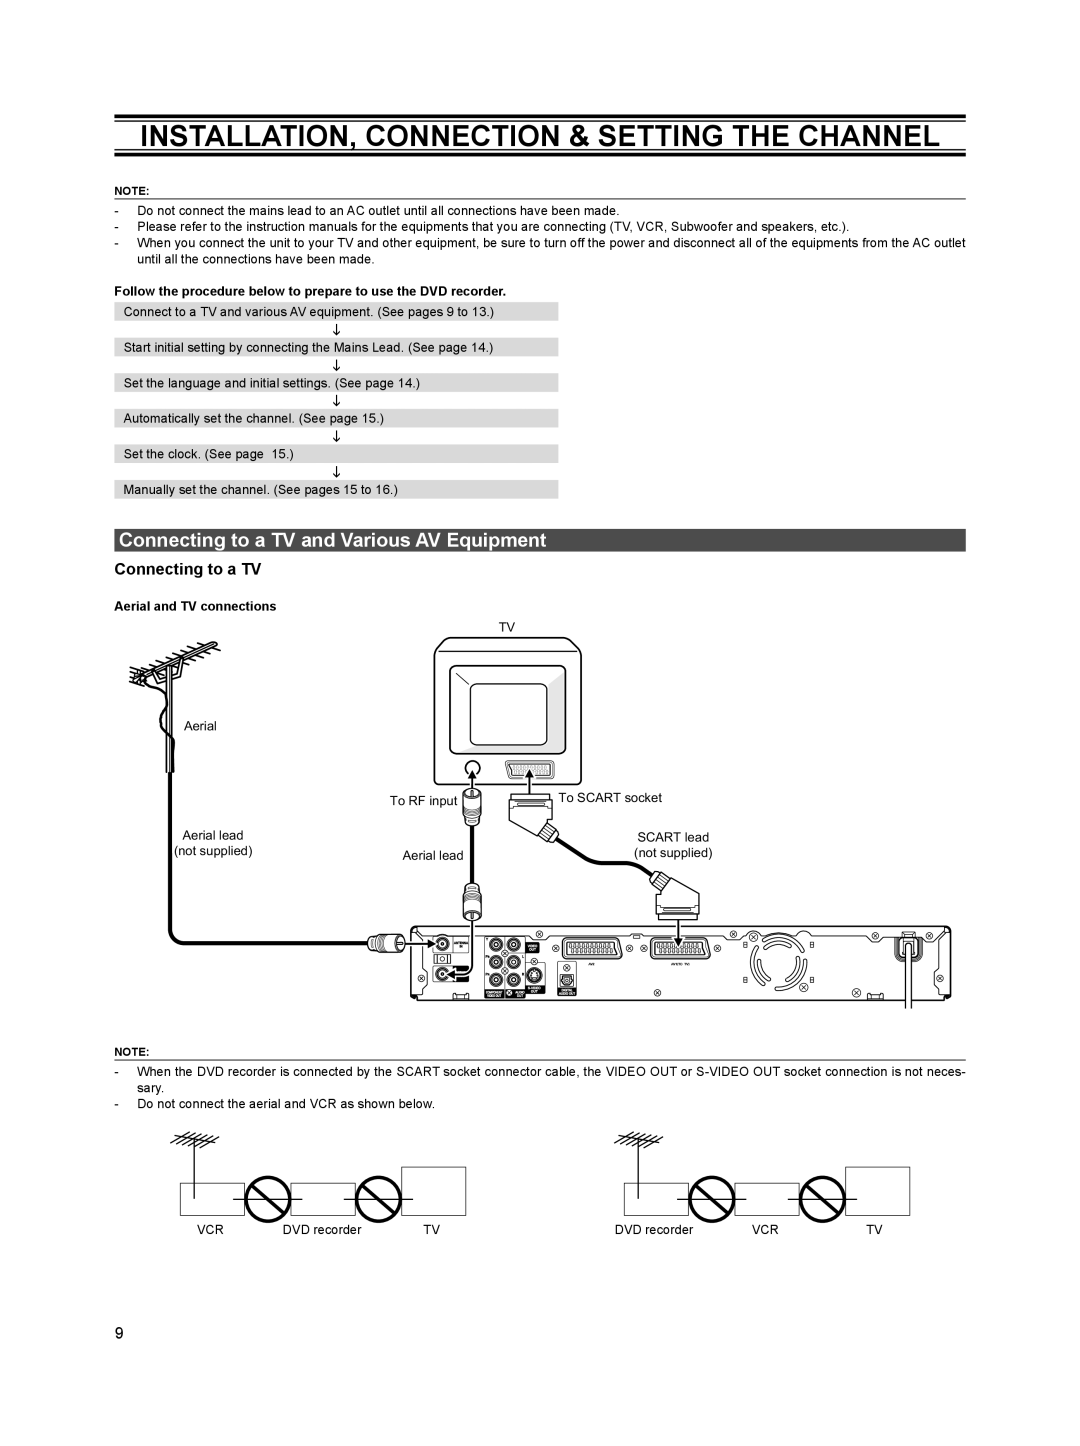
Connecting to a TV
Aerial and TV connections
TV
Aerial |
|
| To RF input |
Aerial lead |
|
(not supplied) | Aerial lead |
|
To SCART socket
SCART lead (not supplied)
NOTE:
- When the DVD recorder is connected by the SCART socket connector cable, the VIDEO OUT or
-Do not connect the aerial and VCR as shown below.
VCR | DVD recorder | TV | DVD recorder | VCR | TV |
9