SECTION 4: CLEANING AND MAINTENANCE
4.4 RELEASING/REPLACING THE PRINT HEAD
The print head on the printer is a
1.Make sure the printer is OFF, and remove the power cable.
2.Lift up the Top Cover.
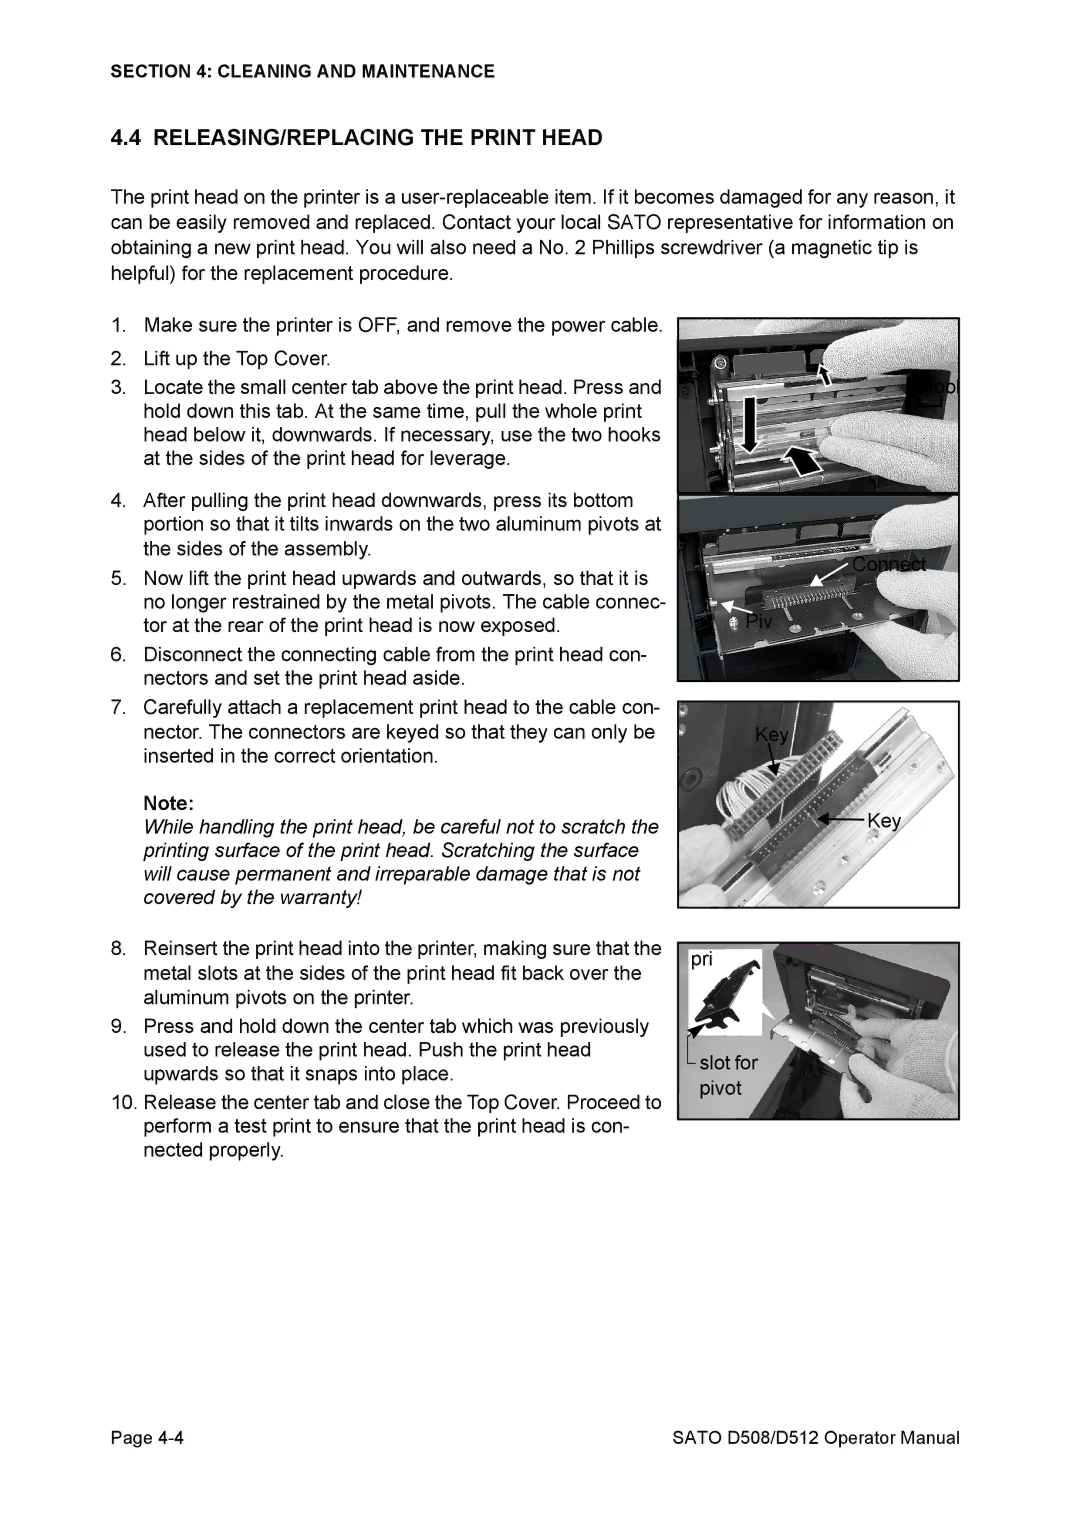
3.Locate the small center tab above the print head. Press and hold down this tab. At the same time, pull the whole print head below it, downwards. If necessary, use the two hooks at the sides of the print head for leverage.
4.After pulling the print head downwards, press its bottom portion so that it tilts inwards on the two aluminum pivots at the sides of the assembly.
5.Now lift the print head upwards and outwards, so that it is no longer restrained by the metal pivots. The cable connec- tor at the rear of the print head is now exposed.
6.Disconnect the connecting cable from the print head con- nectors and set the print head aside.
7.Carefully attach a replacement print head to the cable con- nector. The connectors are keyed so that they can only be inserted in the correct orientation.
Note:
While handling the print head, be careful not to scratch the printing surface of the print head. Scratching the surface will cause permanent and irreparable damage that is not covered by the warranty!
8.Reinsert the print head into the printer, making sure that the metal slots at the sides of the print head fit back over the aluminum pivots on the printer.
9.Press and hold down the center tab which was previously used to release the print head. Push the print head upwards so that it snaps into place.
10.Release the center tab and close the Top Cover. Proceed to perform a test print to ensure that the print head is con- nected properly.
Hook
Connect
Piv
Key
![]() Key
Key
pri
![]() slot for pivot
slot for pivot
Page | SATO D508/D512 Operator Manual |