TO INSTALL/TENSION PIN TYPE BLADES:
WARNING: FOR YOUR OWN SAFETY, TURN
SWITCH ='OFF", REMOVE KEY AND REMOVE
PLUG FROM POWER SOURCE OUTLET BEFORE
REMOVING OR INSTALLING SAWBLADE,
t Locate two (2) blade holders among loose parts
2 Blade clips and set screws are not needed in blade holders with pin type blades; they can be stored in base of unit. If previously installed there is no need to remove clips and screws, but set screws should be securely tightened in holders
3 Place each blade holder in upper and lower arm cap ends (with
4 Locate two (2) blade holder keys among loose parts.
5 Position one key over top holder, and one key under bottom holder to secure holders while
installing blade.
6 Install (pin type) blade first in lower blade holder, then in upper blade holder by sliding pin into pin = Made slot
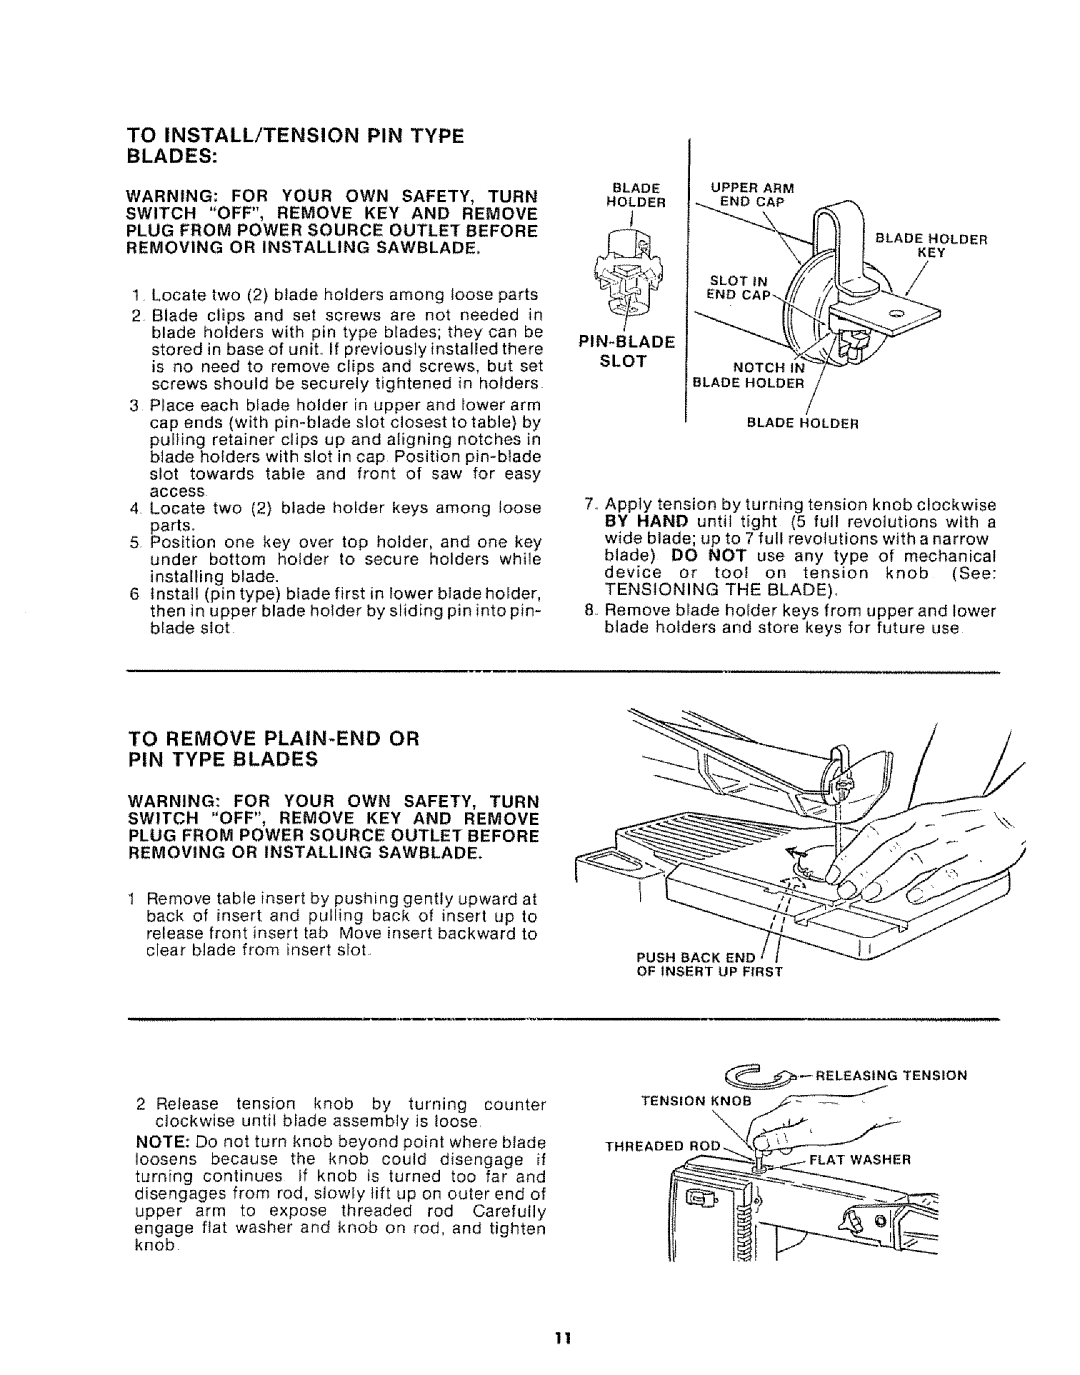
BLADEUPPER ARM
HOLDEREND CAP
l
BLADE HOLDER
KEY
PIN-BLADE
SLOT
BLADE HOLDER
7, Apply tension by turning tension knob clockwise BY HAND until tight (5 full revolutions with a wide blade; up to 7 full revolutions with a narrow blade) DO NOT use any type of mechanical
device or tool on tension knob (See:
TENSIONING THE BLADE),
8, Remove blade holder keys from upper and lower blade holders and store keys for future use
TO REMOVE PLAIN-END OR
PIN TYPE BLADES
WARNING: FOR YOUR OWN SAFETY, TURN
SWITCH "OFF", REMOVE KEY AND REMOVE
PLUG FROM POWER SOURCE OUTLET BEFORE
REMOVING OR INSTALLING SAWBLADE.
Remove table insert by pushing gently upward at
back | of | insert and | pulling back of | insert up | to |
|
release | front insert | tab Move insert | backward | to |
| |
clear | blade from insert slot |
| PUSH BACK | END | ||
|
|
|
|
| ||
|
|
|
|
| OF INSERT | UP FIRST |
2 Release tension knob by turning counter clockwise until blade assembly is loose
NOTE: Do not turn knob beyond point where blade
loosens because the knob could disengage if turning continues tf knob is turned too far and disengages from rod, slowly tilt up on outer end of upper arm to expose threaded rod Carefully
engage flat washer and knob on rod, and tighten knob
TENSION | KNOB,_- | - | |
THREADED | ROD__R _ | l |
|
11