basic | drill | press | operation |
|
| |||||||
We | recommend | the | following | instructions | for operating | properly | and that the cutting tool is not causing | |||||
your | drill | press so | that | you | get | the | best | results and to | ||||
excessive | vibration. | |||||||||||
minimize | the likelihood | of | personal | injury. |
|
|
| |||||
3. Never perform any operation freehand
workpiece rather than supporting it on table) except
WARNING: FOR YOUR OWN SAFETY, ALWAYSwhen wire brushing or polishing,
OBSERVE THE FOLLOWING SAFETY PRECAUTIONS.
4,
I.Check spindle speed
5.
2. Before operating, turn the switch "on" then "off" to make sure that the cutting tool is centered in the chuck
Keep your hands clear of the cutting tool (drill, shaper cutter or router bit).
Make sure quill is locked securely when shaping,
routing, dovetailing, wirebrushing, polishing sanding or surface planing.
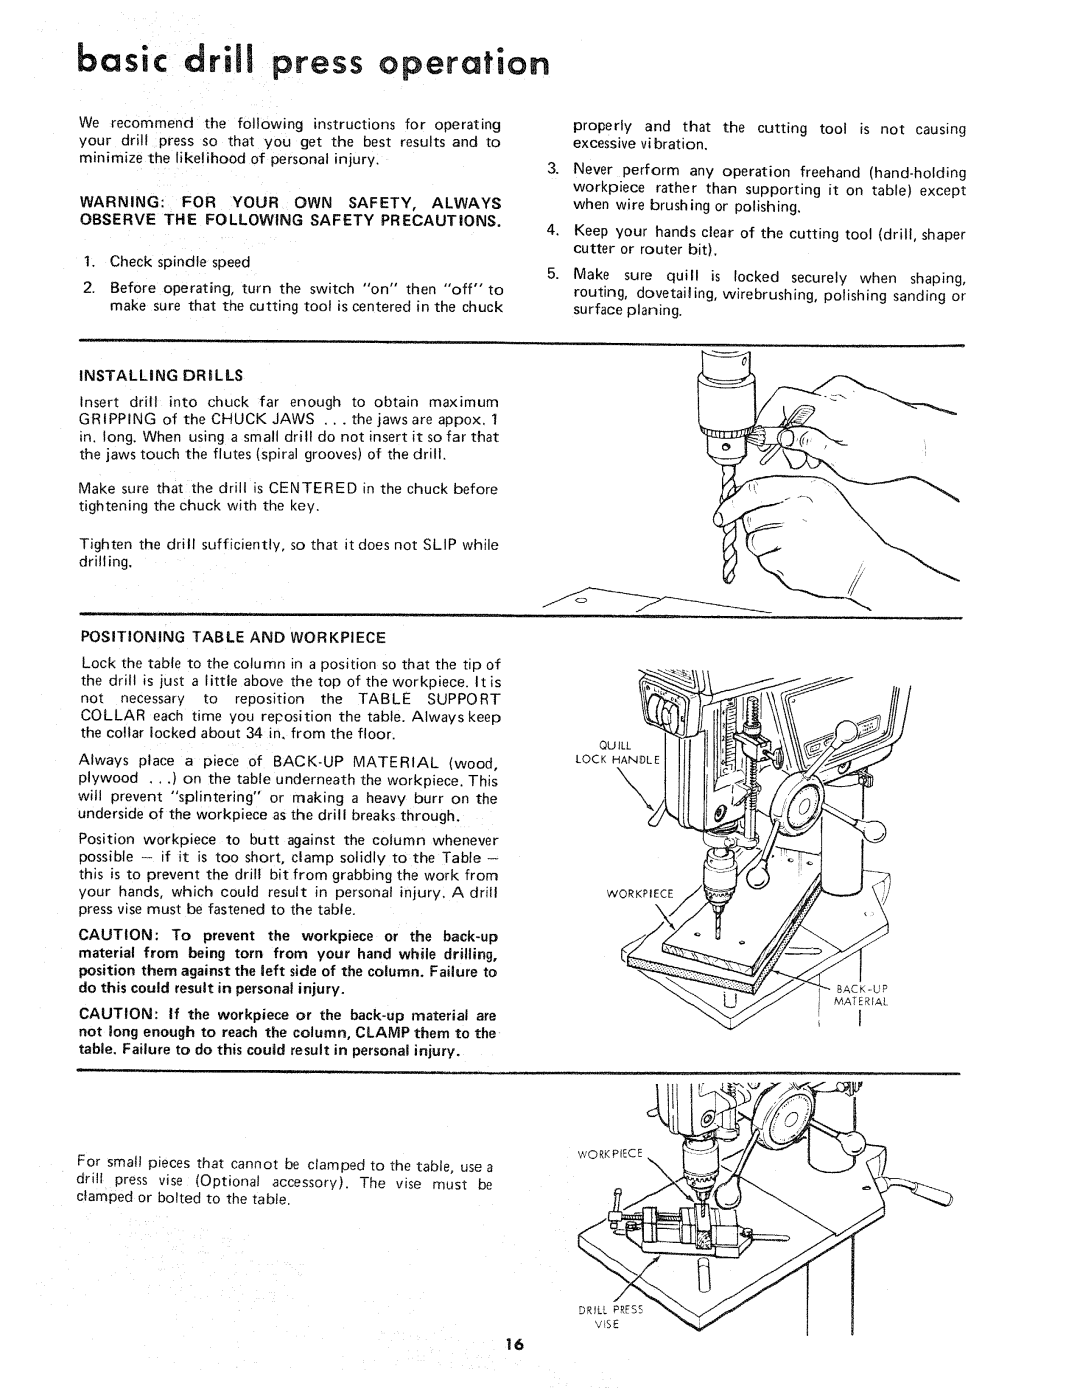
INSTALLING DRILLS
Insert drill into chuck far enough to obtain maximum
GRIPPING of the CHUCK JAWS . . . the jaws are appox. 1
in. long. When using a small drill do not insert it so far that the jaws touch the flutes (spiral grooves) of the drill.
Make sure that the drill is CENTERED in the chuck before tightening the chuck with the key.
Tighten the drill sufficiently, so that it does not SLIP while drilling.
POSITIONING TABLE AND WORKPIECE
Lock the table to the column in a position so that the tip of
the drill is just a little above the top of the workpiece. It is
not necessary to reposition the TABLE SUPPORT
COLLAR each time you reposition the table. Always keep the collar locked about 34 in, from the floor:
Always place a piece of
plywood , . ,) on the table underneath the workpiece. This
will prevent "splintering" or making a heavy burr on the underside of the workpiece as the drill breaks through,
Position workpiece to butt against the column whenever possible - if it is too short, clamp solidly to the Table - this is to prevent the drill bit from grabbing the work from your hands, which could result in personal injuryl A drill press vise must be fastened to the table.
CAUTION: To prevent the workpiece or the
CAUTION: If the workpiece or the
table. Failure to do this couJd result in personal injury.
For small pieces that cannot be clamped to the table, use a
drill press vise (Optional accessory). The vise must be clamped or bolted to the table.
QUILL
LOCK HANDLE
\
WORKPIECE
DR_LL PRESS
V{SE
MATERIAL
r1
16