assembly
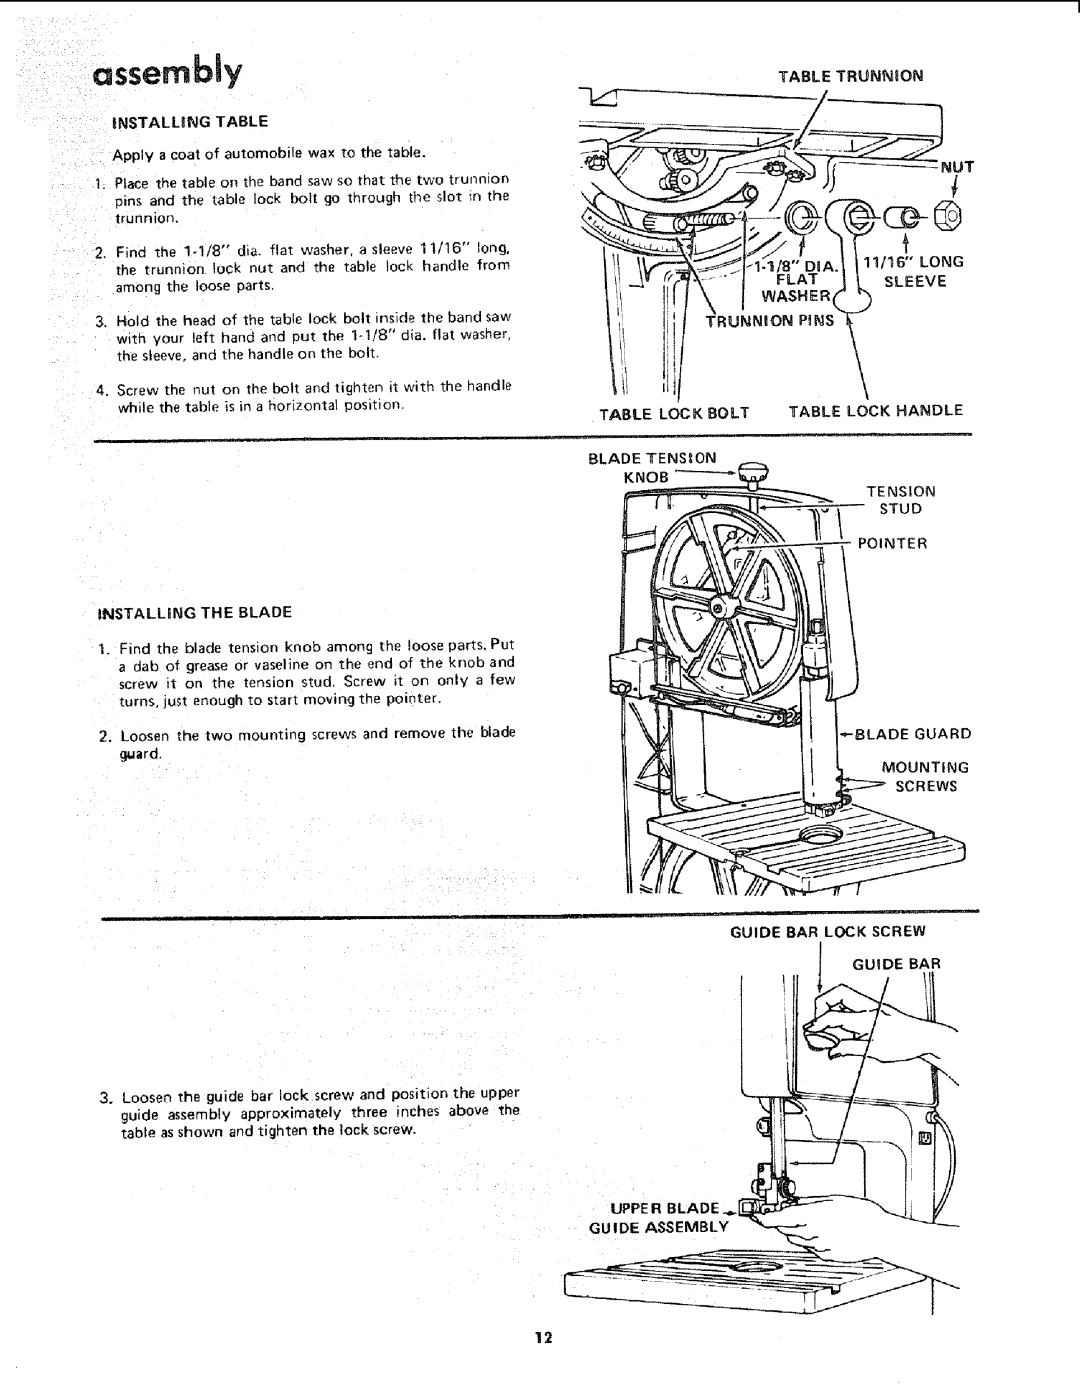
INSTALLING TABLE
Apply a coat of automobile wax to the table.
1.Place the table on the band saw so that the two trunnion
pins and the table lock bolt go through the slot tn the trunnion.
2.Find the
the trunnion lock nut and the table lock handle from among the loose parts.
3.Hold the head of the table lock bolt inside the band saw
with your left hand and oul the
4.Screw the nut on the. bolt and tighten it wit_ the handle while the table is in a horizontal position.
TABLE TRUNNION
TABLE LOCK BOLT TABLE LOCK HANDLE
__TENSION
_ | I | STUD |
INSTALLING THE BLADE
,"__POINTER
Find the blade tension knob among the loose parts. Put a dab of grease or vaseline on the end of the knob and screw it on the tension stud. Screw it on only a few turns, just enough to start moving the pointer.
2.Loosen the two mounting screws and remove the blade Hard.
GUIDE BAR LOCK SCREW
GUIDE BAR
3.Loosen the guide bar lock screw and position the upper
guide assembly approximately three inches above the table as shown and tighten the lock screw.
UPPER BLADE.
GUIDE ASSEMBLY
12
