geffing to know your band saw/sander
2
8
/--TENS,ONA UST,NGK.OB-- GUIDE BAR LOCK SCREW
COVER.ETAININGCL,P"\3
\
TENSION SCALE
(Inside)
CORD
OUTLET
"7 THRUST BEARING
ADJ. KNOB
(Lower Knob
Not Shown)
TI LT LOCK
HANDLE
SAW PULLEY
FRONT
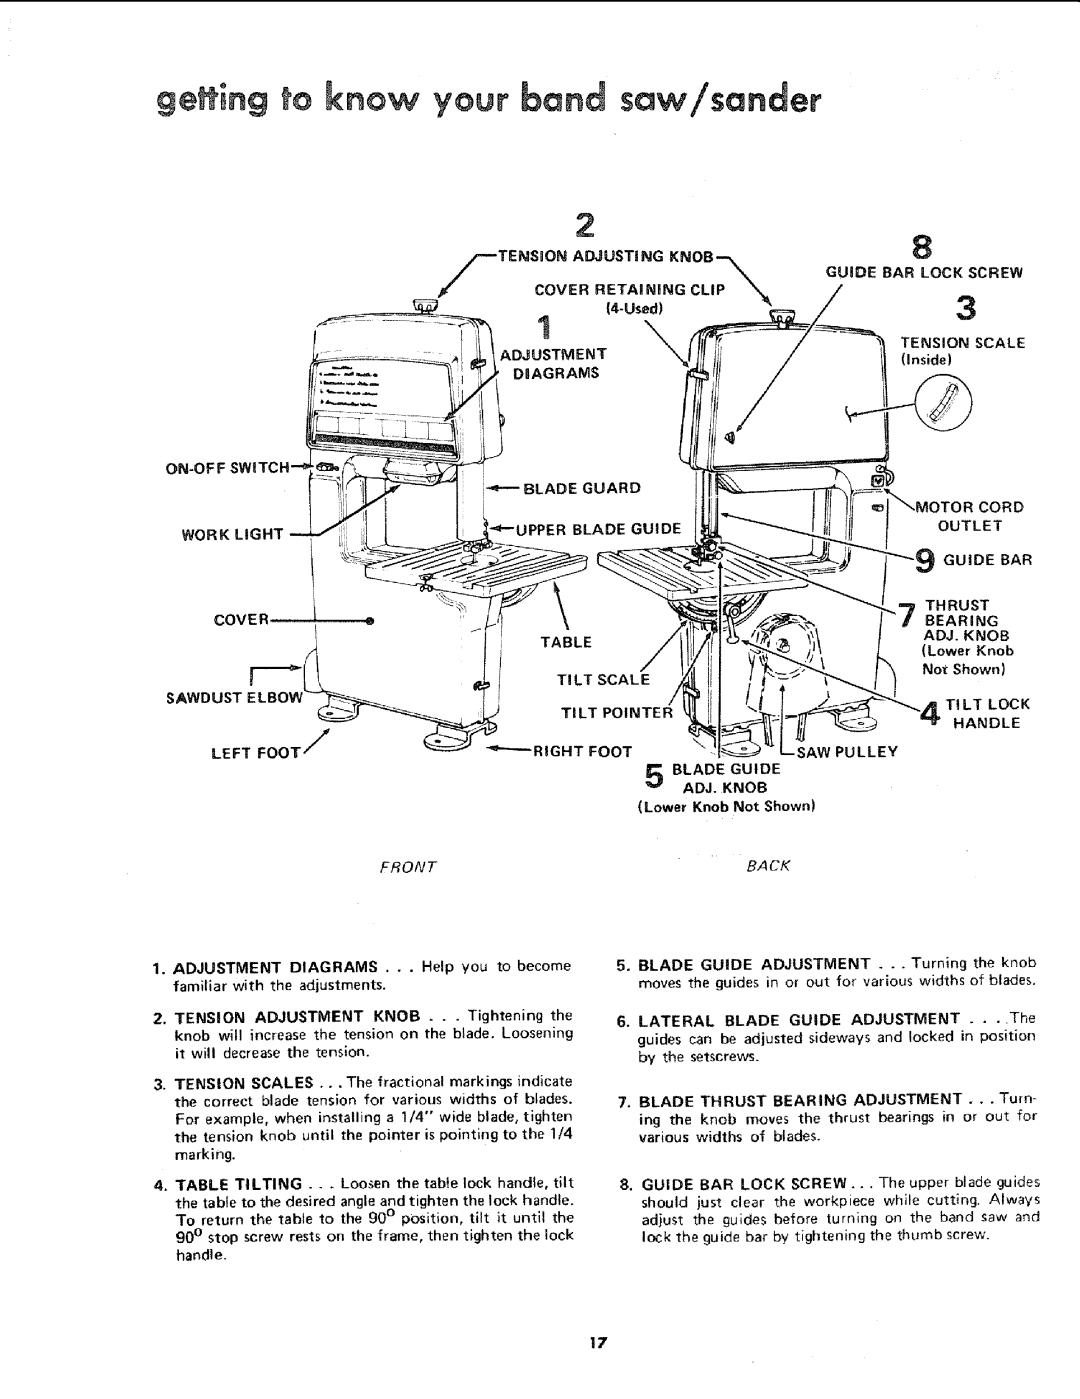
1.ADJUSTMENT DIAGRAMS . . . Help you to become familiar with the adjustments,
2.TENSION ADJUSTMENT KNOB . . . Tightening the knob will increase the tension on the blade. Loosening it will decrease the tension.
3.TENSION SCALES... The fractional markings indicate the correct blade tension for various widths of blades.
For example, when installing a 1/4" wide blade, tighten the tension knob until the pointer is pointing to the 1/4
marking.
4.TABLE TILTING . . . Loosen the table lock handle, tilt the table to the desired angle and tighten the lock handle. To return the table to the 90 ° position, tilt it until the 90 ° stop screw rests on the frame, then tighten the lock handle.
BLADEGUIDE
ADJ. KNOB
(Lower Knob Not Shown)
BA CK
5.BLADE GUIDE ADJUSTMENT .
6.LATERAL BLADE GUIDE ADJUSTMENT .... The guides can be adjusted sideways and locked in position by the setscrews.
7.BLADE THRUST BEARING ADJUSTMENT . . . Turn- ing the knob moves the thrust bearings in or out for various widths of blades.
8.GUIDE BAR LOCK SCREW... The upper blade guides
should just clear the workpiece while cutting. Always adjust the guides before turning on the band saw and lock the guide bar by tightening the thumb screw.
17