HEELING ADJUSTMENT or PARALLELISM
OF SAWBLADE TO MITER GAUGE GROOVE
While cutting, the material must move in a straight tine
PARALLEL to the SAWBLADE ,. therefore both the
miter gauge GROOVE and the RIP FENCE must be
PARALLEL to the SAWBLADE
tf the sawblade IS NOT parallel to the miter gauge groove, the blade will bind at one end of the cut, (This is known as
"HEELING"),
To check for parallelism:
WARNING - FOR YOUR OWN SAFETY, TURN SWITCH
"OFF" AND REMOVE PLUG FROM POWER SOURCE OUTLET,
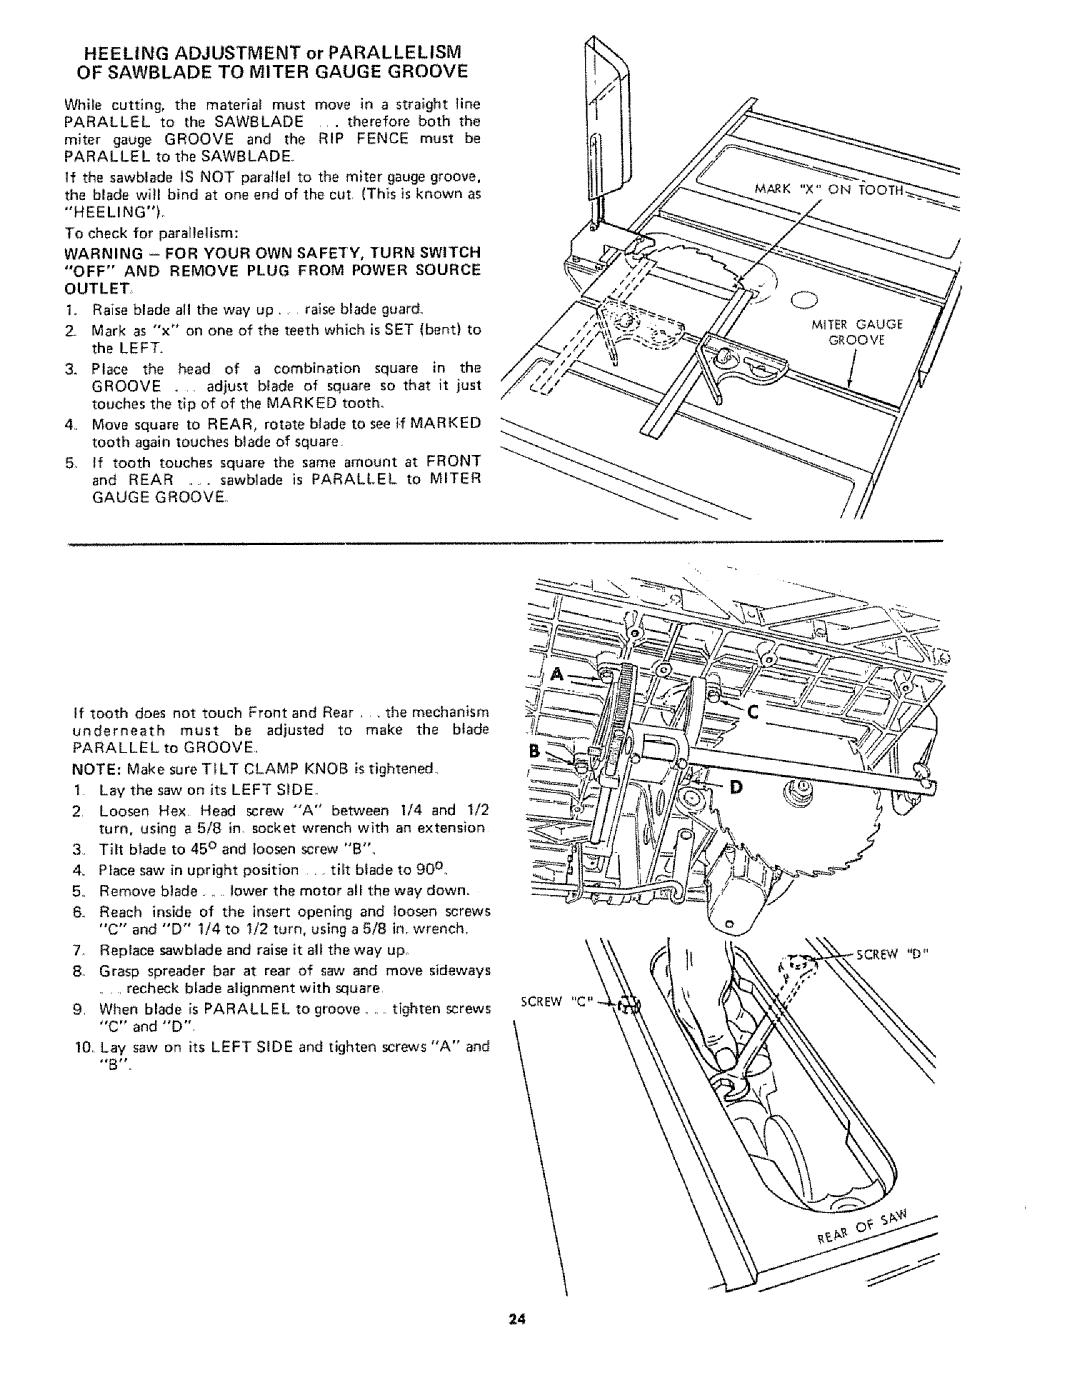
1.Raise blade all the way up .... raise blade guard.,
2, | Mark | as | "x" | on one of the teeth | which | is SET (bent) | to | ||||
| the LEFT, |
|
|
|
|
|
|
|
| ||
3. | Place | the | head | of | a | combination | square | in | the | ||
| GROOVE |
| .... | adjust | blade of | square | so that | it | just | ||
| touches | the | tip of of | the | MARKED | tooth. |
|
| |||
4.Move square to REAR, rotate blade to see i.f MARKED tooth again touches blade of square.
5.If tooth touches square the same amount at FRONT
and REAR ...... sawblade is PARALLEL to MITER GAUGE GROOVE,
If tooth does not touch Front and Rear, • the mechanism
underneath must be adjusted to make the blade
PARALLEL to GROOVE.
NOTE: Make sure TI LT CLAMP KNOB is tightened, 1 Lay the saw on its LEFT SIDE,
2 Loosen Hex Head screw "'A" between I/4 and 1/2 turn, using a 5/8 in socket wrench with an extension
3, Tilt blade to 45 ° and loosen screw "B".
4.Place saw in upright position .... tilt blade to 90 °. 5, Remove blade ..... lower the motor all the way down.
6.Reach inside of the insert opening and loosen screws "C" and "D" 1/4 to I/2 turn, using a 5/8 ino wrench,
7.Replace sawbtade and raise it all the way up
8- Grasp spreader bar at rear of saw and move sideways
.... recheck blade alignment with square
9.When blade is PARALLEL to groove ..... tighten screws "C" and "D".
10.Lay saw on its LEFT SIDE and tighten screws "A" and
\
SCREW "C"
24