Controlling Your TV
Remote Control Operation
Before attempting to operate your
remote control, install the batteries
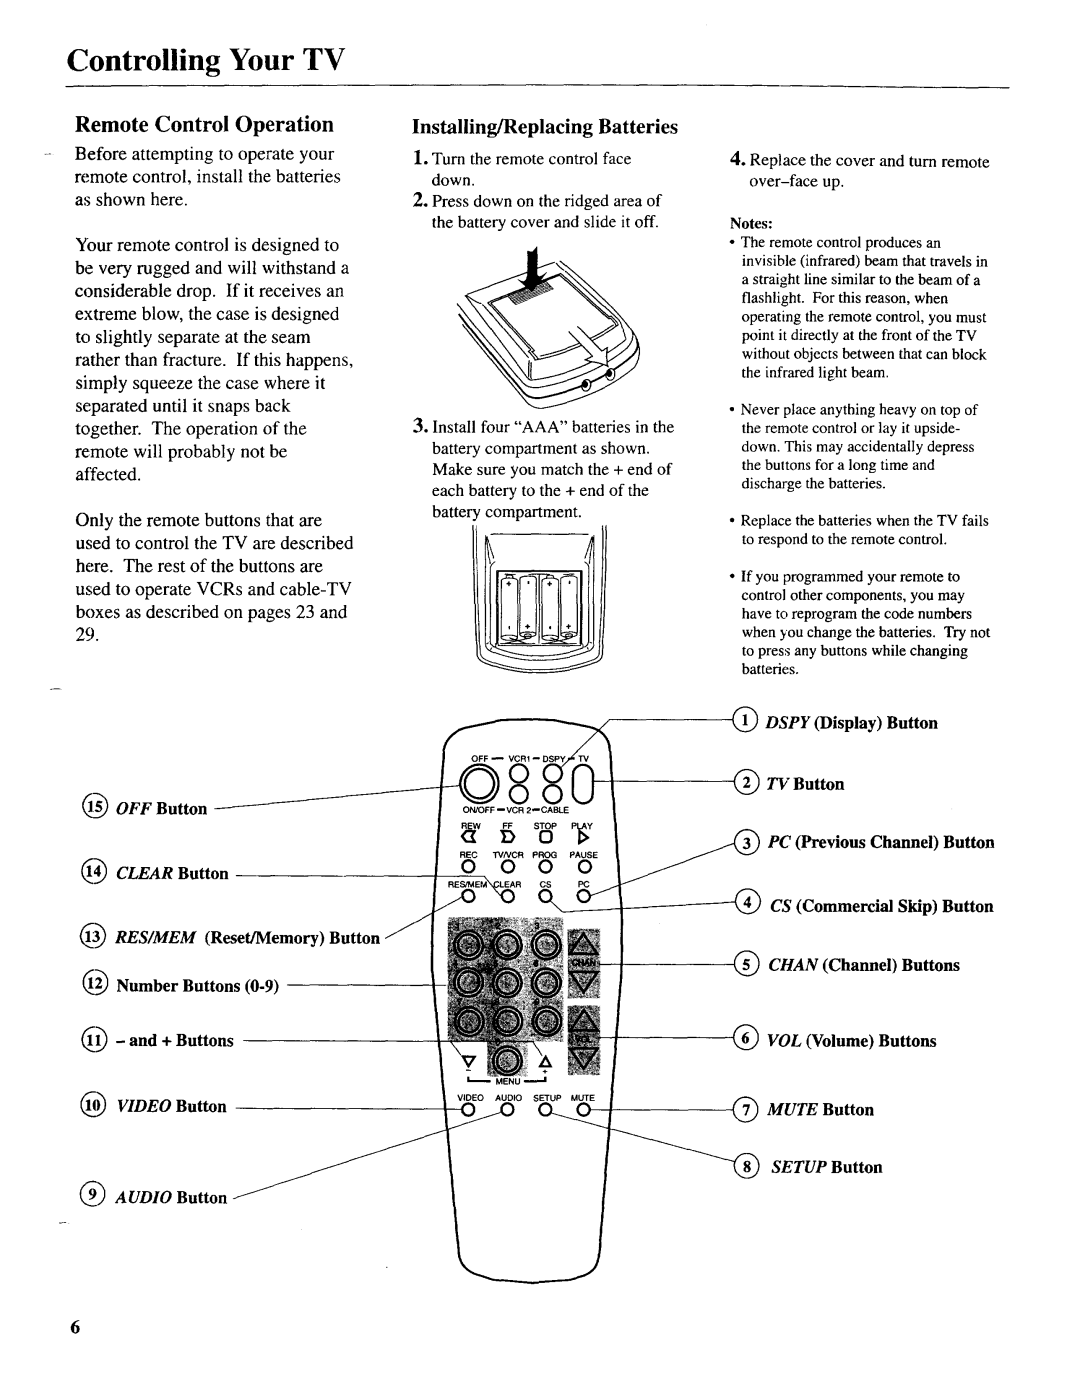
as shown here.
Your remote control is designed to be very rugged and will withstand a considerable drop. If it receives an extreme blow, the case is designed to slightly separate at the seam rather than fracture. If this happens, simply squeeze the case where it separated until it snaps back together. The operation of the remote will probably not be affected.
Only the remote buttons that are used to control the TV are described here. The rest of the buttons are used to operate VCRs and
OFF Button
CLEAR Button
I_3_RES/MEM (Reset/Memory)
_2_ Number Buttons
_I_ - and + Buttons
VIDEO Button
Installing/Replacing Batteries
1.Turn the remote control face down.
2.Press down on the ridged area of the battery cover and slide it off.
3.Install four "AAA" batteries in the
battery compartment as shown. Make sure you match the + end of each battery to the + end of the battery compartment.
ON/OFF _VCR 2_CABLE
REW FF STOP PLAY
cI D 121
REC TVNCR PROG PAUSE
0 O 0 0
4.Replace the cover and turn remote over-face up.
Notes:
•The remote control produces an invisible (infrared) beam that travels in a straight line similar to the beam of a flashlight. For this reason, when operating the remote control, you must point it directly at the front of the TV without objects between that can block the infrared light beam.
Never place anything heavy on top of the remote control or lay it upside-
down. This may accidentally depress the bunons for a long time and
discharge the batteries.
•Replace the batteries when the TV fails to respond to the remote control.
If you programmed your remote to control other components, you may have to reprogram the code numbers when you change the batteries. Try not to press any buttons while changing batteries.
@DSPY (Display) Button
®TV Button
PC (Previous Channel) Button
CS (Commercial Skip) Button
®CHAN (Channel) Buttons
VOL (Volume) Buttons
MUTE Button
SETUP Button
_) AUDIO Button
